How to insert an animation into a presentation. How to make animation in a Power Point presentation? How to animate text or an object in a presentation
Today's advanced tools for working with animated GIF images allow you to create much more animated PowerPoint presentations than ever before. So the only thing left to do is to simply insert it after receiving the necessary animation.
Inserting a GIF into a presentation is quite simple - the mechanism is identical to ordinary adding images. Simply because a gif is an image. So the exact same adding methods are used here.
Method 1: Paste into a text area
GIF, like any other image, can be inserted into a frame for entering text information.


As in other cases, with such an operation the window for the content will disappear; if you need to write text, you will have to create a new area.
Method 2: Normal addition
The most preferred method is to insert using a specialized function.

By default, if there are content areas, pictures will be added there. If they are not there, then the photo will simply be added to the slide in the center in its original size without automatic formatting. This allows you to throw as many GIFs and pictures as you like onto one frame.
Method 3: Drag and drop
The most basic and accessible way.
Simply collapse the folder with the desired GIF animation to standard window mode and open it on top of the presentation. All you have to do is take the picture and drag it into the slide area in PowerPoint.

It doesn't matter where in the presentation the user drags the image - it is automatically added to the center of the slide or the content area.
This method of inserting animation into PowerPoint is in many ways superior to even the first two, but under certain technical circumstances it may also be impossible to implement.
Method 4: Paste into a template
In some cases, it may be necessary to have the same gifs on each slide, or simply on a significant number of them. This most often occurs if the user has developed animated viewing controls for his project - keys, for example. In this case, you can either manually add it to each frame or add an image to the template.

This method is only suitable if you need to insert a large number of identical animated images into many slides. Single cases of addition are not worth such difficulties and are performed using the methods described above.
Additional Information
Finally, it’s worth adding a little about the features of how GIFs work in PowerPoint presentations.
- Once a GIF is added, the content is treated as an image. Therefore, in terms of positioning and editing, the same rules apply to it as to regular photos.
- When working with a presentation, such an animation will look like a static picture on the first frame. It will only play when viewing the presentation.
- GIF is a stable element of a presentation, unlike, for example, video files. Therefore, you can safely apply animation effects, movement, and so on to such pictures.
- After insertion, you can freely adjust the size of such a file in any way using the appropriate indicators. This will not affect the functionality of the animation.
- Such images significantly increase the weight of the presentation depending on their own “heaviness”. So you should carefully monitor the size of the animated images you insert, if there are regulations.
That's all. As you can understand, inserting a GIF into a presentation most often takes much less time than it takes to create it, and sometimes even to search for it. And given the uniqueness of some options, in many cases the presence of such a picture in a presentation is not just a nice feature, but also a strong trump card. But here it depends on how the author implements it.
You can add an animated GIF (or meme) to a PowerPoint slide just like any other drawing file. You can insert a GIF file that is stored on your computer's hard drive or OneDrive.
Animated GIFs on the Internet
You can search for GIFs on the Internet by clicking or Inserting a picture(depending on the version of PowerPoint). On the tabInsertclick the button Insert pictures from the Internet or Inserting a picture. In the search field, enter "animated GIF".

You can add an animated GIF to a PowerPoint slide just like any other drawing file. You can insert a GIF file that is stored on your computer's hard drive or cloud storage (such as OneDrive).

Setting the number of animation cycles
Typically, animated GIFs repeat endlessly. But you can change this by editing the GIF before adding it to your PowerPoint slide.
Once you have GIFs saved on your computer, a relatively easy way to edit GIFs is with an online editor called ezgif.com.
Once you save the modified GIF on your computer, you can add it to a slide in PowerPoint.
You can add an animated GIF to a slide using PowerPoint for the web just as you would with any other picture file, but the GIF won't play when you view your presentation in a slide show. PowerPoint for the web does not play animated GIFs.
: you’ve placed hyperlinks throughout the text, selected the background, inserted music and video, it’s time to add animation to it for text, graphs and images. Thanks to this, your presentation will look impressive and it will be more interesting for the viewer to watch it. And you, in turn, will be able to place additional emphasis on the necessary details.
In this article, we will look at various effects, how to insert, customize and remove animations in PowerPoint. Now let's talk about everything in order.
Animation effects
First, let's figure out what effects exist in PowerPoint. Open the presentation and go to the “Animation” tab. Now click either on the black arrow in the “Animation” group to expand the entire list, or on the “Add...” button. The drop-down lists in both cases are completely identical.
In the program, it is divided into four types: “Input”, “Selection”, “Exit” and “Move”. The list shows their main types. To view all options for each type separately, you need to click on the corresponding button at the bottom of the menu.
Here you can choose how the text or image appears on the slide. You can set the object to rotate, appear as a selected shape, or smoothly move into place.

"Advanced Highlight Effects". This is good to use if you need viewers to pay attention to a certain text or picture. Using it for text, you can emphasize it, recolor the color of the letters, or enlarge it.

"Additional Exit Effects". By applying this view to an object, you can hide it from the slide for a while or make it disappear from the slide over time and not appear at all.

"Other ways to travel". Here you can select a different path along which the object should move. For example, you can set a motion trajectory for a picture on which a car or any animal is drawn.

After we have become acquainted with the main effects, we move on to the second part of the article.
How to make it
Creating animations in PowerPoint is quite a fun activity. First, you need to select the text or image to which it will be applied. Now open the drop down menu with different views. If you click on any of the options in it, the effect will be applied immediately.

I prefer to select an effect through dialog boxes for each type separately. Let's make the text “Comp-Profi” more interesting. Since this is a header, let's apply one of the effects from the "Input" group to it.
Let's move on "Add Animation" – "Additional Entry Effects". A familiar window will appear. Make sure there is a checkmark in the “View…” box below. Next, click on any view and see how the text appears on the slide. When you select the appropriate option, click "OK".

Animation for images is selected in the same way. Select it, then use the different type dialogs to select the appropriate input, selection, or output type.

If you need the image to move on the slide along a given path, click "Add Animation", then in "Paths of Travel" select "Custom Path".

The cursor will change to a plus sign. Press the left mouse button and, without releasing it, draw a path for the image or text. In the place where the end point should be, double-click with the mouse. The object will move relative to its center. The green arrow indicates the starting point, the red arrow indicates the ending point.

If animation is applied to text or a picture, there will be a number next to it in the upper left corner. It also shows in what order objects will appear on the slide.
In the example, the text “site” will appear first and after it "Installing and Configuring Windows".

Settings
After you have chosen the appropriate option for text or image, you need to configure it. To do this, you can use the buttons in groups "Advanced Animation" And "Slide Time".
By clicking on the button "Animation Area", a corresponding window will open on the right, in which you can also make various settings.

Let's set it up for the "site" header. In the appropriate area it is called Heading 1, select it with the mouse.
It can be played: by clicking the mouse on the slide, together with the previous one, or after the completion of the previous animation. Here you can configure its duration and delay - after what time the text should appear on the slide.
You can set the duration using the advanced timeline. Hover your cursor over it so that it looks like an arrow pointing to the right and left, click the mouse and set the appropriate time.

You can also customize the animation by clicking in the area of the same name opposite the desired object: text or picture, on the small black arrow. From the drop down menu select "Effects Options".

A dialog box will open with three tabs: Effect, Time, and "Text Animation". If you configure it for a picture or for movement paths, the last tab will not appear.
Select the options you want and click OK.

You can see how we set everything up on the current slide by clicking on the “View” button in the animation area.
If you need to change the order of its playback for text and pictures, select the corresponding field in the animation area and, using the "Order" arrows, move it to the desired position.
Now, in the example, the subtitle “Installing…” will first appear, and then the title of the slide.

You can also customize the effect for the selected type of animation. For example, I chose “Appearance” for the text. I select the text on the slide and press the button "Effects Options". Here you can choose where the object will appear from: right, left, top or bottom.

How to delete
And the last thing we will look at in the article is removing animation on a slide.
Click on the number in the upper left corner of the text or picture for which you want to remove the animation - the number will be highlighted. Now press "Delete" on your keyboard.

There is another way. In the area on the right, select the desired line and click on the arrow. Select "Delete" from the drop-down menu.
" at the end. But to do this, you first need to insert a GIF into the presentation. We will tell you about this in this article. Everything is just outrageous.
How to insert a GIF into a presentation? For this you just…
You need to click on the “Insert” tab in the top menu and click on the “drawing” icon below. Since GIF animation is still a picture, the same rules will apply to it. It's a shame you can't print a GIF on a T-shirt this way.
After clicking, a standard window appears with a file selection. Select and insert the desired gif, drag it to the desired location. Voila, done! You can also simply drag the GIF into the presentation from the folder.
Why does my GIF insert like a regular image and not move?
In presentation editing mode, the GIF does not move and looks like a static image. But as soon as you save the presentation with the GIF and open it for viewing, a miracle happens - the GIF animation comes to life! So if your GIF is not animated, then most likely you just opened the Powerpoint presentation in edit mode. The image below shows how to open a presentation for viewing.

To open a presentation in view mode, right-click on it, then “Show.” It will open in view mode, where all the GIFs will be animated.
Also, your GIF will lose its animation properties if you apply some Powerpoint filters to it. We don't recommend adding a frame to your GIF, but shadows won't do anything bad to it and the animation will still work. You can experiment with this. Check if the GIF you want works in view mode without Powerpoint editing applied.
How to insert GIF animation on each slide of a presentation?
There can never be too many GIFs in a presentation! If you agree with this statement, then you might want to add a GIF to every page of your presentation, every slide. Instead of manually adding GIFs to each individual slide, it's better to do everything automatically. So:
1. Click the View tab, then the Slide Master button.

2. Add GIF animation using the above method.
3. When the pattern is finished, click on the “Close Pattern Mode” button as shown in the picture.

4. GIF slide template created! Now you can create new slides based on it, or apply this template to already created slides. To do this, right-click on the desired slide and point to the “Layout” tab. The program will offer you various templates, including the one you recently created. Ready!

You can also manually add gifs to all the necessary slides. You don't need to drag anything or add anything from the folder to do this. Simply select the GIF, press ctrl+c, then go to the slide where you want to insert the GIF and press ctrl+v. The GIF animation will appear on the target slide in the same place where it was on the donor slide.
What else do you need to know about inserting GIFs into a presentation?

Cat pianist
- Remember that GIFs can significantly increase the size of your presentation: many weigh more than 1 megabyte! And all of them will be stored in your .ppt file. If you are limited in file size, then pay attention to this factor.
- You can easily resize a GIF, like any image, simply by moving and expanding its borders. Her ability to animate will not be lost because of this.
- The GIF will not play in edit mode: there it looks like its first frame. Only in viewing mode will it start playing!
- It often takes more time to find GIFs than to complete the entire presentation. So we took care of you and created many thematic collections of GIFs in. Some collections of gifs - from, . Here you will surely find the animated picture you need!
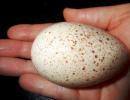
We hope our ways to insert GIF animation into a presentation helped you. Let your presentation bring you a good grade, credit, or approval from your superiors. And finally, a gif that we used as an example.
Starting from school, everyone has to get acquainted with many programs for creating presentations. With the help of this tool, many types of work can be significantly simplified. Let's remember where and when it is used, what software products we know for creating it. Despite such a diverse number of programs, the most widespread was and remains the product of Microsoft. What will this article be about? First of all, we will get acquainted with the functional purpose of the presentation, consider the PowerPoint program and its capabilities, and most importantly, answer the question of how to insert pictures into a presentation.
Even for beginners, such software tools will seem quite simple. The main thing is to familiarize yourself with the possibilities. Despite the simplicity of the work, many cannot answer the question of how to insert pictures into a presentation. All this will be described in detail in this work.
Presentation
So, first, let's get acquainted with the concept and purpose of the presentation. How to insert pictures into a presentation will be described below.
Presentation is an English word that translates to "presentation". In simple terms, this is a performance. This can include the presentation of people, ideas, products, materials, and so on.
Why do people prefer to use presentations? Its main advantage is the clarity of the material. Which lesson at school would be more interesting to you? A continuous and monotonous lecture from a teacher or a visual, colorful presentation with photographs and thematic video files? You don’t have to answer this question, everything is already obvious.

Many people understand the word “presentation” as exclusively scientific material on a monitor screen, but they can be not only computer-based. The simplest example is showing a new clothing collection, because this is also a presentation. A speech by the director of a company with hand-drawn graphs is also a presentation. There can be just a lot of examples. But today we are exclusively interested in electronic options and the answer to the question of how to insert pictures into a presentation. Let's move on to the most common software product for creating a computer presentation.
PowerPoint
As we said earlier, PowerPoint is the most widely used software tool from Microsoft. Beginner users wonder how to insert a picture into a PowerPoint presentation, but fifteen minutes after getting acquainted with the program, this will seem like a trifle.

Even the most advanced users who think they know the software inside and out use only a small percentage of PowerPoint's capabilities.
Presentations are interactive; this feature is given to them by hyperlinks, which can be both internal and external. What are they needed for? So that when working with a large volume of material, you can quickly get to the slide that is needed. Based on this, we can highlight one more ability - the order of the slides may not be sequential, and the presentation can be controlled either manually or automatically, remotely.
Background
Now let's touch directly on the main issue. How to insert a picture into a presentation? You can use standard templates as a background, but sometimes it becomes necessary to make a picture as a background.
Everyone will probably figure out the question of where to get the image on their own. The Internet is limitless; you can use pictures from many sites or insert photos of your own production.

So, when we opened the program, we need to right-click on the slide and select “Background Format”. A window appears where we can place a drawing from the collection or upload it from a computer. If the picture you like has not been downloaded to your computer, you can simply copy it to the clipboard and select “Clipboard” in the PowerPoint window that pops up. As you can see, working with graphic images is extremely simple and straightforward. But many people have probably seen that the slides of many ready-made presentations contain animated pictures. We will explain to you how they got there in the next paragraph.
Animation
So how do you insert a moving image into a PowerPoint presentation? Let's start with the fact that many of these animations are created independently, directly in the program itself. But if you decide to use a ready-made one, then we present to your attention the sequence of actions on how to insert a moving picture into a presentation:
- We use the Gif format: simply drag the required object onto the slide.
- Please note that there are cyclical animations, and there are simple ones, that is, they are performed once and then stop. If the animation is not cyclical, then insert it through “Insert” - “Multimedia” - “Video” - “Video from file”. Now we have access to settings where we can set automatic and continuous playback.
That's all the tricks. We hope that our work was useful to you.