Why gel polish does not hold reasons. The subtleties of the correct application of gel polish. Individual reasons, violation of the rules of care.
Shellac nails are a very popular procedure these days. This is not surprising - after all, shellac provides a resistant, shiny and long-lasting coating, which, moreover, is safe for nails.
Many women have already chosen this type of manicure for themselves and do not change it. But there are also negative reviews that claim that shellac does not hold on nails at all or quickly peels off. In fairness, we must admit that this happens. But each specific case of such a poor-quality result has its own reason.
In the article, we will consider why shellac does not hold well on nails, we will analyze all the main reasons.
In addition, we will find out what mistakes you can make when applying the product yourself, and give recommendations on how to avoid them.
 If the coating is applied correctly, in compliance with all the requirements and the sequence of steps, shellac should hold at least two weeks- No cracks, chips or other defects.
But sometimes, nevertheless, the coating becomes unusable much earlier than the guaranteed period.
Why is this happening, let's look at possible reasons.
Mechanical damage
Oddly enough, but women often forget that they have, in fact, glass on their nails, polymerized and frozen, but still fragile.
It does not withstand significant mechanical loads.
To the number the most common mechanical damage includes damage during active typing on the keyboard, in case of accidental impact on the table or other hard surface. In addition, sometimes the nail can be damaged by the door of a car or even a refrigerator. Therefore, all manicure masters strongly recommend that you be as careful as possible with this coating. Of course, one should not reach fanaticism, but also do not forget that fragile shellac is on the nails.
If you have a habit of impatiently drumming on the table with your nails, get rid of it as soon as possible. If you often do this with shellac-coated nails, then no master will guarantee that the manicure will last two weeks. Most likely, much earlier, shellac will be covered with miniature cracks, and then it will slowly chip off. 
Technology Disruption
This reason happens when the manicurist did not fully study all the intricacies of applying shellac, or was careless, forgot to degrease the plate, missed one of the stages of the three-phase system.
In the case of one of these reasons, the shellac will begin to move away from the plate quite soon, perhaps in a couple of days you will notice the first detachments at the cuticle.
Exposure to chemicals
Some types of shellac afraid of aggressive household detergents, containing solvents, bleaches, chlorine.
Therefore, be careful when working with such compounds and wear gloves. In addition, in addition to shellac, this will also protect the delicate skin of your hands. 
Nail condition
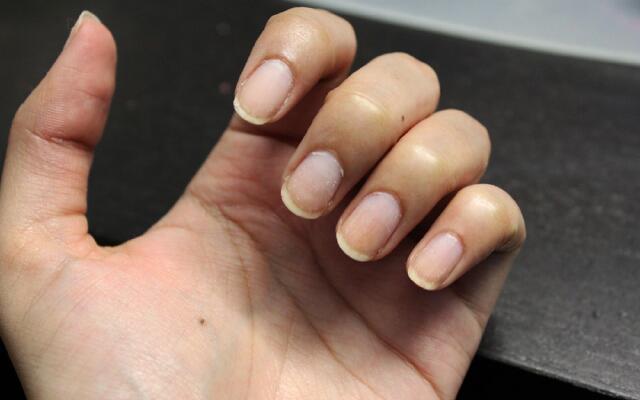
Many manicurists even refuse to apply shellac or dissuade the client from the procedure when they see that her nails are thin and too soft, with a layered structure.
On such nails, the coating, as a rule, does not last long.
Poor quality materials
Sometimes a manicurist acquires materials at a discount, at sales, and a product with an expired expiration date, and a poor-quality fake for expensive brands, may come across.
As a result, it is not surprising that after a procedure carried out using such products, the coating refuses to hold. 
Hormonal surges
Shellac can fall off the nails for purely internal reasons of the client. Hormonal activity during pregnancy, taking OK, drugs during diabetes and other diseases can lead to detachment of the material.
Taking antibiotics can also negatively affect the condition of nails under shellac, so be sure to keep this in mind.
The natural nail, as it were, rejects the artificial coating, despite the observance of all stages of application and precautions.
Therefore, the masters usually warn the client about the possible risk, explaining to her what can happen.
So that there is no “surprise” later, when a couple of days after the procedure, the coating begins to gently slide off the nails.
On the video: why shellac does not hold well on nails
Mistakes
What mistakes in applying shellac can cause peeling of the material.
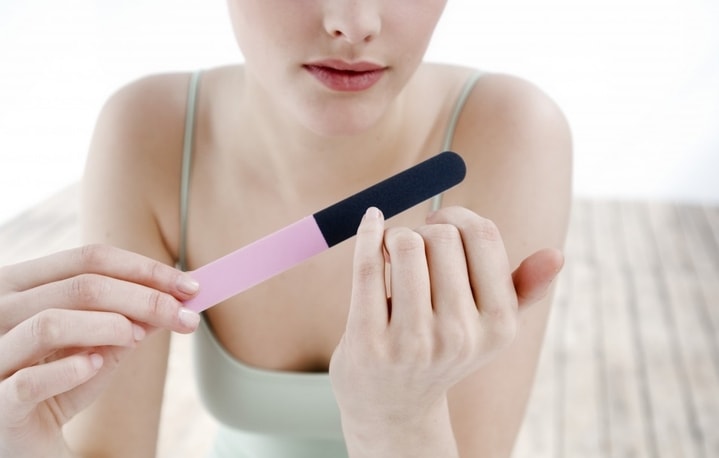
Poor preparation of the plate before the procedure. The preparation stage should be given no less attention than the direct application of the product. In particular, incompletely removed pterygium can cause detachments. The pterygium is the thin skin at the base of the nail. It can be removed only by high-quality processing with a nail file or a special nozzle of a manicure machine. The last way- best.
Sometimes the master forgets or does not consider it necessary to use special primer before applying the base coat. And, indeed, many types of shellac exclude this stage.
These materials do not have lint, and a cotton pad will leave a pile of stubborn lint on the surface of the plate.
Do not forget that any mote can lead to detachments and material discharge.
Poor drying may affect the final result. According to the rules, it is recommended to dry the nails for two minutes - at each stage. Most UV lamps even have a special timer designed exactly for this time. However, sometimes drying happens too quickly when the master or the client is in a hurry, or, conversely, the nails are “overexposed” in the lamp. As a result, after some time, detachments can be observed.
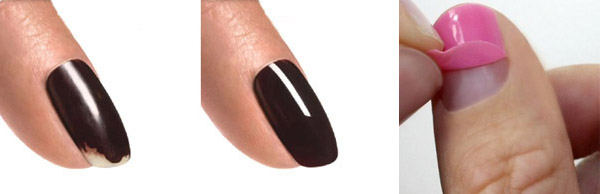
Often, during the procedure for applying shellac, such a simple but mandatory technique is forgotten as sealing the end of the nail.
Keep in mind that the end is sealed only with transparent materials: base and finish.
Take Special attention preparation of the nail plate before the procedure.
A natural nail must be carefully treated with a polisher, degreased, and a primer must be applied to it.
If you skip or poorly perform one of these stages of preparation, then detachment of the material is almost inevitable.
If your nails are thin and brittle, it is recommended that before trying shellac, first treat them.
Drink a course of special vitamins with calcium, buy healing varnish, make baths with salt and iodine.
After the plate is strong, it will be already possible to proceed with the procedure with greater confidence, knowing that the coating will last a long time.
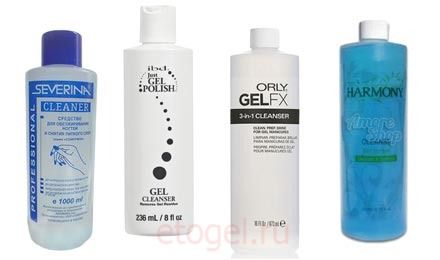
If you want to make shellac at home yourself, choose professional tools, rather than the popular "3 in 1". Although the latter are cheaper, they do not guarantee a quality result. But the three-phase system, proven by time and hundreds of masters, will cope with any nails much better and better.
Try to get products of the same brand. This method will greatly reduce the risk of possible detachments. Products of the same brand are already initially suitable for each other, so it is logical and profitable to use them.
Before applying shellac no need to shake bottles of funds. Such shaking may cause air bubbles to form in the liquid, which is undesirable.
Be careful when applying shellac. You do not need to touch your nails during work, apply hand cream, oil - all this will lead to the appearance of greasy spots, which means that the next layer of material will no longer have high-quality adhesion (adhesion) to the surface.
Don't forget to follow for the serviceability of the lamps in the UV device. If even one lamp out of four does not work, this may lead to the fact that the coating does not dry completely.
After the procedure is completed, It is not recommended to wet your nails for two hours. During this time, the shellac will finally polymerize. And then you can safely take water procedures without fear that water will get between the layers of the coating.
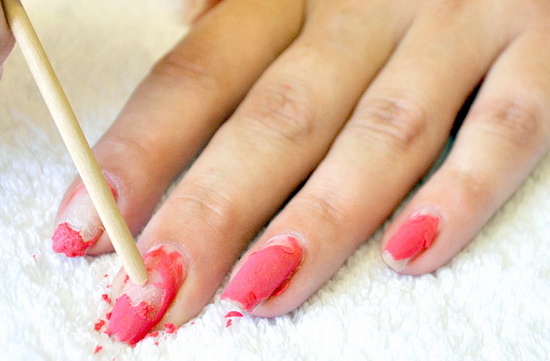
 If you do nails at the master, then wait for the correction, and do not begin to shorten, file off shellac-covered nails on your own.
In most cases, this leads to detachments and even sometimes to a complete “slipping” of the material.
Going to visit the salon choose a good master. In this case, it is best to use the old proven method - word of mouth. Friends and work colleagues may well suggest and recommend their master, who perfectly applies shellac. The recommendation of a good friend is the best guarantee of quality work.
After applying shellac try to minimize contact with aggressive detergents. Avoid contact with chlorine bleaches, solvents.
If such work cannot be avoided, wear gloves.
Here 
Hello! Tanyusha is with you, in this article we will analyze all possible causes of peeling gel polish. Unfortunately, this problem occurs quite often. And, of course, many wonder why gel polish is chipped at the tips or moves away from the cuticle, and sometimes it even peels off with a film. Gel polish does not stick on nails for many reasons, and here I will try to tell you about all known to me, as well as what to do to solve the problem and finally get a truly long-lasting coating at home.
To begin with, it is worth saying that a high-quality gel polish coating should be worn without chips and detachments. at least two weeks, regardless of manufacturer. If you have a shorter wear period, then it is already worth looking for the causes of detachment. All of them can be divided into 2 large groups:
- due to incorrect application technique
- or due to the characteristics of the body and, in particular, the nail plate.
It can also be separated the nature of the detachments:
- sometimes gel polish is chipped at the tips of the nail (ends),
- it happens to move away from the cuticle,
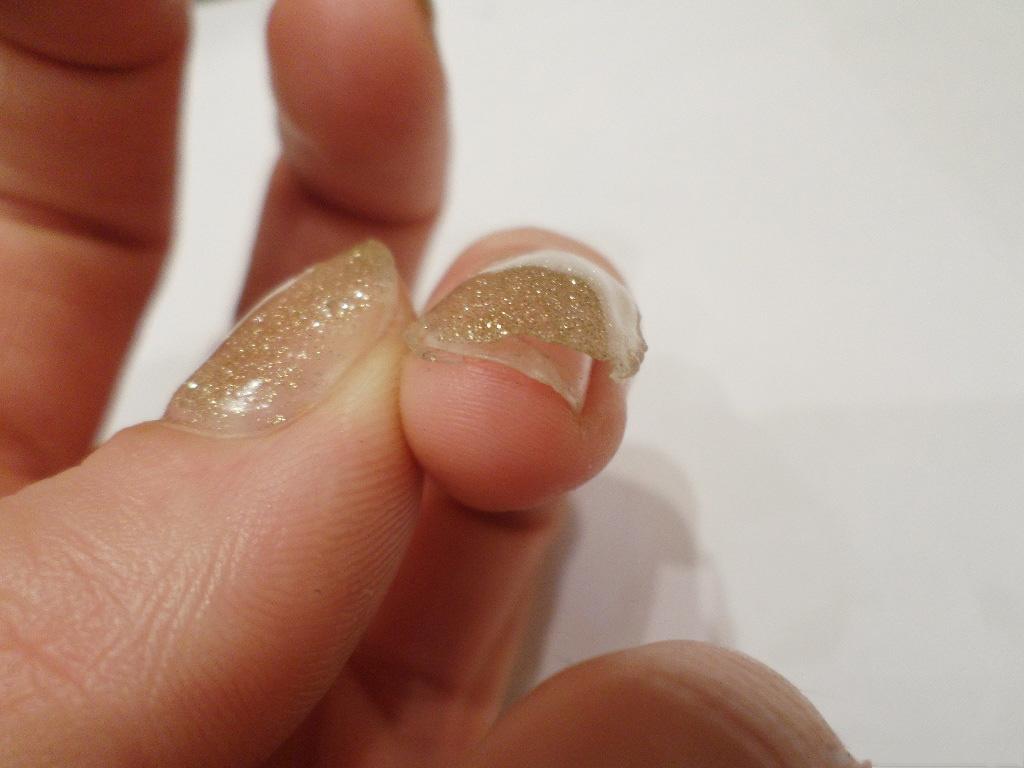
- well, in the saddest case, the coating peels off with a film, which usually happens on the second or third day and clearly indicates problems with the application technique.
Errors in the technique of applying gel polish, leading to detachments
On the Internet, you can find other reasons that are mostly are myths or trying to justify a job well done. One of the most common is constant contact with water. Believe me, unless your hands are constantly in the water, this cannot be the reason for the discharge of the material. And regular washing of dishes without gloves can not lead to detachments.
Causes of detachment associated with our body
We are all individual and the condition of the nail plate is the same, so the same coating technique can be worn in completely different ways on different nails. Therefore, it is worthwhile here to “study yourself” experimentally and find those means that will help you with solving the problem. And this could be:
- Wetness of hands and nails. Someone's nails are drier, someone, on the contrary, has a problem of hydration - excessive moisture. Fortunately, it is easily solved: it is enough to use a “more powerful” primer - an acid one, or even go through it twice before applying the base. Treat them for reliability as well as the ends.
- fragile nails may lead to a reduction in the wear life of the coating. For example, due to fragility, the tip of the nail broke, and you decided to file or cut it to make it even. In this case, the edge of the nail will no longer be sealed, and there is a high probability of chips at the end.
- On soft nails gel polish wears worse. Here the problem is solved quite simply - the procedure is prescribed for you, and that's it!
- Tubercles, grooves, stripes- all the irregularities that are on the nails are also the reasons for reducing the wear time of the coating. This is also easily fixable - do it in advance.
- Some internal diseases organism can lead to a decrease in the wearability of the coating: hormonal disruptions, diseases nervous system, diabetes, failure of the naming system, taking antibiotics or undergoing surgery. All of these are risk factors that should be considered if all other causes are ruled out.
In addition to the solutions indicated in each paragraph, it is best to eliminate the root causes if possible, especially since it is very simple to cure brittle or soft nails in our time - there are many medical complexes and even folk remedies for this.
How to apply gel polish so that it lasts for a long time?
- Quality nail preparation. I repeat again and again that the key to a beautiful and durable coating is a properly executed manicure and adherence to the technology of applying gel polish.
- If you do it at home, then you will certainly have time to do a manicure with cuticle hydration in advance. This will allow the nails to be dry before coating itself. The same applies to the removal of old gel polish if you use the method of soaking the material.
- Qualitatively remove the cuticle and pterygium. Often this thin film at the cuticle is neglected, which causes consequences in the sock. The fastest and most convenient way to do this is with cutters.
- When removing, pay special attention to removing the gloss from the overgrown area near the cuticle. It is often difficult to crawl there with a thick buff, so you can use a soft thin file.
- If the nail exfoliates at the tip, then do not regret taking off the length and sawing off the entire affected part.
- Observe everything coating rules:
- The most important thing here is to apply the base, color and top in a thin layer. This will prevent leakage on the side rollers and cuticles and ensure high-quality drying of the material.
- Seal the ends on each layer. I have already written about the importance of this.
- A good lamp and drying time are also important. Make sure that all the bulbs in it work and change burned out ones in time. For highly pigmented colors and thick materials, increase the drying time.
- Use quality materials:
- The most resistant coverage will be if you use a thick top and base. It is for this purpose that special rubber products have been developed that provide maximum adhesion of the material.
- It is worth refusing to use express tools, such as top and base 2 in 1 or. These are recommendations from the masters for those who want to carry coverage up to 4 weeks or more, if 2 weeks is enough for you, then you can save a lot by buying them.
- Watch the expiration date and storage of materials, shake the bottles before use and wipe the neck after.
- Try to use materials so that the base, color and top are from the same manufacturer.
Well, I wish that your gel polish does not chip off and you only remove it like this:

I hope my material was useful to you, if so, then share it in social networks or leave your comment, I will be pleased. If you have any questions, be sure to ask, I will answer everything that is in my competence. Thanks for reading to the end, bye!
If this page was useful to you, recommend it to your friends:
You just did the extension procedure three days ago, but the extended nails have already lost their appearance? But they promised that the coating would last three weeks! Is the master or gel polish to blame, why does gel polish peel off from nails?
Gel polishes are firmly in the top 5 nail products. Appearing in 2010, from the company CND under the name Shellac, he quickly gained popularity and recognition. In the CIS countries, the name shellac took root, and gel polish began to be called that. It is quite durable, bright, does not require special care.
But if the application technology is not followed correctly, then there may be problems with the quality of the coating. Novice masters are wondering why the gel polish on the nails is cracking. There are several reasons for this.
Much depends on the experience of the manicurist. Each stage of gel coating must be performed according to a clear algorithm. It is better to contact the salon to a qualified specialist. It's more expensive, but saves you time and nerves.
Preparatory stage
Before applying the gel coat, the nails need to be prepared. They need to be filed and given the correct shape.

The edge of the nail must be perfectly aligned and cleaned. For this, a natural nail file is used. Use acetone liquid or degreaser to clean and degrease. Carefully treat the area near the cuticle. The cuticle itself is removed with a pusher. Incorrectly removed cuticle leads to peeling of the gel polish. Then, with a medium-grained file, remove upper layer nail plate. Remove carefully, very thin layer. If you remove too much, then the nails will become thin and lose their healthy appearance. After cutting, carefully degrease the nail surface. Proper cleansing allows the gel to bond better to the nail.
Coating Technology
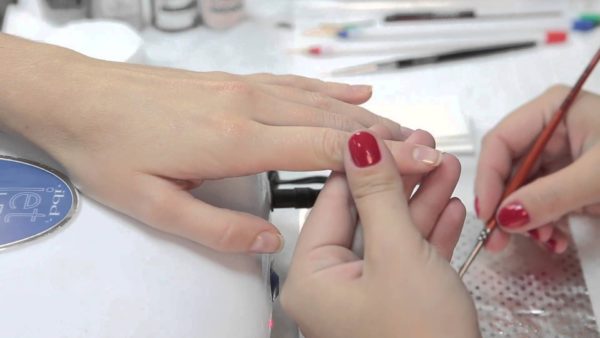
The next step is applying the base. It protects against the harmful effects of toxic substances and holds natural nails and shellac together. Before that, we treat them with a primer to make the surface smoother. We apply the base gel very thinly, with light movements. Dry it for three minutes. The dried base becomes sticky, it can be smoothed with a dry brush.

The color coating is done in a couple of layers, depending on the desired color. The more of them, the brighter the color. We apply the layers thinly, otherwise the shellac will begin to bubble. Thick layers - common cause why gel polish won't stick to nails After the final drying, apply the top coat.

It seals all layers and adds gloss. Apply it with a medium layer and dry well with a lamp. The final stage is the application of Clinser. The clinser removes the sticky layer and prevents the gel polish from drying out.
What other errors of the master lead to peeling of the coating?
If everything is done correctly, then shellac lasts up to three weeks without detachment and damage.
In addition to violations in the technology of preparation and coating, there are a number of factors due to which it exfoliates.
- Damage to the periungual area.
- Thinned, uneven nail surface. On such nails, the coating does not hold well.
- Low quality materials. Choose materials only from trusted manufacturers with a quality certificate. Low-quality materials from unknown manufacturers may be of poor quality.
- Failure to follow manufacturer's recommendations. Gels of different brands may vary in drying time and method of application. Be careful.
- Poor health, such as diseases of the nervous and hormonal systems, as well as endocrine disorders, can cause gel nails to stick poorly.
- Strongly sweaty hands and constant contact with water lead to peeling of the coating. If you have extended nails, wash the dishes with gloves.
- Gel intolerance. This is rare, but in some people, shellac nails are rejected. In this case, the procedure will have to be abandoned.
Also, mechanical damage, impacts can lead to peeling of the varnish. Therefore, gloves are needed for housework.
- Practical recommendations
- Base gel coating
- Coating with color
- Additional points
An important difference between regular polish and gel polish is the durability of the coating. But why does gel polish peel off?
The main reason is a violation of the technique of applying gel polish. How to apply the gel in order to achieve a flawless result and maintain a perfect coating without chips and cracks?
Back to index
Proper preparation of the nail plate
First you need to give the nail the desired shape and align its free edge with a file. It must be perfectly smooth and completely free of dirt. Before applying the gel, you can not use a cream or cuticle oil, and the nails must be degreased with a dehydrator and dried thoroughly. If you do not have a special tool, then you can use alcohol or nail polish remover containing acetone for treatment. Apply the product to a lint-free cloth and wipe your nails well.
Especially carefully it is necessary to process the areas near the cuticle and side ridges, it is very convenient to do this with the corners of the buff.
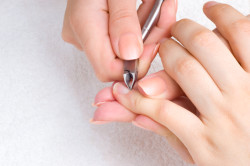 Be sure to push back the cuticle and remove the layer that adheres to the nail, because the material applied to the cuticle will 100% peel off.
Then remove the top layer of the plate with a coarse-grained file, paying particular attention to the top edge.
Try to do this carefully, without scratching the plates and not removing too thick a layer, since each such treatment makes the nails thinner and deprives them of their strength and healthy appearance.
After cutting off the gloss, treat the plates again with a dehydrator to remove any remaining fat and moisture from them. Avoid touching them with your fingers to avoid recontamination. Such scrupulous cleaning contributes to a more reliable adhesion of the gel polish to the surface.
Back to index
Base gel coating
Before this procedure, it is desirable to coat the plates with a primer, especially if they are thin and brittle. It evens out the delamination of the base, which contributes to a stronger attachment of the product and avoids chipping.
![]()
Let's figure out what the importance of the base component is. It serves as an intermediary for the connection at the molecular level of synthetic material and natural. Therefore, it protects the nails from dyes and is responsible for ensuring that the coating does not peel off.
Remember that all components must be applied as thinly as possible and carefully paint over the cut of the plate with each layer, as if sealing.
This also applies to the base. Apply it with a brush, rubbing movements, without affecting the skin and cuticles. Dry the base well in an ultraviolet lamp.
After drying, the base ingredient will become sticky, it can be leveled with a dry brush in order to next layer laid down more evenly.
Back to index
Coating with color
Depending on the desired shade, you can apply the color gel in one layer, then the color on the nails will be translucent. In order to get a more saturated shade, you need 2-3 layers of varnish. But they must all be very thin! If the layer is thick, then bubbles will appear on the nails, and the varnish will lie unevenly.

Do not try to paint over your nails by adding more gel, it is better to apply several thin layers, curing each one in an ultraviolet lamp.
The final stage is the application of the top or finish gel. This coating serves as a fixative for all applied layers of gels and gives the nails a beautiful glossy shine.
Finish Gel Apply More dense layer, again paint over the upper edge of the nail well and dry under the lamp.
It is very important to dry the top gel well, otherwise it will not shine.
At the end, remove the sticky layer with a special Cleanser liquid. This liquid contains moisturizing elements that protect the nails from drying out.
Shellac manicure does not chip off and does not change its color during wear, provided that the coating technique is correct. However, sometimes it happens on the second day. And here it is important to understand the root cause of the problem in order to eliminate it in the future. Let's talk further about what to do if shellac has moved away: professional recommendations.
Advantages and disadvantages
Shellac is a unique tool for creating beautiful manicure. The advantages of such a manicure are its beauty and attractiveness, long wearing life, safety for the nail plate and the variety of designs that can be created using gel polish.
The main disadvantage of this coating is the need for special equipment, without which it is unrealistic to perform a shellac manicure.

So to create it, a special lamp is required, but an error in choosing such equipment can lead to peeling off the coating on the second day. In addition, other reasons can provoke a situation where the shellac moves away from the nail, and the tips quickly break off.

Let's talk about what to do in this case next.
Causes of problems
Often fashionistas wonder why shellac leaves. There are many factors that provoke the backlog of gel polish coverage from the base:
- absence careful preparation coating often causes problems later on. If the cuticle is not well pushed back, the coating simply will not hold. Why? Because shellac perfectly adheres to the nail plate, but not to the skin;
- wrong lamp. So in the LED lamp, not all brands of gel polish dry equally effectively. Some brands may not dry at all, but only seize with a light film, or crack quickly after drying. What to do in such a situation when the gel polish has moved away from the nail? Remove the coating with a defect and perform a manicure again;
- violation of manicure technology. After filing the nail, it should not be allowed to come into contact with other objects. Why? This provokes a decrease in the adhesion of subsequent layers to the base. In this option, it is necessary to start the procedure from the beginning, performing all the operations sequentially;
- haste during drying of the coating. Excessively short exposure of the nail to the UV lamp can cause problems in the wear of the coating. If the nail comes off after shellac, you will have to do a manicure again, but definitely keep the drying time. To ensure that the coating dries completely, and not just the film on top;
- shellac quickly moves away from the base if the base, primer and top of different brands were used during the coating. Manufacturers for the most part create a series of gel polish products that match each other in their composition. If products of different brands are used, problems may arise. Just replace the jars in your kit with products of the same brand so that the composition does not move away from the nail;
- not unimportant factor is the individual intolerance to shellac, which is typical for some of the fair sex. Why? In such a situation, you will need to use other means for decorative coating of nails.

Now you understand why shellac quickly leaves. In other words, situations in which shellac has moved away from the entire surface of the nail plate or only from the tips are a lot. In order to try to completely avoid such problems, strictly adhere to the gel polish manicure technology, and also buy products for such a coating exclusively from trusted manufacturers.