Request to remove Yandex search suggestions. How to Remove Suggestions in the Google Chrome Address Bar on Windows and Mac
Instructions
Google Chrome To prevent the search engine from automatically loading previously entered words into the query string, and at the same time clearing the browser cache, click on the wrench icon in the browser panel and select the “Options” command. In the “General” menu, in the “Search” section, uncheck the box next to “Enable Live Search”. In the "Advanced" menu, click the "Clear browsing data" button, and then check all the available boxes, click and confirm to clear the cache and other data.
Opera In this browser, to perform the same procedure, press Ctrl + F12 to open the Settings dialog box. On the Search tab, uncheck the box next to Enable Search Suggestions and click OK. Go to the Advanced tab and open the History menu. Click the Clear button in the Disk Cache section.
Mozilla Firefox From the Firefox menu, select Settings and go to the Privacy tab. Click the active link “Clear your recent history.” In the new dialog box, select a time period to delete query history for a specific period of time and check the boxes for Forms and Search History and Cache. Click the Clear Now button to apply the changes.
Internet Explorer In Microsoft's browser, open the Internet Options dialog box from the Tools menu. In the “Browsing History” section, click the “Delete” button, check the boxes associated with entering queries and confirm the changes. Click the Options button in the Search section, select your default search engine, and click Disable Options to prevent the search service from saving your entered queries.
Sources:
- previous searches
- Remove a specific word from a string
Many users have probably noticed that the activity of the new Webalta search engine is growing by leaps and bounds. Webalta PS freely takes over our computers, occupying the start pages of browsers. Unfortunately, a standard change of settings often fails to get rid of this uninvited guest. Our tips will help you avoid another unwanted meeting with Webalta.
Instructions
Instructions for getting rid of Webalta for Opera and Internet Explorer:
- First of all, go to the Start menu and click the Run button.
- In the window that appears, enter the “regedit” command.
- In the Registry Editor that opens, find and select “Edit”, then “Find”.
- Next, enter “webalta” in the search box (Attention! You must enter without “http” or “.ru”).
- Now click the “Find” button.
- Find all mentions of “webalta” and delete them. (To guarantee everything, you will most likely have to repeat the previous two several times). When you delete the one you found, you can continue searching for the next one by pressing the F3 key.
- Launch and install the page in the traditional way: “Tools” // “Internet Options” for Internet Explorer and “Tools” // “Settings” for Opera.
Instructions for getting rid of Webalta for Mozilla Firefox:
- First, open the “user.js” file. The path to this file is as follows: drive C//Documents and Settings//Username//Application Data//Mozilla//Firefox//Profiles//xxxxxxxx.default. Attention! xxxxxxxx is a digital value, each computer has its own.
- After you have opened the user.js file, delete the entries “http//webalta.ru” in the 1st and 3rd lines. Now you can enter the address of your home page here.
- Check also the “prefs.js” file, which is located in the same folder. In some cases, line 55 is changed: user_pref, where you will find “browser.startup.homepage”, “_http//webalta.ru” instead of chrome://speeddial/content/speeddial.xul, which assigns the speeddial extension as the start page.
- Finally, launch the browser and set the start page in the traditional way: “Tools” // “Settings” // “General”…
Sources:
- how to remove webalta from yandex
Browsers have long implemented a function that relatively recently appeared in search engines - you start typing a word, and a list immediately appears, offering you to choose an option to continue this word or phrase. This is called “contextual hinting” and is used in browsers to speed up entering website addresses into address bar. The option is very convenient, but sometimes this convenience runs counter to the desire to maintain privacy when using the Internet. Then it becomes necessary to clear this list of visited sites.

Instructions
To completely clear this drop-down list, you must visit all web resources. In Internet Explorer, the path to the cleaning option is in the “Tools” section in the menu - in it you need to select “Internet Options”. This will open the settings window, in which, on the “General” tab, you need to click the “Delete” button in the “Browsing history” section. As a result, the “Deleting browsing history” window will open, where in the “Log” section you should click the “Delete history” button.

In Mozilla Firefox, to delete your browsing history, open the “Tools” section in the menu and select “Settings”, then in the window that opens, go to the “Privacy” tab and in the “Personal Data” section click the “Clear Now” button. There will be no immediate deletion - the browser will open the “Delete personal data” dialog box, where you should clarify the list of types of stored information that you need. Check the box next to “Visit log” and click the “Delete now” button.

In the Opera browser, to get to all the cleaning options, including deleting your browsing history, you need to open the “Settings” section in the menu and click on the “Delete personal data” item. This will open a dialog box where you need to expand the list of data to be deleted - that is, click the “Detailed settings” checkbox. You should make sure that in this list there is a checkmark next to the item “Clear browsing history” and click the “OK” button.

Google Chrome has perhaps the fastest access to history clearing options - just press CTRL + SHIFT + DEL. But there is another way to the same window with the heading “Clear browsing data” - in the upper right corner of the window, click the icon with the image of a wrench, select the “Tools” section in the drop-down menu, and in it the “Delete data on viewed documents” item. In the data deletion dialog box, you need to specify the time period and check the “Clear browsing history” checkbox. After this, all you have to do is click the “Delete data on viewed pages” button.

In the Apple Safari browser, to delete your browsing history sites, open the “History” section in the menu and click the very bottom item that says “Clear history”. The browser will ask you to confirm the operation - click “Clear”.

Video on the topic
In order to find something on the Internet, you need to use search engines like yandex.ru or google.com. Enter your query into the search bar and click the search button. What if you need to remove words from the search bar?

You will need
- Internet
- Browser
- Search engine website
Instructions
First way.
You can clear what you entered from the search bar by pressing the Backspace key. To do this, set italics after the last word in the query. Press the Backspace key on . It is usually located above or near Enter. Hold down the keys until you erase .

Second way.
Select the text you want to delete with your mouse and press the Backspace key. To select, position the mouse near the first letter and, without releasing the left mouse button, drag to the end of the text, only then release the right mouse button. It will turn blue.
Third way.
Select with your mouse the words you want to delete. Right-click on the blue highlighted text and in the window that opens, click “Delete”.
Fourth method.
Select the desired text to delete with the mouse and press Ctrl+X.
note
For left-handers, the mouse buttons are opposite.
Banners that block access to the operating system are a very unpleasant type of virus. Every active Internet user should be able to deal with it, because until now the main part of anti-virus software cannot prevent a banner from penetrating your system.

You will need
- Internet access
- second PC
Instructions
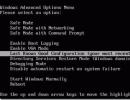
If you do not have the ability to hard drive to, then you can use the startup recovery function. This method is only suitable for the Windows 7 operating system. Insert the installation disc with this OS into the drive and run the installation program.
When a window with the “Install” button appears in front of you, select “Additional features”. Find the “Startup Repair” menu and click on it. Wait for the system boot files to automatically fix and restart your computer.
While browsing the Internet, all popular browsers remember the addresses of sites that have been visited. A list of these addresses can be seen in the address bar of the program. If necessary, your browsing history can be deleted. To delete your browsing history, you need to make changes to the program settings.

Instructions
Google Chrome browser.
Open the settings window by clicking the “Customize and manage Google Chrome” button. Go to the "Advanced" section. In the “Personal Data” block, click the “Delete data on viewed pages...” button. In the “Clear data” window, check the “Clear” checkbox. If you need to fill out form lines, check the “Clear saved form autofill data” checkbox. In the drop-down list, select the time period you want to delete. Click the "Delete Browsing Data" button.
Browser Mozilla Firefox.
From the Tools menu, select Settings. Go to the “Privacy” tab. Click the "Clear your recent history" link. In the window that opens, check the boxes “Log and downloads” and “Log of forms and search”, select the period to be deleted. Click the "Clean Now" button. To prevent the browser from keeping a history of the pages you visit, select “will not remember history” in the Firefox drop-down list and click OK.
Opera browser.
In the "Tools" menu, select "Settings...". Go to the "Advanced" tab. Open the “History” section, in the “Remember addresses” block, click the “Clear” button. To prevent the browser from keeping a history of visited pages, select the value “0” in the “Remember addresses” drop-down list and click OK.
Internet Explorer browser.
From the Tools menu, click Internet Options. Open the General tab. In the “Browsing History” block, click the “Delete...” button. In the “Delete review history” window, check the “Log” and “Web form data” checkboxes. Click the "Delete" button.
Safari browser.
Press the Alt button and the menu bar will appear. In the “History” menu, select “Clear history...”. In the window that opens, click the “Clear” button. To automatically clear history, open the “General” tab in the settings window. In the “Delete history objects” drop-down list, select the interval at which the cleaning will take place.
Video on the topic
Viruses that block access to a computer and require sending an SMS to a short number are not uncommon today. You can avoid wasting money on purchasing an unlock code from scammers. To do this, you should use special pages on the websites of antivirus manufacturers.

Instructions
First of all, don't panic. Under no circumstances should you fall for the virus authors’ call to send an expensive SMS message.
From another computer, go to the following page:
http://www.drweb.com/unlocker/index/?lng=ru Enter in the form the number to which the virus offers to send a message, and which it is offered to send to this number. In response, you will receive exactly the same unlock code as the one you would receive in response to the message.
If a second computer is not available, use it to work with the site mobile phone. In this case, it will be more convenient to use its version, specially designed for viewing in this way:
http://www.drweb.com/unlocker/mobile/
Enter the unlock code you received, and if it matches, the system will be unlocked.
After unlocking, conduct a full system scan with any antivirus to completely remove the virus.
It is very rare, but it happens that machines become infected latest versions viruses that are not yet in the database listed above. In this case, you have the honor of becoming a pioneer. Do not spare money for the message, and after receiving the unlock code, enter it along with the rest of the data in the form located on the next page:
https://support.drweb.com/new/free_unlocker/?lng=ru
In all cases, act quickly. Some viruses give you a certain period of time to enter the code, after which they begin to destroy data.
To avoid problems with SMS viruses in the future, switch to Linux at least partially, so that you can use it at least when your computer is connected to . A complete transition to this OS is even more desirable. But remember that if you have a Wine emulator, this is not a panacea.
Video on the topic
The search bar is the text string in the upper right corner of the browser window, in particular Firefox. It provides the ability to search in various search engines. When you enter a query into the search bar, the search engine you are using is displayed in the list on the left, and the search results are displayed in the right area of the browser window.

Instructions
Click the "Start" button to enter the main menu of the system and go to Firefox.
Configure the program display settings. To do this, follow these steps:
Call the drop-down menu by clicking on the arrow icon to the left of the search box to select a search engine. By default, Firefox includes: - Google - for searching in Google;
- Yandex - to search through Yandex:
- Ozon - to search in the Ozon.ru store;
- Price.ru - to search for goods and services through Price.ru;
- Wikipedia - to search in Russian Wikipedia:
- Mail.ru - for searching via Mail.ru;
- Yandex dictionaries - for searching in Yandex dictionaries.
Select the desired search engine from the list of suggested ones.
Click on the search engine icon and select "Manage Search Engines" to add the desired search engine to the list.
Click the “Plugins for other search engines...” button to view the options offered and select the one you need.
Click the "Add to Firefox" button to open the program download window.
Select “Start using it now” to apply your changes immediately.
Click the "Add" button to complete the operation.
Click the View button on the browser menu bar and go to Toolbar to remove the search bar.
Select "Customize" and wait for the "Customize Toolbars" window to appear.
Drag the “Search Bar” element with the mouse from the space in the “Toolbar Settings” window.
Click the "Done" button to confirm your choice.
note
By default, Firefox uses the Icons Only option to display toolbar items.
Use the Customize Toolbar window to add, remove, and rearrange browser toolbar items using the mouse-drag method described above.
Sources:
- Firefox Help - Customizing Toolbars
Any browser, whether you want it or not, remembers all the website addresses that you enter into the address bar. During further operation, it will return addresses of previously visited sites if the new addresses entered are somewhat similar to the old ones. To prevent this from happening, you need to clear the address bar.

Instructions
See which one you have installed. The sequence of actions with which you can clear the address line will depend on this. Currently, four browsers are the most popular. This is Internet Explorer - a standard program of the Windows operating system. Best to use latest version. It can be downloaded on the Internet. Or if on your personal computer The Windows 7 operating system is installed, then the version of Explorer will already be updated. The remaining three are Mozilla Firefox, Google Chrome and Opera. To remove addresses from a string, you will need to adjust your actions depending on the browser.
Go to the "Tools" menu if you have Internet Explorer. Then go to “Internet Options” and go to the “Content” tab. Click the "Options" button, which you will find in the "Autofill" section. After that, use the “Delete Autofill History” function. To completely clear addresses, check the box next to “Log” and click the “Delete” button.
Go to the General Settings menu if you have Opera. Find the “Advanced” tab there and open it. Browse the menu on the left. Find the “History” item in it. Then click the "Clear" button.
Click once on the wrench icon if you have Google Chrome. It is located in the upper right corner near the address bar. A menu will appear. Select the “Options” item in it. Go to its “Advanced” sub-item. There, find the item “Delete data about previously viewed pages.” Check the “Clear history” checkbox and click “Delete.”
Click the Firefox button and then select Settings if you are using the Mozilla Firefox browser. Go to the “Privacy” tab. Then click on the active link “Clear recent history”. Next, select “Clean Now.”
Sources:
- address line
By default, all user searches are saved in the browser history. This feature is designed to reduce the time it takes to repeatedly enter search parameters for desired web pages. However, this is not convenient for everyone, so this setting can be easily adjusted to remove the entire list of requests.

Instructions
If you want to delete your search history from the Mozilla Firefox browser, open the toolbar or simply press the Alt+T key combination (depending on the program version). Select "Erase Recent History" from the drop-down menu. Uncheck the items you want to keep and perform the delete operation.
Also, if you don't want to delete completely, delete the settings one at a time. To do this, start typing keywords search query, when the drop-down list opens, point the mouse pointer at the item you want to delete, press the Delete key. Repeat the operation if necessary. Proceed in the same way if you need to delete your browsing history. In this browser, setting up such menu items is much easier than in others.
If you want to delete search history from the Apple Safari browser, click in the open window on the rightmost button next to the search engine, and select “History” in the menu that opens. Perform the Clear History action. Also, if this does not work for you, try deleting your search history as in point 2.
In Internet Explorer, open the “Tools” menu item and click on delete log. If the program version is lower than 6, then in the menu open the general browser settings tab. The version of Internet Explorer is indicated above on the open application window.
If you want to delete your search history from the Google Chrome browser, click on the program settings icon in the upper right corner. Select “History” and click on the change elements button. Check the box to delete query history and delete. The same sequence applies to other browser menu items, such as browsing history, log, personal data, temporary files, and so on.
Video on the topic
note
The procedure is irreversible.
Helpful advice
Add frequently visited sites to your browser bookmarks.
Your browsing history is saved in your browser, but can be deleted using the appropriate settings. Which ones depend on the browser installed on your computer.

Instructions
So, to search for “Google Chrome” do the following: open the browser, click the “tools” icon, which is located in the upper right corner of the window. Next, select “History” in the context menu; in the window that opens, delete elements individually or the entire search history completely.
If you decide to remove specific sites, click the "Edit Items" button. Then simply check the boxes next to the sites you want and click “Remove selected items.” If you need to delete all browsing data, set your privacy settings.
To set your settings, open your browser, find the “tools” icon in the upper right corner of the window and left-click on it. In the context menu, select “Options”, then the “Advanced” tab and click on the “Delete browsing data” button. You will be taken to a window where you can clear the cache, delete cookies, clear saved passwords, and set a period during which you want to clear the history.
Proceed to the next item, click on the “Content Settings” button. Window options allow you to set custom settings for cookies. You can choose to allow or not allow sites to save data. Block cookies or enable settings that clear site data every time you close your browser. To view information about cookies, click the corresponding line at the bottom of the same window.
You can delete a search result in the Internet Explorer browser directly from the log. Find the “clock with an arrow” icon on the toolbar, click on it with the left mouse button - a log will open in which information about the sites you visit is saved.
Information about visited sites can be arranged either chronologically or alphabetically. If you set the information in chronological order, you can delete all data saved for a day, week, or month - everything will be displayed in the corresponding folders. If you need to delete only some sites, open the folder or change the order in which the information is stored, find the name you need, right-click on it and click “Delete”.
Video on the topic
Helpful advice
If you do not want your browser to not save your search history, disable cookies.
Sources:
- http://www.google.com/support/websearch/bin/answer.py?hl=ru&answer=465
Every time you enter any link in the address bar of Internet Explorer, results of saved pages appear. In some cases, their display needs to be hidden; to do this, just launch the registry editor and perform a simple operation.

You will need
- Software:
- - Internet Explorer;
- -Regedit.
Instructions
The simplest and most drastic way to clear the contents of the address bar is to delete the contents of the folder that is responsible for storing . Typically, this directory is called Temporary Internet Files. But after deleting all files, in addition to the history, cached images also disappear, which allow you to load previously opened pages much faster.
A more complex method is to edit registry files, which not every user of Windows operating systems does. Registry Editor is a program whose main function is to display the registry and edit them. The abbreviated name of the registry editor, if this phrase is translated into English language, it will sound like this - RegEdit.
Registry Editor is a standard program, but the shortcut for this utility cannot be seen in the Accessories section of the Start menu. Open the Start menu and select Run or press the Win + R key combination. In the Run applet that opens, left-click the empty text field and type regedit, then click OK.
In the Registry Editor window, you need to open the HKEY_CURRENT_USER branch and follow this path, opening one by one the directories listed here: Software, Microsoft, Internet Explorer, TypedURLs. Inside this folder there are parameters that need to be deleted if they look like this: url1, url2, url3, etc.
You can also repeat this operation if you look at the Start button settings. To do this, right-click on the Start menu and select Properties. In the window that opens, click the “Customize” button and go to the “Advanced” tab. Go to the “Recent Documents” block and click the “Clear List” button.
Deleting browsing history may differ in the technical methods of execution in different browsers, but remains a standard operation designed to ensure user privacy. This procedure does not imply the use of additional third-party software.

Instructions
Call the main menu of the Windows operating system by clicking the “Start” button to carry out the procedure for deleting query history and go to the “All Programs” menu.
Launch the installed browser and expand the “Tools” menu in the top toolbar of the Internet Explorer 6 application window.
Select "Internet Options" and select the "General" tab in the dialog box that opens.
Delete the request history by clicking the “Clear history” button and confirm the execution of the command by clicking OK (for Internet Explorer 6).
Expand the “Tools” menu in the top toolbar of the Internet Explorer 7 window and use the “Delete browsing history” option.
Click the “Delete Log” button in the dialog box that opens and confirm the application of the selected changes by clicking the “Yes” button in the new system prompt window (for Internet Explorer 7).
Expand the "Tools" menu in the top toolbar of the Internet Explorer version 8.0 and higher application window and select the "Delete browsing history" command.
Apply the checkboxes on the Log and Web Form Data fields and confirm the operation by clicking the Delete button (for Internet Explorer 8 and higher).
Expand the “Tools” menu in the top service bar of the Firefox 2 or Firefox 3 browser window and use the “Delete personal data” option.
Press the Alt+T function keys simultaneously to open the “Tools” dialog in Firefox version 3.6 or higher and select the “Erase recent history” option.
Select the time period to be cleared in the drop-down list of the “Clear” line and open the “Details” dialog box by clicking the button with the arrow logo.
Check the boxes for “Forms and search history” and “Browsing and download history” and confirm your choice by clicking the “Clear now” button (for Firefox 3.6 and higher).
Sources:
- Clearing search history
- where is the history of visiting sites on the Internet?
Removing what has become unnecessary, outdated, hooligan, etc. lines can be a serious test for the site owner. Without going into technical features different platforms, let's look at the procedure for deleting this line using PHP.

Instructions
Determine the path to the file containing the line that has become unnecessary, and its serial number in the file. (Note that line numbering starts at one.) Begin creating the required delete command"
Create a copy of the data of the selected file: $data = file (path_to_file); Determine the number of components included in it: $count_data = sizeof ($data); Remove the row that has become unnecessary using the id-1 formula, since the numbering of the array components is different from the document line numbering and starts from zero: unset ($data [$id-1]); Open the selected file to edit its contents: $fp = fopen (path_to_file, a);. Set the lock variable of the selected file flock ($ fp, LOCK_EX); and remove the invalid contents of the file to be modified: ftruncate ($fp,0);.
Create new content for the file to be modified: for ($j=0; $j
Complete the procedure for creating the necessary command for deleting a line that has become unnecessary by entering the standard "?>" (without quotes). Use the above-described algorithm of actions to create your own scripts for deleting lines not only by , but also by the identifier of the component to be deleted - id. To do this, set a string search variable containing the identifier you are looking for in the first field.
Please note that there is no need to first check all created scripts on test files in order to be able to recover all deleted data.
Video on the topic
Sources:
- Competent work with files: Deleting lines
When developing a new project on the Internet, you have to create new pages. Each link is a universal page. To edit you need to use a special built-in editor.

You can also use Macromedia Dreamweaver. This package allows you to edit various pages. Install the utility from disk or download from the Internet. Next, open the program. A menu will appear in which you need to specify the path to the saved page on your local disk. If it is not there, download it using your browser. To do this, log in to the admin panel and save the page. There is another method. Go to the page you are interested in. Click the "Page" tab in your browser and select "Source Code". Save everything to a text file and change the format to html. Then edit in the program.
If you need to delete a specific row in a table on a page, you need to use the built-in editor. To do this, go to the page you want to change. Click "Edit". Next, a built-in editor will appear that allows you to transform information directly on the site. Click the "Table" button. In different engines, this menu is indicated by different icons. Place the cursor in the part of the table that you want to delete and click the Delete button. You can simply select an area and press this button on the keyboard again.
You can use an easier editing method. On the site, open the page from which you want to remove a specific line. Copy the contents. To do this, click the “Edit” button. All the text contained on the page will appear. Next, transfer it to the editor. As a rule of thumb, it is best to use software that highlights the code. On this moment Nowadays, one of the popular utilities is Notepad++.
Change the data you need to edit. This could be done using the built-in notepad on the site, but not all engines support syntax highlighting technology. As soon as a certain line on the page is deleted, copy all the information and transfer it to the site. Next, save all changes. To view the edited information, reload the page using your browser.
Unfortunately, it is not possible to remove it using standard Webalta tools. If you set your favorite search engine as the main page in Opera, after restarting the browser the virus-like Webalta appears again. To get rid of it, you will need to clean the registry.
Click Win+R or Start, then Run. Type regedit into the command prompt. A Registry Editor window will open. Press Ctrl+F, write webalta in the search bar, check the boxes for “Section names”, “Parameter names” and “Parameter values”. Click Find Next. Right-click on the found folder or parameter and select the “Delete” command.
Since Webalta is registered in different sections, you will have to repeat the search several times. To continue, press F3 and delete the newly found parameters. When the registry search is completed, close the editing window.
Now you need to remove the remaining traces of Webalta from the system. Click Start, Search, and Files and Folders. Follow the "Files and Folders" link. Enter webalta in the search bar. From the “Search in” list, select “Local drive C”. In the “Advanced Options” section, check the boxes for “Search in system folders”, “Search in hidden files and folders”, “Browse subfolders” and click “Find”. Delete all found files with this name.
Removing the Webalta search engine
It is quite difficult to remove such a search engine. To do this, you need to go into the registry and clean it. To do this, go to the Start menu and select Run. A special window will open in which you need to enter the regedit command. The registry window will open, where you need to select the “Edit” tab, and Webalta is entered in the “Find” field. Then you need to click on the search button, after which the results will appear. When you find the search engine, you need to click on the delete button to remove it from the registry. Then run the search again to ensure that all data has been removed from the registry.
Removing search engines from browsers
If you want to remove some other search engine, then this can be done much faster and easier. It all depends on the browser you are using.
You have Google Chrome browser installed and want to remove or change the search engine. To do this, you need to go to “Settings,” which can be found by clicking on the button with the image of a wrench or a gear in the upper right corner of the window. Then, you need to scroll and select “Install a search engine for the omnibox.” There is a whole list of the most popular search engines here. You can choose the one that suits you and delete unnecessary ones using the “Delete” button.
In order to remove a search engine from the Mozilla Firefox browser, you need to go to the “Add-ons” tab and find the search engine that is to be deleted. Then, using the appropriate button, it is deleted. To prevent the search engine from returning to its original location, you must enter the command about:config in the address bar. Next, enter the name of the search engine (for example, mail.ru) and manually, using the “Reset” button, disable each item. To launch a specific search engine, you need to enter keyword.URL in the same window and select the appropriate one, entering the address.
In the Opera browser, to remove a search engine, go to “Settings”, select “General settings” and click on “Search”. After you find the search engine, you need to click on the “Delete” button. Then you can install the search engine you need with a simple click on it.
For example, in Internet Explorer you need to go to “Internet Options” and find the term “Home Page”, where there is a list of search engines and the one specifically used. Using the “Delete” button you can get rid of the unwanted search engine.
Use the system search, the line of which is located in the Start menu. Enter Webalta as a search term, then go to the advanced options tab. Mark search items in system folders, as well as among hidden files and folders. Once the search is complete, delete all files whose names contain Webalta. This will help you permanently remove Webalta search engine from all browsers.
Virus programs often leave their traces in the registry, which can lead to their recovery after the removal procedure. Use the Windows + R key combination, then enter the command Regedit. Search the registry for Webalta, then delete any settings that contain that name.
Make sure that the "Webalta" search engine is no longer the home page in your browsers. To do this, go to the settings of the application you are using to access the Internet, open the home page tab and clear it. Also clear your cache.
Antivirus programs can finally help you remove the “Webalta” search engine from your system and browsers. Launch any of them. Scan your system for viruses. The program will automatically detect infected files and delete them. Restart your computer. In the future, to prevent your computer from becoming infected and downloading malicious files, carefully read the license agreement for the programs you install.
Video on the topic
Goinf, Megogo, Webalta - all this search engines, which often automatically become start pages. They end up on your computer with various unlicensed programs. There are several ways to remove Goinf and other systems from your PC.

If your browser opens Goinf, Webalta, etc. instead of the usual start page, then first of all go to the settings, find the “ ” column and change it to the resource that you need. For most browsers, settings are located in the context menu next to the address bar.
There is a possibility that this method will not help. This is explained by the fact that the listed search engines and their analogues penetrate very deeply into the computer and “settle” in various folders. This is why some experts equate Megogo and other pages to viruses.
To get rid of systems, you should take a number of steps:
- Go to Start. Find Control Panel and Uninstall Programs. Find a search engine that you have. The name of the program must be appended with the suffix “toolbar”. Check the “Remove toolbars from all browsers” box and delete the file twice.
- Open the "Properties" of the browser you are using and go to the "Object" section. The line shown should not contain any URLs.
- Go to your browser settings and set the search page you need.
- Remove from the registry all references to Goinf, Webalta and other search engines that are unknown to you. This must be done through the Regedit command, which should be entered into Start.
Yandex.Browser hints will help you formulate search query. And if you highlight a word or phrase on the page of any site, the browser will show help for it (quick answer) right in the context menu.
- Search tips
- Search by page
Search tips
Search by page
To start searching the page, click → More → Find or press Ctrl + F (Windows) or ⌘ + F (macOS).

By default, page search in Yandex Browser finds any grammatical forms of the searched word on the page. For example, if you enter the word “teacher” into the search bar, the browser will also show the words “teaching”, “teacher”, etc.
If you need only specific grammatical forms of a word, without taking into account related forms, turn on the option in the search dialog Exact match.
Note. The browser can automatically switch the search query layout. If it doesn't do this, click → Settings → Tools → Search by page and check if the option is enabled If nothing is found, look for the typed query in another layout.
Open the search engine and notice the “Settings” link in the upper right corner. Click on it and select “Portal Settings”. On the page that opens, you can configure the display of search results, as well as delete the search history itself in Yandex. Just click on the “Clear Query History” button in the “Search Suggestions” section. Now other users, as well as you yourself, when you go to the site, will not see the previously entered words and phrases in the line.
While remaining on the settings page, you can click on the “Search Results” link. In the section that opens, go to the “Personal search” item and uncheck the boxes next to the “Take into account my search history” and “Show favorite sites” options. This will help maintain your privacy as much as possible, and other users will not be able to see which sites you visit most often and what queries you use for this.
Return to the main settings page and uncheck the “Show frequent queries” option. This will completely clear the search bar, so that when you enter any words and phrases, you won't see similar queries entered by other people. This useful option will allow you to make your own search more accurate and targeted.
Clearing search history in Yandex through browser settings
Setting the necessary options in the search engine itself does not always guarantee the security of your data, since other users can reactivate the disabled settings, and the entered phrases will again be displayed in the line. To prevent this from happening, you can go to your internet browser settings. Usually they are located in the main menu, the button to go to which is located at the top of the window.
In the options menu, you need to find user settings such as “clear browser history”, “clear cookies” and “save forms”. They may be named differently in different browsers. One way or another, performing these actions completely erases from the browser’s memory any manipulations that users have performed over the entire time or the time period noted in the current settings.
Thus, by performing these steps after each closing of the browser, you can delete your search history in Yandex, as well as any other information about the sites you visited. To avoid doing this all the time, you can use the Internet browser in incognito mode, which is activated through the main menu. It does not automatically save browsing history and other user actions.
This is an extremely relevant topic. Many people use Yandex.Stroy in Windows or shape Yandex search in browser. Traditionally, answers to popular queries and search suggestions are displayed in the input field itself in the form of a live search. This is very convenient, but... search engines, including Yandex, collect information about your interests on the Internet, then try to guess your preferences taking into account these interests. Those. It’s worth looking for a recipe for buns in Yandex once, and the next time as soon as you enter the letter “P”, a bunch of hints with the word “bun” will pop up. This indirectly indicates your past search history and online interests. Sometimes a computer is used by more than one person, and you don't always want the other person to see your search history. How to delete queries in the Yandex search bar if you don’t want to share your interests with other people, read on.
We will look at what to do when using the search bar in the browser and for search in Yandex on the taskbar Windows.
To prevent hints from popping up in the browser
First thing. We delete the search history in the browser itself. This does not apply to Yandex search, but what's the point of hiding your past queries if you can easily find a list of all visited sites in your browser.You can see how to clear your browser history in the pictures. Or find more details on the Internet if your browser is not listed below.
| Clearing browsing history in Mozilla FireFox |
| Clearing browsing history in Google Chrome |
| Clearing browsing history in Opera |
It is also possible clear cookies after each search use. In this case, the search history information will no longer be associated with your browser. After clearing your cookies, search suggestions will no longer contain any information about you.
However, the easiest way to set up is " Personal search" so that the suggestions do not reveal information about your search history.
The algorithm is as follows: 

How to delete requests in Yandex String
In Windows 10, Yandex.String is located on the taskbar, default. Yandex.String makes it possible to carry out a search query on the Internet directly from the taskbar without directly launching the browser. Another line searches folders on your computer. And can respond to voice commands. Quite convenient and safe if only you use the computer.
Where does Yandex.Stroke get search suggestions?
The string draws information from multiple sources- list of links on request from Yandex search
- links to sections of the selected site
- answers to popular Yandex queries
- computer media indexing results (HDD, SSD, etc.)
Greenbot resource manager Florence Ion faced this difficulty because she had to type texts in Romanian. And I decided to compile instructions for all users who would like to disable autocorrection (autocorrection), but do not know how to do it or do not want to spend a lot of time delving into the settings.
The user's vocabulary may be wider than that offered by the operating system. In addition, these tips are often simply confusing. And I would like a person to decide for himself what exactly he is going to write, and not resort to the help of computer pseudo-intelligence to do this.

known for its over-automation. Now this operating system can be found in a wide variety of technical means - from watches to. But sometimes the computer's concern for the user can be too intrusive. An operating system's keyboard strives to predict what word its user is about to type. These hints can be completely far from what the user needs. For example, in cases where he uses the English layout to type text in another language with the Latin alphabet. In this case, auto-correction of entered words will only interfere with the user.
Undoubtedly, sometimes auto-correction of words and displayed hints can be very convenient. But in some other situations they are not needed. Luckily, these features are easy to disable and enable again. It’s enough just to know where the corresponding settings are located in the Android mobile operating system.
Without a doubt, among our readers there are many experienced Android users who know how to configure things even more complicated than disabling automatic correction. But we are also read by new users of the world’s most popular mobile operating system, who have not yet had time to comprehend the full depth of its intricacies. Auto-correction is not an Android feature, although it sometimes causes dissatisfaction among users. 
First of all, you need to go to the Android settings panel, which helps bring operating system according to your tastes. In this panel you need to find the “Language and input” item (the names may vary depending on the version of Android and its interface shell, the meaning is important). Next, select “Android Keyboard” and touch it with your finger. 
In the menu that opens, scroll to the “Auto-correction” item and tap on it. 
By default, moderate autocorrection is selected. 
You can change this setting by turning off autocorrect completely, or by making it active or very active if that operating system feature helps you. Touch will be enough. The dialog box will close and new setting will be accepted by the operating system. 
But the Android keyboard also tries to suggest to the user the words he is supposedly about to type. The mobile pseudo-mind does not always guess correctly. It is difficult to imagine that these clues would help in the correspondence of two mathematicians discussing the fine points of the complex science they are studying. And there can be many similar situations. This means that it is sometimes advisable to turn off automatic suggestions. 
The next item is “Show correction options.” By default, Android always shows them. This item allows you to configure the operating system so that it provides hints only when the device is in a vertical (portrait) scan of the screen or never shows correction options at all, leaving the user to decide for himself what word he is going to enter and what errors he intends do it in it.
It must be said that the method of disabling auto-correction described above is common to all Android devices. Some custom keyboard apps provide an easier way to disable automatic correction of user-typed words. There are also third-party keyboard apps for Android.
Users who are not confident in their experience should write down the sequence of actions so that, if they want to return the settings to their original state, they will always be able to do this.
Do you think the auto-correct feature is more useful or more of a distraction? Is she helpful or just annoying?