How to do a photo shoot for yourself. Choose adequate means
Having your own studio is the cherished dream of any photographer. Today we will tell you how to get closer to achieving it and not go broke.
What is photography without?
There is a proven question with which experienced photographers confuse beginners. It goes like this: “Without what is photography impossible?” There are various answers, quite logical at first glance: “without a camera”, “without a photographer”. Only a few answer correctly: “No light.”
Indeed, it’s easy to do without a photographer by using a computer and setting a shooting program. You can also do without a camera; an example of this is the camera obscura (the predecessor of the camera) and the increasingly popular scanography. So the main thing in photography is light. And in this regard, the photographer is very dependent on the vagaries of the weather if he focuses on natural lighting. You can only fully control the process in the studio.
What is a photo studio
Firstly, this is a sufficient amount of usable space (preferably high ceilings - from 3.5 square meters), suitable for photo sessions and the presence of a certain minimum of professional equipment. What does it include?
Equipment
- Professional camera
Tripod
Lighting equipment
Reflectors
Nozzles
Background
Additional interior
Necessary themed accessories
Computer
The minimum required for a comfortable stay in the studio

Types of light
- Painting light. The main light source, it is the one that indicates the shape of the subject and emphasizes the details. Brighter than other types.
Fill light. Needed to soften hard shadows. Removes excessive contrast. Equipment: softbox and reflective panel.
Backlight. Separates the object from the background, creates light accents, and emphasizes texture. A hard light source located behind the model.
Background light. Works with the background, creating various lighting effects. Allows you to simulate various natural lighting effects.
Directional light. It illuminates only surfaces that face the source; the remaining parts, as a rule, are in the shadow. It shows the volume of the image well, but the shape is somewhat blurry. Gives the effect of glare and denotes sharply expressed lights and shadows.

Types of lighting schemes
Having asked the question “How to make a photo studio at home,” you need to study such an important issue as the types of lighting schemes. It is the control of light that makes a photograph a masterpiece.
It is important for a beginning photographer to master the first two schemes, after which it will not be a problem to learn how to work with other options as they become more complex (and their capabilities increase).

Option 1. Involves the use of one source (monoblock and dish) and a white background.
We get clear transitions between light and shadow, that is, maximum rigidity of the picture. The model stands close to the background so that the front light source casts a dense, short shadow.

Option 2. This scheme also implies the use of one light source. Components: monoblock and white umbrella + dark background. We get depth and expressiveness. This time the model is standing some distance from the background.
Making a studio at home
Let's move on to the most interesting part of our article. To create a mini photo studio at home.

Space
As we have already said, the first and most important component of a studio is space, and you definitely can’t have too much of it.

If you have the luxury of highlighting separate room- Great! free it from furniture and everything that takes up space. More air, more light! After all, objects have the ability to absorb light. We understand that this is not always possible. Therefore, compromise options are possible.
Light
The next step is to ensure light control, regardless of the time of day or night. Natural light may also be necessary, but you should be able to completely block out natural light with a “light movement” of your hand.

Temperature
Neither heat nor cold, much less changes, will benefit professional equipment. And a model wet from sweat or shaking from the cold is not conducive to a successful photo shoot.
Soundproofing
This point is important if you are going to do video shooting in addition to photography.

Making a softbox
A softbox is a device that is placed on a light source to produce soft light without glare.

- We will need: a cardboard box, a Whatman sheet, a halogen lamp, a piece of translucent fabric, wooden slats, clothespins, wire, a cutting device, a set of nuts and bolts, a set of studs.
Components: frame (any cardboard box can be adapted. One lid is cut off. The next item is a layer that reflects. Take paper white(or foil) and carefully paste it over. Next, a light and translucent fabric is taken to create a reflective screen and the side without a cover is glued to it.
Any softbox has a two-color case: black on the outside and metallic on the inside. The opposite side of the screen should have a hole for a lighting fixture (a halogen-type spotlight will do). You can attach it using wire
If there is a need for a large softbox, it can be made from slats and wire spokes. The frame for the screen should be significantly wider than the frame for the spotlight. A cover is pulled over the frame. Separately we tighten the walls using clothespins. To mount the softbox, you can use a microphone stand or a table lamp leg. To avoid excessive heating of the equipment, turn it on only when you are actually shooting.

When asking the question “how to equip a photo studio at home,” it is important to take everything into account. But this is impossible, so we take into account the essentials, the rest is purchased as needed. In addition to the equipment that we talked about at the very beginning of the article, you cannot do without: a beauty dish, reflectors, an umbrella, reflectors, color filters, tubes, honeycombs.
Background reflector

The function of the background reflector is to uniformly illuminate the background. It provides the hard light necessary for any shooting.
The beauty dish is placed in front of the subject. Thanks to it, the photographer receives soft, concentrated light, complemented by diffused light. This is why you need a softbox with an umbrella.

The lamp is placed directly behind it or used as a reflector (if a white cloth is placed on the inner surface). Today, the softbox remains the most common attachment.
Softboxes are divided into octagonal ones (octobox), which are great for group shots, and long rectangular ones (streepbox), which are suitable for shooting portraits and if you are going to shoot full-length models.
Using a sync cable. This method is inconvenient because it gets under your feet.
After synchronization, switch the camera to manual mode. We measure exposure using a histogram or flash meter.

Conclusions on the topic
As you probably understand, it is problematic to cover such a broad topic as “Photography studio at home using improvised means” within one article. We talked about the main components of a studio, the role of light, what color schemes you initially need to know, how to make a softbox and how to inexpensively furnish your studio.
Sooner or later, there will be a return on the effort and money invested, and you will gratefully remember the day when you decided to take the first step in this matter. We wish you good luck in your endeavors and thank you for your attention to our portal. You can also find other articles on photography on the site.
How to take professional photography at home so that it takes its rightful place in your photo collection? Let's try to consider some aspects for proper photography.
Important moments of photography
Shooting location
Choose a place in the apartment so that the background for the photo is a light wall (preferably white). If this is not possible due to the color of the walls, then curtain the wall with a white sheet. Stretch the sheet well and secure it to the wall, making sure that no air bubbles appear on it.

sunlight
Pull back the curtains on the windows, let the room fill sunlight. Lighting is the most important element in order to obtain high quality photo. Choose a sunny day for shooting. If the light is very bright from direct sun rays, then diffuse the light by covering the window with a sheer white curtain or white sheet. IN cloudy days the sun can still provide enough light for your shoot.

Additional light
Provide yourself with lamps with a “dull” shade. Usually these are table lamps that have such shades. With the help of lamps, you can focus the incidence of light on a specific (needed for you) place.

Conditions for home photography
- Direct the light of one table lamp to the ceiling, this way you can achieve soft light without shadows;
- Install another lamp on the wall behind the screen and far enough from the subject to be photographed so that there are no shadows when shooting;
- These two lamps can be used with diffused natural light;
- An overhead lamp (chandelier) should not be used for lighting. When turned on, the light from the chandelier will create sharp shadows from the subject of photography.

Props
Props for photo shoots
Prepare the necessary props that you plan to use when photographing. For children, they usually choose a toy, flowers are best for women, but men, for some reason, prefer to be photographed with a glass in their hand.

Advice
Be sure to think through and dress yourself or your family members in the clothes that, in your opinion, will most advantageously emphasize the figure of each participant in the shooting. Naturally, hairstyles and makeup should match the chosen image.

Photography object
Pre-position the subject in the pose and with the props, that is, in the composition that you came up with for shooting.

How to prepare equipment for shooting?
Modern digital cameras allow you to do this quickly. On hand-held cameras, you need to check the settings are correct and, if necessary, adjust the lighting. Digital cameras have an automatic setting mode, so you just need to make sure the flash is turned off.

No ideas for home photo shoot? Don't know what you can come up with and how to take a really beautiful photo? Do you find it difficult to relax, overcome stiffness, and your face, which should have a bright smile on it, expresses something completely different? You can get ideas from this article, find out which poses are suitable for home photos, and other important aspects.
If you are a beginner photographer, then first you need to find a model. Discuss the terms of the contract in advance, check whether the girl knows how to pose for the camera, and not just smile sweetly. If you are in the role of a model, remember all the information presented below:
- Try to relax. If you don't feel comfortable in the photo, it will be captured. Remember that you are in the comfort of home and very attractive! Call a friend to entertain you during filming.
- Be yourself. But at the same time, learn to adapt to the appropriate image. Think about what your heroine or hero should be like, and then become them!
- Pose, image, position. Decide in advance on the position of your body. To do this, you can take a few training photos yourself.
- Don't forget about the background and objects. Maybe you should change something in the foreground or remove some things from the background?
- Makeup. If you are a girl, then decorate your face with festive makeup and decorative cosmetics. For a home photo shoot, ideas and variations, suitable everyday makeup.
- Transitions to poses. You should not twitch or move suddenly when moving your body from one position. Transition smoothly, don't sacrifice your attitude.
- Glitter. Give up this idea immediately! Remove glitter from your hair and lips, and do not add it to your makeup. You may end up with unpleasant glare, and glitter on your hair may future photography will look like dandruff.
Types of poses for a home photo shoot
For a photo shoot at home, the idea is far from the main thing. You must express your idea, show its essence. To do this, choose the right position for you and your body. For example:
- Standing. When standing, your knee should be extended forward, which will add nice curves to the figure. You can stand either in front or extend your knee from a back angle. Interesting fact: if you raise your hands to the level of your head, then your stomach will visually become slimmer!

- Knees on the floor. The main thing is to be natural. That is why try to find your body position on the floor so that you are comfortable.
- Playing with perspective. The angle can be lower (point from the ground) and upper (point from above). The lower angle emphasizes the slenderness of the legs, promotes visual increase growth. The idea for a home photo shoot from a low angle is to choose the right “sweet spot”. The top angle suits some people with a slender body and small in stature.
- Inventory. The simplest option is a chair. Bend your head a little, you can put one leg on a chair and stretch your arms towards your toes. Show yourself as a relaxed person, ready for action at any moment!

Try to relax during the photo shoot. Think about something pleasant.
Unusual ideas for photo shoots for girls at home
If you are ready, then the next step is to bring your idea to life! But you don’t know what would go well with your clothes and makeup? There are several options:
- Life in a city apartment. If your apartment or house does not have any special things, unique design and interior, then this option is for you! The photo can be taken during any household chores or entertainment. The most important thing is to choose correct posture and place accents (bright makeup, clothing style, hairstyle or image).
- Photo with husband, boyfriend. Do you need a regular photograph of a loving family? If not, try to take a photo during some interesting situation. For example: A simple home photo shoot of a girl, the idea of which is family life, can be played out in the form of a pillow fight, a battle in computer game. If you are a lover of more intimate photos, then opt for a sexy version with bright makeup, on the kitchen table.

Find the topics closest to your husband's heart. They will bring the family together and bring back pleasant memories.
Easy options with available tools!
Don't want to bother with complex photos, but want to see a great shot? Use improvised means or other additional accessories that can bring a smile to your face!
- Shooting with plush toys. One of best ideas for a photo shoot - a children's toy and an adult owner. Your favorite plush animal will bring back fond memories, and all you need for a photo shoot is the right clothing, pose, and toy! A more complex option involves returning to childhood. Braid 2 braids, put on knee socks and your look is ready! The animal must be held like a pillow - hugging it to you.
- Photo with your favorite pet. Another " improvised means" is your pet that will happily fit in the photo! For a frame with an animal, you can wear a simple home clothes. Take a photo while playing with your pet. Your task is to lure the animal.
From improvised means, you can use the simplest household items - a beautiful vase, chairs or a kitchen table.
Ideas for a home newborn photo shoot
Every family dreams of capturing their child at the first stages of life, but getting not an ordinary family photo, but an interesting combination of design and objects surrounding the baby. Of course, all this can be found in special photo salons. What to do if the child is still very young?
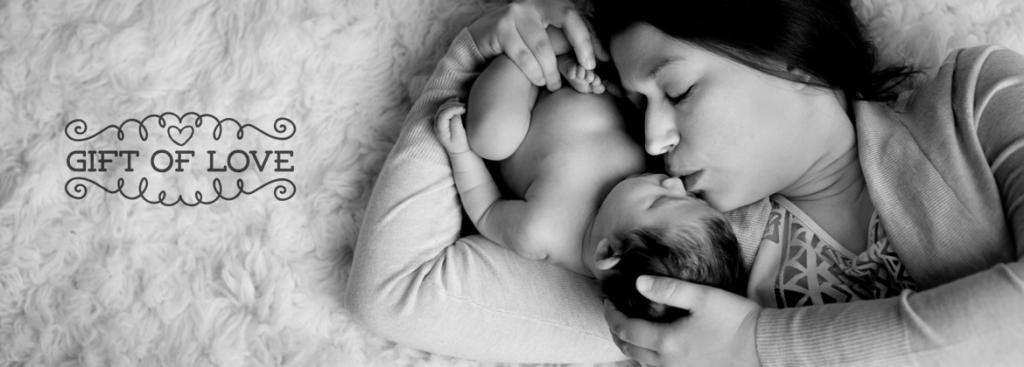
The simplest option is gender and mother. A newborn photo shoot at home (see ideas and variations below) should be done on a warm blanket.
Lay a soft and clean carpet (preferably a soft, solid, pastel or beige color). You can depict soaring in the clouds, scattering the mother's hair, or make an unusual fabric composition, in the middle of which the child is placed. Remember that the photo session should be quiet and without bright flashes so as not to scare the baby.

Photographing a pregnant mother: what ideas and ideas?
The photo session of newborns at home, the photo of which you will find above, is very touching and sweet. But what if you take pictures during pregnancy? They will also be pleasant and beautiful if you place a caring father on them.
- You can try taking 1-2 photos every month, measuring your belly size. At the end of pregnancy, place a frame with a newborn baby and make a great collage!
- An interesting option would be one photo with inscriptions in the abdomen: "I want to see the world", "Produced with warmth", etc.
- Very attractive shots with pregnant women who do not hide the growth of their belly. Simple pictures in white tunics with a black and gray background look very stylish.

Involve all relatives in the filming. Let the wonderful moments remain in your memory forever!
Shooting with Mom and Dad: Family Scene
In this frame, you should focus not on the features of clothing, the style of the apartment or interior. Demonstrate warm family relationships.
For a photo like this great solution knitted things will become. They give the picture a touch of warmth and comfort.
Delicate fruits and flowers in a vase or in a bouquet will also look good in the frame.
A child can hug, kiss his parents, put his head on their shoulder. The whole family (including pets) will look great under a long blanket. Sit on the floor, mattress or bed.

Experiment, take a photo in the spirit of yesteryear dining table in an aristocratic family. Add new colors to the past!
Photo at a specific place
A photo shoot can be done absolutely anywhere in your room. You should show the idea in the resulting frames.
- Photo on the floor. A home photo shoot must be natural. This important indicator must be monitored not only by the person being photographed, but also by the photographer. It's great if the house has a fireplace. You can pose next to him. If you want to look cute and cozy, wear a sweater and scarf. If the choice is on a sexy frame, then bare your back and leave lace underwear. Add a fluffy carpet and a drink in your hand to the interior of the frame.
- Shot on the bed, sofa. A more revealing option for filming than on the floor - a sofa, bed and chair. A home photo shoot, photo ideas of which are below, can be of 2 types. Try to find a body position that makes your back stand out. You can rest your head on the edge of the bed. If you don't want to get a particularly candid shot, you can make it more cozy with a men's shirt while sitting on the bed with a cup of coffee or tea. The main thing is to choose the angle, but this is the photographer’s task. You can place your favorite toys, bed linen, canopy (if you have one) in the frame. A short skirt, blouse or tight clothing will not work. The best option It will be regular pajamas.

A photo session at home, photo ideas and variations can be done in any corner of the apartment. On the sofa, bed or floor, you can take both passionate and ordinary photos.
Conclusion
Ideas for a home photo shoot can be gleaned from the everyday things that you and your family do on a daily basis. The main thing is to beat the resulting situation with positive side. Think about what event is the most significant for you? What happened in this apartment or house that you remember for a long time?
When photographing with family, try to create a cozy atmosphere with the help of blankets, warm clothes and cheerful smiles! A photoshoot with a newborn can be performed on the floor using additional materials.
In fact, the organization of a photo shoot involves not only finding a photographer and models, but also drawing up a detailed brief, preparing props and a lot of other details that must be done. Check out our tips and expert comments to help you avoid stupid mistakes.
If you are not limited by the budget, you can safely contact advertising agencies. They will save you from all the troubles of organizing a photo shoot, and you will only have to select the pictures you like and report to the management.
Everything is much more complicated if you prepare the shooting yourself. Even the smallest and seemingly unimportant, at first glance, details should be taken into account and, just in case, spelled out in the brief. Don't forget about backup options. What to do if the props break, the model gets sick, or you don’t work well with the stylist?
How to organize advertising photography yourself
Step 1. Coordination of the concept with management.
Step 2. Selecting an advertising format.
Defining the format is very important. Filming differs in complexity, implementation time and costs for everyone. And do not postpone this matter for later, otherwise, what will you write about in the terms of reference?
Step 3. Drawing up a brief.
Perhaps this is the most important part at the stage of preparing and thinking through a photo shoot. In the terms of reference you must specify everything that directly and indirectly relates to the shooting. Typically, technical specifications include:
- the task itself, what you want to get in the end (with sketches)
- basic contact details
- type of photography (product, interior, shooting with models)
- advertising format, specifications, target audience
- necessary details
- estimated date and place of shooting, deadlines for submitting finished photographs
- planned budget
When setting your budget, take into account everything: fees for photographers, stylists and models, studio rental, cost of clothing and accessories rental, transportation costs, as well as everything that requires even minimal spending.
If you are organizing a photo shoot for the first time, it is better to consult more experienced colleagues on estimates so as not to forget anything.
- Is it difficult for beginners to organize their first photo shoot? What should you pay attention to? What's the hardest thing?
The most important thing when organizing a shoot is to choose the right photographer. Clothes or makeup that are not entirely successful can still be corrected through retouching, but if the photographer turned out to be bad, then perhaps there will be nothing to retouch.
Before every shoot, I create collages for each shot we plan to shoot. I take into account everything: from preferred poses to clothes, accessories and makeup. It is then easier for all participants in the shooting to work from these collages.
Don't forget to control every stage of preparation. Do not be lazy and check with the photo studio whether they received the TK, collages and whether they understood everything. Ask all the looks selected by the stylist to be sent to you. And always have backup options! I had a case where a model broke her arm the night before a shoot. It’s good that I worked with an agency at the time, and they quickly found a replacement.
- Is it better to organize everything yourself or contact advertising agencies?
Simple shoots are easier and cheaper to organize yourself. If the photo session is difficult or you are afraid to make mistakes the first time, then it is better to work with an agency. They will decide most organizational issues.
- How much do you interfere in the filming process?
I am assembling a team of professionals. They know better what to do, so I no longer give orders at the photo shoot. But if I see something that can be corrected, I discuss it only with the photographer, and do not rush to correct everything on my own.
- How long does it take on average to organize and conduct a photo shoot?
It took me 2 weeks to organize my first independent photo shoot. Now it takes a maximum of 3-4 days.
In one shooting day (8 hours), we usually shoot about 1000–1500 frames, from which we then select 8–10 of the most successful ones.
Tatyana Bragina, Co-Founder, co-founder and PR manager of GoodSellUs, Kaliningrad
Organizing a photo session is not very difficult. The main thing is to discuss everything with the photographer before shooting, so that there are no unspoken things. Because they are the ones who tend to manifest themselves.
Of course, there are times when the finished photographs do not meet expectations. There is no way without this. We discuss with the model and with the photographer what went wrong, and reshoot until we get what we need. In most cases, the problem is that someone misunderstood someone.
During the shooting, I sometimes intervene in the process and ask for something to be corrected, but only if it is justified. Of course, you can’t run in front of the camera and command the model. When shooting, the photographer is in charge.
Advertising agency representative

Ksenia Murdasova, account manager at Radar Advertising
- Do you work with the same photographers every time or are you looking for new ones?
We usually work with different photographers, depending on the task: some specialize in food photography, some in fashion, and some in reportage.
Is the agency preparing a team for the photographer? Or does the photographer himself look for stylists, models, makeup artists? Were there any cases when companies used “their” models for filming?
The agency takes full responsibility for the preparation. If the project is large, then a whole team works. As for “our” models, this happens in cases where a person is the face of a brand (director, best doctor, leading specialist, etc.).
- How do you feel about the photographer’s initiative to change the concept, the idea of shooting?
We always discuss the shooting with photographers in advance, because this is a joint work. If the photographer has comments and recommendations, they are taken into account when developing the concept. But if there is already an agreed upon idea or concept with the client, then changes during the shooting are impossible.
- Client during filming: hindrance or help?
The customer on the shoot is very good! A brand manager or marketer knows much better about his product, so he additionally controls small nuances. In addition, the possibility of a negative result is excluded.
Photographer

Ilya Trudenov, art director, photographer and former owner of the GrandImage studio (St. Petersburg)
Most often, companies work through advertising agencies that have a ready-made database of photographers, models, and stylists. But it happens that people turn to this or that studio only for equipment. For example, once for a photo shoot of Zenit football players, Gazprom hired a very cool photographer who needed good lighting equipment. I was the only one who had this experience in St. Petersburg.
You may also only need the photographer himself, and your own models and equipment. And some people completely rely on the photographer. This mainly depends on the budget that the company has allocated.
Of course, the most difficult thing is to remove the object. Only a few can present a product beautifully. But in general, everything always depends on the conditions. One time you have to shoot in a studio, another time in the forest.
If there is a technical specification, then you simply do what is written there. And this is how most photographers work. But it happens that companies order top photographers and ask them to shoot in their style.
- Were there any cases when customers were dissatisfied with the material they received?
This is common. Even if you did everything according to the specifications, the customer may not like something. Rarely do jobs get accepted the first time. In such cases, I re-shot everything again using a new technical specification for an additional fee. Although many beginning photographers can redo it for free.

Dmitry Penkov, freelance photographer
How does a photo shoot usually go?
Ideally, the customer sends the technical specifications a month in advance, and the photographer calmly prepares the team. But in fact, everything happens fragmentarily and quickly: in a few days, and sometimes hours, it is necessary to assemble a team of specialists who have the same vision, all the material is available, and are still free at the same time.
IN general view The work includes: preparing references and mood boards, searching for a shooting location, crew, and props. Preparation time varies from one day to a month.
There are a lot of features and it is difficult to list them all. In short, everything must be perfect. Therefore, desserts are poured with shaving foam, and people who are strangers to each other in life, but very suitable for each other in the frame, turn into exemplary happy family. Animals are the most difficult to work with because it is very difficult to get them to work according to instructions. And they don’t understand the essence of your shooting. Children come in second place, for the same reason.
- Does the photographer simply fulfill the wishes of customers or can he offer his own shooting options?
At the preparation stage, the photographer can offer his own options for solving the problem. But the last word, as a rule, for the customer. It happens that a photographer makes an additional solution that he considers necessary, after the main one, of course. By the way, the customer often chooses this option.
The preparation stage cannot be underestimated. You can't help but have a backup option. The larger the project, the greater the likelihood that someone will get sick or something will break. You always need a backup option, for one case or another.
For an inexperienced marketer, organizing a photo shoot may seem like an incredibly complex process that cannot be handled alone. Let's not hide it, this is not an easy job. It requires obsessive attention to detail and vigilant control. But that doesn't mean you'll never learn it. Develop your first photo shoot with the help of an advertising agency, then start working on it yourself and in the near future you will definitely be able to organize shoots in a couple of days and tell beginners that it is not difficult at all!
It's much easier than it seems
The thought of setting up a photography studio with the right lights, backdrops, etc. right in your home is often daunting and seems unattainable. But you can rest assured that the portrait photography lighting equipment you'll need has gotten a lot cheaper and easier to use. Moreover, it does not require much space.
The beauty of a home photography studio, especially for portrait photography, is that you have complete control over the light sources. And also decide what additional accessories you will need and where to place them.
You decide for yourself what equipment to purchase, focusing only on your preferences and budget. Should I make do with a foam panel as a reflector or shell out for a life-size softbox? You decide.

If you want to save money, you should pay attention to sets of studio equipment for beginners, equipped with 2 pulsed light sources. At a cost ranging from 15 to 25 thousand rubles, you can purchase a kit suitable for the first time.

Newcomers to studio photography are often concerned about how to control exposure when the scene is illuminated by flashes. You can use the “shooting” method to estimate the light intensity using a hand-held flash meter. But you don't have to use this rather outdated method.
The histogram is an ideal tool for checking and adjusting exposure. A histogram can be displayed on the camera screen for any shot taken. Using a histogram, it is enough to check that the tones of the image are evenly distributed within its boundaries.
Below we show what the three exposure states can be - normal, overexposure and underexposure - and what histograms correspond to each of the states.

By decreasing or increasing the aperture value, you can adjust the intensity of light passing through the lens. This best way working with exposition. Or try adjusting the power of the light pulse on the light sources to increase or decrease the intensity of the illumination.
Add drama
Most studio kits for beginners include a reflective umbrella. This is a very useful accessory. It is very convenient to place two umbrellas “for reflection” on either side of the model. They create soft, evenly covering and pleasant lighting.

However, the photo above was created using "high energy" lighting, creating deep shadows. This was achieved due to the fact that only one source with an umbrella was installed to the right of the model and above the level of her head.
Due to the proximity of the source to right side face, the largest “portion” of light falls on the model, and the opposite side of the face is less illuminated. The shadows were deepened by a black foam panel installed to the left of the model.


There are no rules that uniquely define your camera settings for studio portraits. But there are parameters, adhering to which, you can get better results. Let's start with ISO. It should be minimal so that digital noise shows up weakly in the pictures.
It's best to shoot in manual mode. In it you control the aperture value and shutter speed. In automatic and semi-automatic modes, the camera takes on these responsibilities.
Shoot in RAW format. Even if you monitor the exposure using the histogram on the camera screen, you may miss slight overexposure in certain areas of the image. Shooting in RAW format will allow you to correct the pictures taken in a photo editor.

If you shoot at a shutter speed shorter than your camera's sync speed, you will see black stripe on one side of the frame. This strip is the shutter “curtain”, which is still moving at the moment the pulsed light source is triggered.
Obviously, the photo from black stripe- marriage. To avoid this, just set the shutter speed longer than the sync speed. Most modern cameras have a sync speed of 1/200 second. Some cameras can sync flash at 1/500th of a second.
One of the most useful studio accessories is a radio synchronization kit. With its help, you can remotely control the moment of operation of pulsed light sources. Connect the receiver to one of the sources, install the transmitter on the hot shoe connector, which is located on the top of the camera. Now you can take photos without worrying about wires or being careless about knocking over your light stand.

You should also purchase a softbox big size. This versatile item can be used to create a variety of lighting effects.
Take a few shots, then move the source. Place it on different sides, at different heights. Also, try lighting your subject's face on one side to create dramatic shadows on the other side.
As you can see, today there is nothing difficult about creating a photo studio at home. So if you have enough space at home, go to the store!