Questions from the Riddler. Walkthrough of side missions of the game Batman: Arkham Knight
Read and watch all the latest about games Batman: Arkham Knight – Wanted Side Missions
Blake Island
This is the very first firefighter you will need to rescue the moment the mission becomes available. Follow the marker which will lead you to Panessa Studios. The fireman is inside the building, under the crane. You can use Batman's grappling hook to climb onto the crane and then attack your opponents from the air, breaking the glass on the roof of the building. Defeat all the bandits and free the fireman.
Below we suggest you familiarize yourself with the locations of the remaining firefighters on Blake Island:
1. Described above.
2. Northwest corner of Chinatown, in an alley.
3. Chinatown, the back of the building located northwest of the police headquarters.
4. Chinatown, the center of the area.
5. Northeast part of the Falcone Shipping Antenna yard.
6. At the top of the faucet.

Location of all abducted firefighters on Blake Island.
Move to these locations, enter detective mode and you will easily find each of the kidnapped firefighters.
Miagani Island
Below is the location of each of the firefighters who were kidnapped and moved to Miagani Island:
1. Under the bridge connecting Blake and Miagani islands (enemies will be armed with firearms).
2. Near Grand Avenue, on the upper ledges of the Gotham Herald building. You need to get to the vantage point on the upper right to see the bandits and the fireman.
3. Grand Avenue Station, surrounded by turrets. There is no ventilation shaft or sewer ditch to help you deal with the bandits one by one. You must fight "in the open", but at the same time be in the blind spot of the turret. The bandits will not have weapons. Use smoke bombs to disorient enemies while you deal with the turrets. The turret in the center is especially dangerous. The task will be much easier if your hacking device is improved. This way you can temporarily turn off the optics of the turrets, which will help you get closer to them and destroy them.
4. Southeast corner of Wayne Tower.

Location of all kidnapped firefighters on Miagani Island.
Founders Island
Below is the location of each of the firefighters who were kidnapped and transported to Founders Island:
1. Building in the center of Port Adams.
2. Urbarail Station in Ricker Heights. There are three thugs here and a hiding place from where they will get weapons. First of all, using the disintegrator, disable their weapons.
3. On the hill northwest of Wayne International Plaza. There is also a cache nearby. First, deal with the cache, and then defeat the bandits.
4. Lighthouse northeast of the airships. Detective mode cannot be activated in this area. There is a sniper at the lighthouse. First, kill the sniper, and then deal with the rest of the enemies.
5. The last fireman is more difficult to find than the others. First, you must find the Killinger Dept Store. In front of him there will be a wall that can be moved using the Batmobile drive. The exact location is shown in the screenshot below. Borrow advantageous position and deal with two armed bandits. If you have improved your multi-strike technique, you will be able to deal with at least five opponents at a time.

Location of all kidnapped firefighters on Founders Island.
After rescuing the last fireman, you will need to rescue their chief. Its location will be marked on the map. Drive to the indicated location - Cityvision Construction. The location will be filled with bandits, but you have freedom of action. When you have dealt with all the enemies, find the head of the fire station and free him. Next, go with him to the police department to close the case and complete the mission.
Mission 2. The Perfect Crime
Immediately shortly after taking additional mission you will find the first victim. Go to the Trade Bridge and examine the body. After analyzing the victim's blood, you must use a special scanner. Scan the victim's skin, hold the button to get evidence. Switch the scanner to Muscle mode and check the victim's small intestine to find the ring. Scan again.
Finally, switch the scanner to Bones mode and check the victim's left thigh. The crime scene will be completed. Once you unlock the next area of Gotham, a new part of the mission will become available.
One of the bodies is located at the top of the Gotham Herald, on the roof just below the tower. Use the scanner to look for abrasions or other evidence on the victim's body:
Skin mode: scar on left arm;
“Muscle” mode: left side of the chest;
Bone mode: deformed bones on the left knee.
The third victim is located on the roof of the Heavenly building on Miagani Island. Use the scanner to look for abrasions or other evidence on the victim's body:
Skin mode: mole on chest;
“Muscle” mode: bullet in the right biceps;
"Bone" mode: missing toes on the left foot.
You can find the fourth victim after helping Poison Ivy with her plant, which helped neutralize Scarecrow's toxins. The victim is on top of a small building northeast of the orphanage where there is still a railroad track. Use the scanner to look for abrasions or other evidence on the victim's body:
Skin mode: bite scar on the victim's left side;
“Muscle” mode: prosthesis instead of the right eye;
"Bone" mode: fracture of the right arm.
The fifth dead body is in the lower streets southeast of Stagg's second airship. Use the scanner to look for abrasions or other evidence on the victim's body:
Skin mode: chemical burn on left thigh;
“Muscle” mode: voice box on the throat;
Bone mode: sixth finger on the left hand (WTF?).
The last corpse can be found on the wall near the springboard, not far from the church. Use the scanner to look for abrasions or other evidence on the victim's body:
Skin mode: wound from a removed tattoo on the right thigh;
“Muscle” mode: removed right kidney;
Bone mode: tantalum plate on the victim's skull.

Location of all corpses from the mission "The Perfect Crime".
After examining the last body, Alfred will tell you the location of the killer. Head to the Pretty Dolls salon marked on your map. Go inside (there will also be a Riddler trophy inside). Get under the floor through the grate and blow up the cracked wall with gel.
Go back and go through front door to the operating room. Keep moving forward and you'll catch the killer red-handed. Get closer and watch the cutscene. You need to leave the killer's minions on the ground as long as possible, since they don't feel pain. Use combo attacks. When Pyg calls all his minions, he will be standing at his “workplace”. Approach him and he will run into the corner. When you have dealt with all the enemies, and the last enemy must be defeated with a special move, approach Pig and destroy his workplace.
After beating Pyg, break the electrical box nearby to free the people trapped in the cage. Talk to them, escort Pyg to the Batmobile and go to the police department.
Mission 3. Disarmament
This mission is entirely dedicated to safety on the roads of Gotham. The bandits have planted bombs at some points and you need to defuse them.
The mission becomes available almost from the very beginning storyline"City of Fear" At the same time, it is not possible to go through it immediately from beginning to end. To find all the bombs, you will at a minimum need to have access to all of Gotham's islands. As always, carefully examine the locations using detective mode.
At some point during the main story mission, Alfred will direct Batman to a control point where he will need to dismantle the bomb. In order to disable the bomb, you need to look at the large red object. Put the Batmobile into combat mode and use the powerful drive (winch).
Exact locations of all bombs
Below are the coordinates of all the points where the bombs are located:
Bomb No. 1: visited during the main plot - X: 2105 and Y: 2920;
Bomb #2: Blake Island - X:1790 and Y:2420;
Bomb #3: Blake Island - X:1920 and Y:2680;
Bomb #4: Blake Island - X:2370 and Y:2910;
Bomb #5: Founders Island – X:2150 and Y:1915;
Bomb #6: Founders Island – X:2050 and Y:1570;
Bomb No. 7: Founders Island - X: 2270 and Y: 1540;
bomb #8: Founders Island – X:2745 and Y:1739;
Bomb #9: Founders Island – X:2939 and Y:1449;
Bomb No. 10: Miagani Island - X: 3269 and Y: 2109;
Bomb No. 11: Miagani Island - X: 2999 and Y: 2299;
Bomb No. 12: Miagani Island - X: 2899 and Y: 2729;
Bomb No. 13: Miagani Island - X: 3049 and Y: 2919;
Bomb #14: Miagani Island - X:3159 and Y:2729.
Mission 4. Kings of the roads
The first checkpoints of the Arkham Knight soldiers are located on Founders Island. Checkpoints are usually installed on walls, near which there are several guards. The barrier around checkpoints cannot be destroyed, even with the help of the Batmobile's guns. You must get across and destroy all the guards. After victory, find the commander using detective mode. Then destroy the checkpoint to remove the barricade.
Founders Island
1. Located in westward from the Pobedi bridge.
2. Located in a western direction from the Repentance Bridge.
3. Located on the coastal strip between the “Repentance” and “Salvation” bridges. There are fewer guards here, but there are two thugs with guns and two with stun batons.
4. This checkpoint is located south of the Bridge of Perdition (Curse), in the eastern part of Founders Island. There are two armed soldiers here. Use the disruptor to disable their weapons, then go down to the ground.
5. This checkpoint is located inside the “camp” building. Use the Batmobile's winch to pull the gate northwest of the checkpoint. Take out turrets and guards using the Batmobile's combat mode.
6. The checkpoint becomes available after a collision with Harley Quinn in the story mission. There are several sentry drones. It's good if you have an improved disintegrator, which will help destroy the drone.
7. On the upper platform. Use the Batmobile to increase your firepower.
8. The checkpoint is located at the crossroads near the church.
9. The checkpoint will become available only after you save Barbara (Oracle) and receive the second Batmobile. This is on one of the buildings at the construction site in the middle of the northern part of the island. There is an unmanned drone inside. Try to take control of the drone and deal with your opponents. You can also use the ventilation shaft and multi-hit enemies. There is a switch nearby that will open the gate for the Batmobile.

Location of all militia checkpoints on Blake Island.
Miagani Island
1. The checkpoint is located near the Elliott Hospital.
2. The checkpoint is located at Urbarail Station in Bristol, east of the Salvation Bridge. You can use the Batmobile to kill the militia at the outpost.
3. The checkpoint will be available after the incident with Harley Quinn as you progress through the story missions. It is located near a building previously used by Penguin as a weapons cache. Nearby, you were also destroying a watchtower on the previous mission “Occupation of Gotham.”
4. The checkpoint will be available after the incident with Harley Quinn as you progress through the story missions. It is located inside Ranelagh Ferry Terminal. There are several drones that can be blinded using a remote hacking device. Place explosives on the lower balcony of the station and lure enemies there. You need to lure the outpost commander, after which you can get his controller. Please note that the drones will not turn off after this, so leave the area to avoid getting shot.
5. The checkpoint will be available after the incident with Harley Quinn as you progress through the story missions. It is located at the front of the theater.
6. The outpost is located near the Gotham Globe building.
7. This outpost (checkpoint) will be available after you save Barbara (Oracle) and receive the second Batmobile. Located in the botanical garden. Use the Batmobile, drive onto the ledges and fly the car straight to the outpost.
8. On the upper level of Elliott Hospital. You can use the Batmobile using the adjacent passage.

Location of all militia checkpoints on Miagani Island.
Blake Island
1. This checkpoint will be available after you save Barbara (Oracle) and receive a new Batmobile. After you destroy another outpost, Deathstroke will call you.
2. The checkpoint is in Chinatown. There are turrets (near the entrance) and foot soldiers. You can perform a multi-strike from above. When fighting on the ground, avoid the turret's line of sight.
3. This checkpoint is located near the Scarecrow's hideout in Chinatown. There are turrets and one bandit. Blind one of the turrets, then disable the other one when it turns to the side.
4. Near the bridge of “Destruction” (Curse). Defeat the guards outside or simply use the hacking device to hack the switch near the door. There will be a commander inside the building. Go through the side door and perform a multi-hit while on the ledge.
5. The checkpoint is located near the clock tower. There are two unmanned drones here, but they shouldn't be a problem for you if you've upgraded your disruptor. Use it to make the drones self-destruct. Exploding drones will cause serious damage to ordinary soldiers.

Location of all militia checkpoints on Founders Island.
Mission 5. Occupation of Gotham
This mission will become available once you reach Founders Island. You must neutralize militia towers on the roofs of buildings in each of Gotham's districts. First you need to deal with all the guards, and then apply the explosive gel to the terminal attached to the buildings. Lastly, don't forget to burst the gel.
Miagani Island
1. Look on the roof of the building, not far from Heavenly. Destroy the guards out of sight of the turret mounted on another building.
2. On the roof of the hospital. There are several guards and two terminals. One of the terminals will be unguarded. Destroy it first so that some of the turrets are disabled. Inspect the area and you will see two thugs and bandits with shock batons.
3. On the wing connecting two buildings at the intersection of Grand Avenue. There are no guards, only turrets. Disable the towers first.
4. Near the Mainland Bridge, northeast of Wayne Tower. There are two terminals that you need to destroy. One of them is on the roof, without guards. This terminal is responsible for the functioning of turrets on the walls. There are few guards around the two towers further away from the others, so start there.
5. Northeast of the orphanage, on the river bank.
6. The terminal will be available after meeting Harley Quinn in story missions. The terminal is located at the Gotham Bank.
7. The terminal will be available after meeting Harley Quinn in story missions. The terminal is located on top of a building previously used by Penguin as a weapons cache. The checkpoint is almost nearby.
8. The terminal will be available after repelling the attack on the police department. It is located under the tower about botanical garden. Guarded by one drone and several bandits.

Location of all militia watchtowers on Miagani Island.
Founders Island
1. On the roof of a building near the church and bridge.
2. Close to the Bridge of Damnation and Ricker Heights.
3. On a building northeast of Port Adams and northwest of the Salvation Bridge. Use the hacking device to download security codes into the drone, then use it to destroy the facility's security.
4. The terminal is located south of Wayne International Plaza, which is also close to the airships. Disable weapons caches using a disruptor to prevent the guards from arming themselves.
5. Watchtower north of Port Adams. There will be a burning Otisburg Fire Station right next to the terminal.
6. The terminal will be available after meeting Harley Quinn in story missions. It is located on top of a building in the center of the construction site. This location is unprotected, so destroying the watchtower will be quite easy.
7. The terminal will be available after repelling the attack on the police department. It is located on top of a building under construction.

Location of all militia watchtowers on Founders Island.
Blake Island
1. The only way to get to the terminal is to break the window with your feet. Glide on the cloak and deal with the two enemies, after which you can easily destroy the watchtower.
2. This watchtower is located near the docks, north of the Penance Bridge on Founders Island. The console is located at ground level. There are no ventilation holes here, so it is almost impossible to deal with opponents without making a fuss.
3. This watchtower will become accessible after Harley Quinn appears in the story. Hidden on a train in Chinatown. There will be two drones and several militia nearby.
4. Becomes available after repelling an attack on the police department according to the plot of the game. Located northeast of the police department building.
5. Only accessible after repelling an attack on the police department and is located directly north of the police department. There will be a turret at the top, making the task more difficult. Use the Batmobile to destroy all the soldiers.

Location of all militia watchtowers on Blake Island.
Battle with Deathstroke
When you complete the last three missions (Disarmament, Road Kings, Occupation of Gotham), you will be able to fight Deathstroke. This will not happen before you defeat the Arkham Knight tank "Storm". After this, Deathstroke will take command of the army.

Battle with Deathstroke.
So, provided that you have completed the last three tasks, the battle with Deathstroke will begin. Focus on the Cobra drones first. When all five Cobras are destroyed, then begin to deal with Deathstroke himself. Keep your distance, avoiding his homing missiles, and then aim an energy shot and your missiles at him. When Deathstroke is defeated, the mission will end.
Mission 6. Gotham is on fire
The mission will become available after the story chapter, where you will follow the tracks of the car of the Arkham Knight's associates, in which the kidnapped Barbara (Oracle) was taken away. You will find yourself at the crash site and pick up the scrambler that Barbara threw away. Head to the fire station and use the Batmobile's winch to activate the fire suppression systems.
A Firefly will fly out of the flame. Chase him. Dodge the walls of flame that Firefly will leave behind him on the ground. Chase until Firefly runs out of fuel. Catch him in the air.
As the game progresses you will receive a lot additional information about the latest “achievements” of Firefly. Move to the next burning fire station and repeat the process of catching the Firefly. The last fire station that the villain will set on fire is in Otisburg, on Founders Island. You will have to arrive here in the Batmobile, so you can complete the final stage of the additional mission only after destroying the rocket launcher, which will be in the main plot of the game. As before, chase Firefly until his fuel supply runs out. Catch and beat him. Take him to the police department and complete the mission.
Mission 7. Heir of the Knight
The mission will become available after the story chapter, where you will follow the tracks of the car of the Arkham Knight's associates, in which the kidnapped Barbara (Oracle) was taken away. You will find yourself at the crash site and pick up the scrambler that Barbara threw away. Follow the roof to see a flaming symbol " bat" Talk to Azrael and you will control him in a battle with a crowd of bandits. Complete the challenge successfully without being injured to prove Azrael's worth.
Azrael's next location is Founders Island, north of Port Adams. As before, you need to defeat all enemies without taking damage. Use the same combos and skills as Batman himself. Deal with the small opponents, and then defeat the brute.
Azrael's next location is Chinatown. In this challenge you will have to face a medic and other rebels. Avoid touching electrified enemies. Use the Batclaw to disable them. Deal with the medic as quickly as possible.

The next part of the mission will become available only after Harley Quinn appears in the story. Head to the "Lady of Gotham" statue on the small island in the center of the entire map and climb to the top to see the "bat" symbol. To pass this test, you need to deal with the Arkham Knight fighters.
According to the next part of the mission, you need to return to the clock tower and use the Batcomputer to analyze Azrael's unusual brain activity. After Azrael's memory games, rewind the frames and examine the details with strange symbols to complete and reconstruct the real message.
Azrael will appear inside the clock tower and you will be able to control him. You will need to get the sword lying on top of the cabinet. Make a choice: either try to kill Batman, or throw away the sword. In the second case, break the sword and leave the clock tower on the elevator to complete the mission.
Mission 8. Night flyer
You may encounter this creature on the rooftops of Miagani Island. Catch up with this monster in the air. It is difficult to notice, and even more difficult to catch up with. The creature sometimes makes sounds, which will help you determine its approximate location, as well as the direction in which it is moving. Just catch up with the flying creature and get a sample of its blood.
Next, go to Chinatown to find Dr. Langstrom's laboratory. It is located in an alley. Go there and take the elevator down. Enter the laboratory and examine the lying body. Gain access to a computer nearby, on which you will have to find (create) an antidote. Rotate the DNA chain so as to restore it to the end. Incorrect tension reduces chain integrity. Once you have a clean DNA sample in front of you, you will complete part of the mission.

Batman".
Go to Blake Island, move to the rooftops in search of the bat. You can activate the detective mode, which will help you recognize the desired creature. When you find the creature, follow it and get as close as possible to administer the antidote. However, the dose of antidote appears to be insufficient. Wait until you find out new information about the location of the flying creature.
At the end, the Nightflyer will be floating in the sky above Founder's Island. He will definitely appear after completing the story mission with Harley Quinn. Catch up with him again and administer the medicine. Deliver the creature to the police department to complete the mission.
Mission 9. Armored and very dangerous
You will receive this mission after installing the second upgrade on the Batmobile after the main story mission on Miagani Island in the tunnels. The areas will be patrolled by Arkham Knight armored personnel carriers. They may have drones with them. After destroying an armored vehicle, you will have to wait until another one appears. Check the mission screen from time to time.
For destroying each armored vehicle, you will earn “tech points” for upgrades. Please note that armored vehicles will be escorted. You need to dodge homing missiles. With each new stage, armored vehicles will become stronger.
To find armored vehicles on Founders Island, you will first need to destroy rocket launcher.
Mission 10. Weapon smuggling
According to the plot of the mission, you need to find and destroy all the caches with weapons of the old rascal Penguin. Nightwing will give you data on all the Penguin's weapon vans. Go to this place, track the van and intimidate the bandits. When they try to tear you away, climb onto the roof and watch the van. Stay behind them until they reach Sionis Industries near the Falcone Shipping Antenna on Blake Island.
Enter the building through the side door and hack the console on the wall on the other side. Use a remote hacking device to do this, which will help open the main gate. Switch to the Batmobile and take out all the turrets. Find a grate that you can climb higher on, use the switch to open a passage to the roof.
Move to the roof and break the windows. After you go down below, you will defeat the thugs together with Nightwing. Apply explosive gel to the weapon crates inside the vault and then blow it up.
The second weapon storage will be available after you destroy the rocket launcher based on the story mission on the airships on Founders Island. Move to where the van is and start attacking it. Knock on the truck or call the Batmobile to scare your enemies. Follow them, moving along the rooftops until they lead you to one of the Penguin's weapon caches.
Deal with the guards outside the building and go through the door. Enter the ventilation nearby and reach the wall with a crack. Use explosive gel, but don't blow it up. Then return to the ventilation. When there are two enemies near the wall, then explode that same gel. Deal with the rest.
Use the Batclaw to pull out the grate covering the hole in the ceiling. Move through this opening, use the disruptor to disable the weapons crate and deal with the two armored soldiers near it. The multi-strike technique works well here. Blow up the weapons vault to complete part of the mission.
This vault becomes accessible only after Harley Quinn appears in the story mission. Drive to the marked van location on the map, then intimidate enemies with the Batmobile or knock on the door. Chase them across the rooftops until they reach the hiding place at the water filtration plant on Blake Island. Examine the gate where the truck passed, after which Alfred will help you get into the tunnel.
Move forward along the path leading into the sewer. There are several armed enemies there, so it will be easier to kill them with the help of the Batmobile. Go into the room above to find an electrical box controlling the barrier below. Pull the lever and, if desired, take the Riddler trophy from the table.
Get into the Batmobile and use the powerful winch to lift the heavy gate. Sneak up on enemies and use multi-strike. There are three grates at the top that you can get through. There are no armed enemies inside.
After you eliminate the guards inside, place the explosives (gel) on the weapon crates and close the door to the vault. A little later, blow it up. In this case, a cutscene will be activated, and you will see that Nightwing has been captured by the Penguin. Go to the Penguin's location to save him.
Go up to the roof and check the location. You can't use detective mode here because there is interference from one of the guards. If you manage to deal with the bandit wearing a backpack, the interference will disappear. First, climb to the observation point and deal with the sniper. After eliminating all the guards on the roof, access the fuse box to open the elevator door. Go down until you see bandits surrounding Nightwing.
You need to get inside and attack enemies unexpectedly. There is a hole in the wall that you can crawl through. There will be a turret in the corridor. Disable it using a hacking device, and then destroy it. Open the ventilation grill and crawl through the shaft. Get through the hole. As a result, you should end up at a cracked wall, on the other side of which there is Nightwing and the bandits.

Meeting with Penguin at the end of the mission "Weapons Smuggling".
Blow up the wall and defeat all opponents. Next, set the explosives and close the door to the last vault. Penguin will take Nightwing hostage. Perform a command double strike and detonate the explosives. The last vault has been blown up, so you can safely take the Penguin to the police department.
Mission 11. Two-faced bandit
Head to the Gotham Bank and go inside. The alarm will be turned on, so crawling past the bandits is completely unnecessary. As long as they don't see you, you can take them by surprise without attracting the attention of nearby thugs. After you destroy the first wave of enemies, more enemies will appear. Just deal with them all to achieve the mission goal. This will unlock new challenges. The Drescher area is located on Founders Island.
After you clear out the Drescher branch, you will need to move to Kingston. This is the largest bank and therefore you will have to face a lot of bandits. There will also be two vehicles. Use tricks, combos and your gadgets.

A two-faced bandit will try to rob all the banks in Gotham.
After the destruction of the last enemy in the bank, Two-Face will arrive, accompanied by his retinue. Use multi-strike. In detective mode, be careful because there is an elite specialist in the enemy group. Use a disintegrator to disable weapons. This also applies to the Two-Faced Bandit, who will have a firearm in his hands.
Finally, after defeating all the enemies, defeat Two-Face and take him to the police department.
Mission 12. A Friend in Need
This mission will become available after the incident with Harley Quinn during the story chapter. Head to Wayne's Tower on Miagani Island to begin the mission. Access the elevator in the underground parking lot (go on the southeast side of the Gotham Bank), go to the computer and use the retinal scan.

Hush took Lucius Fox hostage.
When you control the real Batman, go to the door and watch a cut-scene in which you will identify the intruder. Follow inside the office to deal with him. Save Lucius by pressing the button (key) that appears on the screen. When Hash turns the weapon in your direction, press the button to disarm him.
Mission 13. Sacrificial Lamb
You will receive this mission after clearing the clock tower and reconnecting with Barbara (Oracle). Head to the "Lady of Gotham" statue on the island in the center of the city. You will find yourself in a cage with a crazy crowd. Deal with everyone, use a remote charge to turn off the generators. After this you will need to get out of the cage.
Mission 14. The Riddler's Revenge
In Batman: Arkham Knight, Edward Enigma, known to you as the Riddler, went wild. There are approximately 240 different mysteries scattered throughout Gotham by Edward. You will have to look for the Riddler's trophies, rescue victims, solve riddles and destroy various objects.
However, in order to defeat the Riddler and save Catwoman, you must complete the 10 challenges marked on your map.
P.S. Completing 10 challenges will allow you to fight the Riddler and his robots for the first time. But if you want to put an end to the villain once and for all and take him to the police department, you will have to collect ALL the trophies and solve ALL the mysteries scattered throughout Gotham.

Based on the mission "Riddler's Revenge", Batman must remove a bomb necklace from Catwoman's neck.
First test
First of all, get into the Batmobile and head towards the first marker. Go to the Riddler's garage. In the basement you have to race around and around various obstacles. With each new circle the number of obstacles will increase. If you do not complete the lap within the allotted time, you will need to try again. Keep your eyes on the road and press the B (circle) button to remove Riddler obstacles when you encounter them.
Once you complete 3 laps, you will be in control of Catwoman. You must gain access by entering the correct key. As you move around in the Batmobile, you will see a green light surrounded by red lights on the wall. The same thing Catwoman sees. If you are playing on normal difficulty, the green key will be located in the fourth row and third column. In " A new game+" look for the key in the first row and third column.
Second test
You need to go to the Ace Chemicals plant and take the bridge on the left side. A little further on there will be a door with the inscription Balancing Act. Follow through and the second test will begin. You need to climb up the frame and leave the Batmobile. Stand on the switch, switch to the Batmobile and ride onto the balancing platform. This will allow you to activate the first block and open the path further.
For red and green platforms you need to use an immobilizer. Place yourself on the second balance platform, then use the colored blocks to get to the very end. You will need afterburner to jump over chasms. To activate the platform, you need to go around the elevator and use the winch on the right. Press the gas pedal while keeping the needle in the orange zone.
For normal game mode, the key is on the last line and in the second column. For the “New Game +” mode, look for the key on the fourth line of the first column.
Third test
Head to Pinkney's Shelter on Miagani Island, where a puzzle awaits you. There will be three question marks here. Throw a controlled Batarang at each of these signs. Align the circles to make a question mark. After this, stand in such a way that your reflection in the mirror becomes the point for this question mark. Scan the entire sign. Go to the Numeracy room, use Batman to the right switch and Catwoman to the left switch. Now you need to hit the question marks in this order: 3-1-4-5-2 Batman and 1-3-5-2-4 Catwoman. The fight will begin.
Fourth test
Head towards the hospital in Bristol on Miagani Island and go through the door marked Crushonator. Kill the enemies and go to the third cave. Make three laps, passing obstacles and completing them within the allotted time. On normal difficulty, the key is on the last line and in the fourth column. When playing in the “New Game +” mode, look for the key on the third line and in the last column.
Fifth test
Drive to the Kingston area on Miagani Island. Go down to the flight school garage to find the fourth cave. You need to achieve air concentration, which will help you reach the three platforms. It will be quite difficult to pass this test the first time. On normal difficulty, the key is in the fifth row and fourth column. On the New Game + difficulty level, look for the key on the second line and third column.
Sixth test
Revisit Pinckney's Shelter on Miagani Island for a new puzzle. Go through the door marked "Physics". To solve the puzzle you need to throw a batarang at the question mark on the wall to the left and step on the left switch. Next, Catwoman must stand on another switch, and Batman must be moved to the third switch. After that, take Batman out. Place Batman on the second platform, and place Catwoman on the first platform. When the discharge passes, go to the first platform near the Cat. To get the key you must jump as Batman onto the platform with right side. Use Catwoman to pick up the key.
Seventh test
Head to the Otisburg area on Founders Island, towards the church. Go down to the garage marked Drain Pain in the church and gain access to the cave. You need to use a winch and then slide down the wall towards the blades. Move to the right until you see that there is a gap in the wall. Position yourself on the platform to lower the water level and take the Batmobile to the second number on the right.
Shoot the winch again and go down into the water. Follow the left side until you see an opening on a weak wall, which you destroy with a cannon shot. Leave the Batmobile and move towards the hole to stand on the platform and remove the water. Return to the Batmobile and follow forward to the blades. Move along the wall and find the third number. Use the winch to get down, rotate along the wall and climb up. Leave the Batmobile and climb into the hole. Use the platform, then destroy the turrets using the Batmobile. Place yourself on the platform at the bottom of the pit and take the key.
On Normal difficulty the key is in the third row and fourth column, and on New Game+ difficulty it is in the third row and fifth column.
Eighth test
Stand as Batman on the trap located on the right side. Catwoman must climb to the ceiling and stand on the panel in the next room. There will be light on the scoreboard to reflect movement. If the character stands on the correct panel, the amount of light will increase. Move to the desired location. The dot on the question mark is the beginning of the path. Control one or the other character until you reach the panel that equalizes opponents. Kill the red and blue enemies and get the key.
Ninth test
In the new cave there will be the same race as before. You need to complete three laps with obstacles in the allotted time. To remove obstacles you will need an immobilizer. On normal difficulty, the key is in the second row of the fourth column. On New Game + difficulty level, look for the key in the fourth row and last column.
Tenth test
Go through the door of the "Final Exam" shelter. Follow to the second room and inside you will see a platform of 5x5 cells. At the end of each row of platforms there is a generator. Use the device to shoot an electrical charge and hit the generator around open space. This will allow the platforms to be pulled or pushed away. You cannot stand on these platforms and must jump from the ceiling while controlling Catwoman. If Catwoman stands on a platform, it will prevent other platforms behind her from moving. The empty square should be in the place where the red beam falls. This is the meaning of the riddle. When this happens, you need to jump Catwoman onto the ceiling to avoid the spikes.
The beam with the empty square must be lined up three times. When you do this, go to the previous room to get the key, and then try to leave the shelter. When you try to leave, the Riddler will appear with his robots. This time the robots randomly change color from red to blue. Batman must attack the blue robots, and Catwoman must attack the red ones.

The Mad Riddler, whose name is Edward Enigma.
Destroy all the robots to finish the first round of the Riddler fight. The mission is not yet completed. Collect all of the Riddler's trophies and solve all of the Riddler's puzzles located throughout Gotham. After this, return to the shelter to fight the Riddler a second time.
Access the question mark panel and deal with the Riddler and the robots. At first the robots will be almost all blue, but towards the end you will find a few red enemies. A device for shooting an electric charge will help you scare the red robots. When Catwoman is near them, switch to her and defeat the red robots.
The Riddler will hit the ground using his mechanical arm. The color of the fist indicates who can attack the Riddler. As a reminder, red is Catwoman and blue is Batman. If the fist is green, then the Riddler can be attacked by any of your characters. Continue attacking the Riddler's first fist until you've dealt with all of your HP. Next, take the Riddler to the station and complete the mission.
Batman: Arkham Knight has a line of side quests called "Wanted". Completing these missions will help you fully understand the history of Gotham City. But that is not all. If you want to complete the game 100% and see all the criminals behind bars, then you need to complete this quest line in Batman: Arkham Knight. Walkthroughs of missions from the “Particularly Dangerous” series, as well as tips and tricks, await you in this guide.
The Riddler's Revenge
This mission is the longest and most difficult of all the side quests in Batman: Arkham Knight. The passage of “The Riddler” contains 10 tests, the completion of which will give you the opportunity to fight this criminal for the first time, as well as free the catwoman. But in order to put the villain behind bars, you will need to find 243 trophies scattered throughout Gotham City, as well as solve all of Riddler's puzzles. The first test awaits you in the villain's garage. Here you will need to drive three circles, avoiding obstacles in the Batmobile. After this, you need to solve the riddle with the keys, and to do this, select the one that matches the green light on Batman’s screen.

To pass the second test, you will need to drive onto platforms, and by balancing on them, the hero will open a further path. After you reach the top, take the corresponding key and go to the next puzzle. The third challenge will take you to Pinkie's Shelter. In the foyer you need to solve the problem with the keys. And to do this, shoot at the question marks until the rotating circles on the floor form the desired pattern. The next puzzle awaits inside, which can be solved by switching between heroes. As soon as you solve the riddle, robots will immediately appear and you will have to fight with them.
Next puzzles
The fourth test awaits you at Elliot Memorial Hospital. There is a fairly strong checkpoint before entering the location, so it is better to get here in the Batmobile. We use the springboard and get into the barrier zone. After this, we clear the area and turn off enemy cameras. Next you will find a small race with obstacles.

The fifth challenge will begin at Gotham Casino, another Batman: Arkham Knight location. The passage of the “Riddler” in this mission is quite simple: drive into the catacombs and accelerate as much as possible. Once you reach the fence, eject from the car and direct Batman to the center of the green button. After this, the next two will open, and you need to activate them in the same way.
For the sixth challenge, return to Pinkie's Shelter. The main character of the game Batman: Arkham Knight - Catwoman - will help you in this task. This mission involves team movement, so switch between heroes to solve this puzzle.
The Seventh, Eighth and Ninth Trials of the Riddler
To complete the following missions you will need more dexterity than intelligence. In each of these tasks, Batman will need to demonstrate his skills in using available tools. Moreover, if you have reached this stage, then the puzzles will not become something unusual, because their analogues are in the previous parts: there are races, platforms, and switching between heroes.
The Riddler's Final Test
To complete this mission, go to the "Final Exam" shelter. Find a room with a platform of cages. You need to use a device to shoot electricity to hit an open generator - this will cause the platforms to start moving. You can't stand on them, so control Selina by jumping from the ceiling to free space and back. As soon as Catwoman stands on the platform, the movement behind her will stop. So use this feature wisely. The goal of the puzzle is to make the square on which the red ray falls empty.

Remember the game of tag, and then this riddle will not become something difficult for you. You need to solve this puzzle three times, after which a secret room will open in which the key is stored. After freeing Selina, go to the exit. The Riddler is waiting for you here in the company of his robots. The battle will not be easy, because the opponents are constantly changing their “color,” and since Batman only needs to attack blue enemies, and Selina needs to attack red ones, she will have to maneuver. The boss is immortal in this fight, so don't pay too much attention to him. Only after you have found all the signs and solved all the puzzles, you will be able to visit this place a second time and attack the Riddler. And only after the final victory can this villain be sent to jail.
Gotham is on fire
In this mission of Batmen: Arkham Knight, the walkthrough of which you will find below, Batman needs to neutralize the villain Firefly and prevent him from burning the city to the ground. First, find a burning fire station, then use the winch and the Batmobile, which will help you activate the fire alarm, and put out the fire. Immediately after this, the chase for Firefly will begin, and it will continue until the villain runs out of fuel in the gas tank. Be careful while chasing, Firefly can throw fire traps that can damage the Batmobile. After you catch up with Firefly, you need to defeat him in a fight. After some time, the fires will resume, and Batman will have to go the same way. To successfully complete the mission, you need to catch Firefly three times, after which he can be put behind bars.
Weapon smuggling
Completing the game Batman: Arkham Knight and this task will help you neutralize such a famous villain as the Penguin. In this mission, Dick Grayson, aka Robin, will become your assistant, and together with him, Batman will have to find and destroy all of Oswald Cobblepot’s hiding places. The first of these can be found in the northern part of Miagani Island, in a building near the parking lot. Be careful, the area is equipped with security turrets and is swarming with enemies.

The second weapons cache is hidden in the Sionis Industries building. The next one can be found in the Fish Market, and the fourth one is hidden in the Gotham Water Treatment Plant, the entrance to which can be found in Chinatown. The last cache is hidden in a building southeast of Founders Island. Inside you will find not only many opponents, but also the Penguin himself. In order to defeat him, use a double finishing move, after which the villain can be handed over to the police.
Kings of the roads
You can get this quest after the sixth chapter of the main story. The description of the Batman: Arkham Knight mission “Road Kings” comes down to one thing - your hero needs to find and destroy 20 militant checkpoints. Four of them are located on Blik Island. Eight are located on Miagani, the same number are on Founders Island. Each of the checkpoints is protected by well-armed bandits, in addition, some of them are guarded by tanks. So Batman will have to fight hard. Destroying all checkpoints will be the first step in eliminating a particularly dangerous criminal - Deathstroke. But in order to put this villain behind bars, you will need to complete two more missions, which will be discussed later.
Occupation of Gotham
In this mission of the game Batmen: Arkham Knight, the passage of which we analyze, the hero will have to find and destroy bandit towers on all three islands. They are easy to spot, because each such object is surrounded by banners, red lanterns and flags. In addition, the towers are visible from afar due to their flashing lights. To destroy each of these objects, you will first need to clear the surrounding area of enemies, and then blow up the computer using a special gel.

Disarmament
In this quest of the game Batmen: Arkham Knight, the passage of side missions of which we are considering, Batman needs to find and defuse 14 bombs scattered across the map of Gotham City. In order to defuse them you will need to download a special virus. This can be done using the Batmobile's winch. The task will be complicated by a convoy of unmanned vehicles protecting each of the bombs. Once this quest is completed, provided that the missions "Kings of the Road" and "Occupation" are completed, Batman will have to fight Deathstroke. The enemy will hide inside heavy tank, in addition, several drones will be suitable to help him. So to win you will need to show all your skills in driving the Batmobile.
Batman: Arkham Knight. "Night Flyer"
The walkthrough for this mission is short and fairly simple. After meeting the creature, Batman will need to find the strange creature and find out what it is. After the meeting, go up to high building and turn on detective mode. Listen to the sounds this monster makes and fly towards the noise.

When you get closer, grab the “flyer” from the back. After this, your path lies to the laboratory of Dr. Kirk Langstrom, which can be found in the northwest of Blick Island. Here you need to create a medicine, and then go back in search of the creature. You will have to catch the “Flyer” twice, after which the serum will take effect and it will be possible to deliver the doctor to the police station.
Knight's Heir
This mission is one of the most popular in the game Batman: Arkham Knight. The Arkham Knight walkthrough will open after you gain access to Miagani Island. After the mission with the Oracle, Alfred will tell you about a mysterious figure seen on the roof of a building in Grand Avenue. It is there that you will first meet Azrael, an unusual character in Batman: Arkham Knight. The tests from this hero are a skirmish with several opponents, and with each task their strength and skills increase significantly.

You will finish the first battle quite easily. To start the second one, go to the southwestern part of Founders Island. The third test awaits you on the roof of the building opposite Osamu Tower in Chinatown on Blick Island. Last Stand awaits you in the center of Gotham City on top of the Lady Liberty statue. After the battle, Batman needs to go to the Clock Tower, where he learns everything about the identity of the “Heir Knight”, as well as his plans. After this, you have to decide what to do with Azrael. If you, being this character, attack Batman, then the character will face prison. Or you will break the sword and the heroes will shake hands.
Batman: Arkham Knight. "Ideal crime"
Completing this mission will become available in the first part of the game, but to complete it completely you will need access to places that open almost at the end of the adventure. The goal of the task is to find and neutralize a maniac who leaves behind disfigured corpses. You will find the first dead man named Anthony Lund tied to a bridge in the northeast of Blick Island. When examining a corpse, pay attention to the left ear, the stomach on the right and the left thigh. The second victim (Franklin Accardo) is on the roof of a building, on which there is a billboard "Batman Good for Gotham". This house is located in the southwest of Bleak Island - the main location of Batman: Arkham Knight. The versions of who committed these crimes are not particularly convincing yet, so look for the next victims. And then you will understand who this maniac is.
You will find the following two corpses on Miagani Island: Lisa Mendez on the roof of the La Patastray building, which is located near the bridge to Founders Island; Robert Kincaid, whose body is hidden on the roof of a house near the police station. The fifth victim, Ella Montgomery, is tied up near a dirt road on the north side of Founders Island. You will find the last corpse, a girl named Alison Veers, on the roof of one of the houses near the pier.

After examining all the bodies and evidence, Alfred will give information about the location of the maniac - Professor Pigi. The final battle with the villain will be quite difficult, because crowds of opponents are waiting for you inside the shelter. The maniac himself is not that strong, but he can deal a fatal blow if you are distracted. After victory, Batman can only open all the cells and release the prisoners, as well as send the mad professor to jail.
Your adventure will begin in a location called Island Bleake. This is the northeastern part of Gotham City. In this part of the city, you will have to work hard to collect all the Riddler's prizes. Some lie in open form, and you just need to go up to them and take them, the rest are hidden in secluded places, and will require you to have certain skills in solving puzzles. In this guide, we will tell and show you the location of all Riddler Trophies Bleake Island and what is the best way to get them.
We are preparing material for you on all places in Gotham, use the links below to determine the location of Riddler Trophies on other Islands and Locations such as:
We hope that our guide helped you, do not forget to share the information with your friends and acquaintances.
Riddler Trophies Bleek Island
Blick Island Riddler Trophies Map
The so-called Riddler Trophies just need to be found, and sometimes taken out of hard-to-reach places; we have marked the location of such Trophies for you on the map and on the places themselves.

1. Near the clerk's desk in the evidence room at the GCPD Police Station.

2. On the east pier, south of the clock tower, under the walkway next to the boat dock. Use Claw/Batclaw.

3. In a dilapidated building on the western part of the pier, south of the clock tower.

4. Under the bridge near Ace Chemical / Chemical Plant, there are generators nearby

5. At the top of the Ace Chemical tower on a small island with a lighthouse.

6. Behind the destroyed wall on the top floor of the building north of Langstrom's laboratory.

7. Under the canopy north of Langstrom's laboratory. The entrance is on the north side.

8. Between the destroyed wall east of Langstrom's laboratory.

9. On the way to the warehouse in the central part of the island.

10. Inside the hanging container to the north. Look for Crane

11. Go to the helipad on the roof of the Panessa Studios building, then down the stairs to your right there is a hole in the wall that takes you there.

12. Behind the breakable wall at the top of the northern building in Panessa Studios.

13. Behind the breakable wall at the back of the northern Panessa Studios building.

14. Outside a small house next to the water near the trade bridge.

15. In the Barn next to the eastern lighthouse.

16. Behind the destructible ceiling just behind the Kord sign in the Cauldron building. We shoot from a cannon in tank mode on the Batmobile, and then calmly take it out with a hook.

17. In the northwestern part of the Mendo Soap overpass.
Update: Trophy #17-alfa located in the Gotham Water Tunnels. You can find it while completing Penguin missions. More detailed information Unfortunately, I don’t have any for this trophy.
Riddler Trophies - Puzzles.
Solving Riddler's logic puzzles will take a fair amount of effort, so we will need some time to solve such riddles; most of these riddles are blocked by completing story and side missions, and are not available from the very beginning of the game. Some of them require gadgets that you will have access to much later. Riddler puzzles are indicated on the map with yellow signs.

18. Pull out the train with the Batmobile and then move into the vent behind it.

19. Hook the lever with the Batmobile's hook, then shoot the question marks in the order shown when the circles reach the top mark. Proceed carefully.

20a. Shoot the winch at the marked hole, then rev up and get ready to race. The starting position is in the south of Miagani Island

20b. If you are fast enough, you will have time to climb to the top of the Osamu Corp building and take the trophy.

21. Obtaining a trophy will become possible during the completion of the 4th mission of the Penguin's caches. Underground, take the stairs to the office.

22. Use the Batarang to pick up the containers, then press the button on the floor and use the Bat Claw to grab the trophy. After this, several armed robots will attack you; to get rid of them, you will have to throw a Batarang to lower the container on them.

23. On the side where the Langstrom Laboratory is located Use the speech synthesizer on the robot through the glass so that it brings you the trophy.

Update: IN 25a, when the question marks rise to the bridge, you need to turn into the right lane, quickly get to the edge of the sign on the bridge and continue tracking from there. Thanks to the user Kyle.

25a. Move towards the circle Green colour, scan the area, then follow the trail of question marks

25b. Shoot the marker at the end of the path with the Batmobile, then head up into the open area to claim the trophy.

26. Use the speech synthesizer to guide the robot through the maze, it will bring you a trophy. Use the remote hacking device to disable the turrets, this will help the robot.

27. On the roof of Chinatown. You will have to fight with 9 robots, throwing Bzhtarang you will get 3 more.

28. In the west of the Clock Tower. use the winch on the Batmobile to the center of the circle, then use the remote electric charger on the generator.

29. On the northwest side of the building. Standing on the pressure plate with the Batmobile, shoot at the question marks that light up.

30a. Use the winch to get the Batmobile onto the roof and then start scanning the symbol. Follow the trail of question marks.

30b. Shoot the sign under the bridge and then use the Bat Claw to grab the trophy.
Updates: Regarding trophy #31, I’ll say right away that I’m playing on a gamepad. Your actions, we drive up, connect the winch, wait for the car to receive charges and turn on the EMR using the button "Cloak Stun". The electricity goes out and then you will need to act quickly. Jump out of the Batmobile by pressing "Double jump button" And holding her release "Rope Launcher" while holding the left analogue. All this must be done extremely quickly. Yes. This is hard! And yes it is inconvenient! That's why they are Riddler Trophies.

31a. In the tunnel under Panessa Studios, use the winch on the Batmobile to open the door.

31b. Use the power of the winch to disable the electrical barrier, then launch yourself into the air with the help of the Batmobile, once at the top use the Rope Launcher. Throw Batarangs at question marks.

32. Use the Batmobile's winch to remove the glass from the question marks, then throw Batarangs.

33a. Use the winch on the lighthouse to make yourself a springboard. Climb onto the building, find the socket and use the winch to activate the next race.

33b. You'll eventually end up on top of the Chinatown building. If you manage to reach the goal within the allotted time, you can pick up the trophy

34. Use a speech synthesizer to send the robot to one of the buttons, stand on the second one yourself. Use the Bat Claw to collect the trophy.

35. At the Soap Factory, pull the slabs with the Batmobile. Hold each one so Batman can go through and get the trophy.

36. Using the Batmobile, pull the spring so that the ball with the trophy falls into the desired pipe. Happened! We take the trophy.

37a. Pull out the slab using the Batmobile's winch. Use explosive gel on the stove, put it back and blow it up.

37b. It is safe to enter inside. Use the roll to get into the hole.
Well, we found all the possible Riddler trophies on Blik Island. Don't forget to subscribe to news in contact and stay tuned for updates.
In addition to the main plot, any self-respecting game will have a ton of side effects that need to be completed. Or you don’t have to do it, and then you’ll deprive yourself of an extra 10 hours of pleasure. In our Batman, there are perhaps even more of these side effects than the plot itself! And it is they who allow us to come face to face with the next portion of enemies that are not even mentioned in the main storyline. And there are only 6 such enemies: Deadshot, Hash, Bane, Zsasz, Mad Hatter, Riddler. + additional side effects without significant enemy: Track down the mysterious stranger, help Frieze find his wife, complete all AR training. + every little thing, without which the game will not be completed 100% and which I will also tell you about. Let's go straight down the list: |
"Shot in the Dark" (Deadshot)
Guide to completing additional tasks or “catching villains together”
 Guide to completing additional tasks or “catching villains together”
 Guide to completing additional tasks or “catching villains together”
 Guide to completing additional tasks or “catching villains together”
...or Arkham's best assassin. An excellent sniper who carries a large-caliber weapon in his arsenal sniper rifle and pistols strapped to their wrists. The side effect begins when an SOS signal icon appears on your Batcomputer from some rooftop. We fly there, talk to a frightened prisoner who talks “about a psycho who is chasing him and wants to kill him.” In the middle of the conversation, this prisoner receives a bullet in the forehead, and we are obliged to scan the area for evidence. The evidence will be a bullet, by which Batman will identify the killer - this is Deadshot (it will be necessary to track the trajectory of the shot, as was the case with the Joker).
What to do next? We fly up to the area marked on the map with the number 2. At a certain moment, you will simply hear the echo of a shot, and the Oracle will tell you that another victim of an evil sniper has been spotted in *such and such* area. The difficulty here is simply to find this victim, because the area is quite large. I'll make it easy for you: a victim on a bridge. We scan the area, track the trajectory of the bullet, and get another piece of evidence - a rifle stand. Using it, Bats determines the quality of the metal. The third victim is easier to find - bandits have gathered above her. Three or four bandits - is that a problem? We scan the area, find out that the bullet ricocheted (finding the trajectory will not be particularly difficult), follow the trail and get the last piece of evidence - a heat signature. We contact the Oracle, we get a series of locations “possible Deadshot’s lair” (or something like that). The correct choice is the location located in the northeast of the map. There we will find the killer's PDA, hack it and find out about the next victim that we must save in the allotted time. We save and watch the first and last mistake in Deadshot's career. Then the battle begins directly with him.
The fight will take place on the roof, in the center of which Deadshot himself is located. If we come into his sight, he will kill us. Here you just need to quietly sneak up on him, hiding behind objects (while he looks for us on the other side of the roof). We sneak up, knock you out - the quest is completed.
"Search for a Thief" (Khash)
Guide to completing additional tasks or “catching villains together”
 Guide to completing additional tasks or “catching villains together”
 Guide to completing additional tasks or “catching villains together”
 Guide to completing additional tasks or “catching villains together”
At the places marked on the map (one of..) we find a corpse, whose face is cut out and wrapped in a towel, we scan it. A trail appears that we must follow and that will lead us to a frightened policeman who, at the sight of Batman, will lay a bunch of bricks. This is not our “person stealer”, and after a boring conversation with him, we are waiting for the search for the next victims. This is very, very difficult, because they are not marked in any way on the map, and looking for them in Arkham is like looking for a needle in a haystack. The second victim is on the park street, next to the AR training (fly over to the left gargoyle and jump down). We scan the area and find fingerprints on the knife. Then SUDDENLY it turns out that these are the prints of Batman himself, and we are forced to look for a third victim. The landmark for the third victim is a huge green “ACE Chemicals” billboard. The third corpse is next to the building on which this billboard is located. We scan and again follow the trail, which leads us to another fellow bandit, who convinces us that none other than Bruce Wayne is behind all this. Well, we know that this is not so. A marker appears on the map (next to the courthouse), and that’s where we go. There we fall into a trap and meet Hush, who, using pieces of taken faces, changed his appearance so as to look like Wayne (no, to be an exact copy of him). And this is where the quest ends... do you feel who will be the enemy in the next part of the game?
"Fragile Alliance" (Bane)
Guide to completing additional tasks or “catching villains together”
 Guide to completing additional tasks or “catching villains together”
One of the easiest side effects. As soon as the “signal fire” icon appears on one of the roofs on the batcomputer, we fly there. We go into the room and see Bane, pumped up with titanium. From there we learn that throughout Arkham there are 12 containers with titanium, which, no matter how bloody your nose, must be destroyed. Bats takes six and Bane takes six. It is worth noting that these same containers are also available before the start of the quest. So they will only appear on the map, and the whole problem of the quest will be “to fly in, scatter enemies, blow up containers (with explosive gel).” After all the containers are blown up, we return to Bane, find out that he has nothing good on his mind, and gracefully isolate him in his cell. There won't even be a fight - we'll limit ourselves to one video.
"Cold Blooded Killer" (Zsasz)
Guide to completing additional tasks or “catching villains together”
 Guide to completing additional tasks or “catching villains together”
What a name, seriously! Zsasz also appears in Arkham Asulym, but his role there is minimal and he is knocked out with one hit. Here he has a much larger role to play – he has become a real “telephone” maniac! Every area of Arkham has a telephone that might ring if you happen to fly by. After starting the quest, you will need to complete a series of 5-6 similar activities: fly from one point to another in a certain time (all this, of course, is Zsasz’s game, which makes us rush from phone to phone). To track a call during a call, move the cursor so that it does not go beyond the marked area. Repeat the procedure 5-6 times and you will track down the maniac. The neutralization procedure is quite simple - you need to go through a kind of labyrinth (with a constantly changing water level, more details in the video). Don't forget that you can cling to ledges and use a zip-line launcher (I always forget about it).
"Through the Magnifying Glass" (Mad Hatter)
Guide to completing additional tasks or “catching villains together”
 Guide to completing additional tasks or “catching villains together”
The quest begins next to the theater where the Joker tragically died. On the roof of one of the buildings you can find the medicine dropped by Alfred (it is marked on the map). After using it, Batman faints, and then a series of events takes place, which is very difficult to describe without swearing. The hero begins to struggle with the effects of the drug that the Hatter injected him with. The face...the surroundings...it's a must see! By the way, in this mission you can score the maximum combo for the entire game (not counting tests in a separate mode).
Enigma Riddle (Riddler)
Guide to completing additional tasks or “catching villains together”
 Guide to completing additional tasks or “catching villains together”
In my opinion, the most difficult villain. To defeat him, you need to collect 400 (!) trophies and save five hostages.
The Riddler's Revenge is the most difficult and lengthy test for the Dark Knight. This mission is one of most of the minor Wanted missions in Batman: Arkham Knight. In order to complete the missions, you must complete a series of tasks throughout Gotham. However, from the very beginning you will not be able to complete all of the Riddler's tasks, as different missions open at different stages of the main story. The tricky tracks and puzzles in which the Batmobile will directly take part will seem new to you. Riddler's goal, as always, is to make you solve a series of puzzles, take part in a series of challenges in order to collect all the trophies. Edward Nygma aka Riddler is a big pain in the ass of Bruce Wayne aka Batman.
Passing Riddler's Challenges with Catwoman
P.S. Please note that we received all the riddles and their solutions in normal mode, this may differ from the New Game +
General information "The Riddler's Revenge"
- Even after passing all of Riddler's tests, you will not be able to put him behind bars. In order to send him to Commissioner Gordon at the station, you will need to solve and search for all his trophies and riddles.
- The goal is to cope with all the tests of Edward Nygma, which consist of a series of puzzles that can be solved, both with the help of the Batmobile and without it.
- There is a bomb with 9 charges on Catwoman's neck; to save her you will need 9 keys. You will receive the keys only if you fulfill all the conditions in the Riddler's tasks.
- As you complete missions, you will be able to control two characters: Batman and Catwoman
- The Riddler's trials are divided into two parts:
- 1. Puzzles involving the Batmobile, after completing which you will tell Catwoman where the necessary key is.
- 2. Tests with Catwoman, here Selina Kyle comes under your control, with whom you will have to interact to solve a number of puzzles. At the end of each challenge you will receive a key.
- For each successful completion of a challenge, you will receive a reward of 2 WayneTech points, as well as one achievement.
Reward for completing "The Riddler's Revenge"
- 25 WayneTech points.
- “The Road to Hell”, “Fragment of the Puzzle”, “Cat and Mouse”, “The Riddler Raged”, “A Sore Question”, “The Eternal Question”, “Riddle Factory”, “Dangerous Occupations”, “Nine Lives” - an achievement.
- Catwoman, Edward Nygma - figures and biographies of characters.
- Several tests
- Access to the last riddle Riddler on Miagani Island, which you will receive in the "Final Exam".
First meeting with Riddler on Blik Island
The first meeting with Nygma will take place on Blik Island as part of a short briefing on what else to expect from the closed Riddler Races. There you will be taught the basics of Batmobile behavior on specialized Riddler tracks.
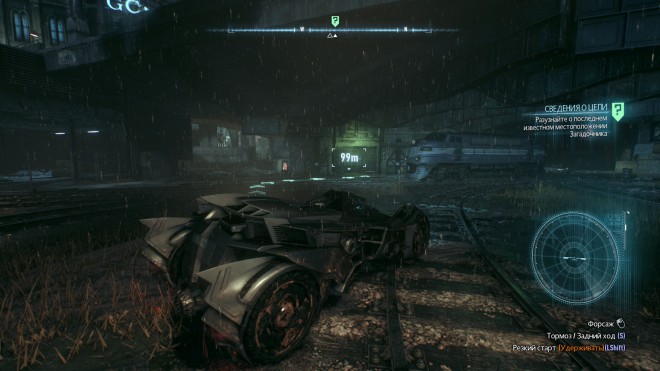
The place where Riddler was last seen.
After successful completion, you will be asked to leave, hinting at further continuation.
The Riddler's Revenge is Catwoman's first test.
After completing the training mission and getting to know the new, open world, you will find yourself in front of the bridge on Miagani Island. Access to him will become available during the passage. Once on the island you will receive message Riddler that he has something interesting to offer you at Pinckney's Shelter. We go to the place and find a tied up Catwoman, free her and enter into a fight with several robots. During the battle, you can switch characters in a single combo, it looks impressive and gives you the opportunity to play as Catwoman. We learn that the cat is wearing a booby-trapped collar that needs to be opened with certain keys. The Riddler will notify you of a new test that can't wait for you to arrive at the specified location.

Catwoman tied to a chair.
The Riddler's second test takes place in an abandoned building underground east of Pinckney's Rest. Here you will be asked to go through a race, in the manner of the Briefing task, switch platforms, remove traps, and so on for 3 laps. The Riddler will then unlock a button that will activate the puzzle and allow Catwoman to take the key by using it on the collar. The screenshots show exactly where the key should be located.

Riddler Race Track Location.

We're doing the Batmobile challenge, it's pretty fun.
Balanced Law - Riddler's Second Challenge
The test will take place in Chinatown in the northwestern part of Bleak Island. Everything here is quite simple and fast. To pass the test you need to get out of the car and press the button, then use the Batmobile remote control to complete a short test with platforms. Important: on the last jump, accelerate well with the afterburner, otherwise you will have to go all the way again. The second part of the task will be to supply electricity using the Batmobile's winch, the panel will light up and you will again be able to help the Cat take the next key.

We arrive at the place and drive into the garage with the sign Balancing Act.

We step on the button and switch to the Batmobile.

Carefully and slowly we move along the arrows.

Here is our springboard, afterburner and platform switching button to help.

We charge the panel with the puzzle.

Help the Cat decide on the key.
To be continued…