Textbook: Airborne training. Airborne training in the us army parachute training program
About the book: Textbook. Air airborne training, cargo parachute landing craft, their preparation, landing of military equipment and cargo. 1985 edition.
Book format: djvu file in zip archive
Pages: 481
Language: Russian
Size: 7.9 MB
Download a book: free, without restrictions, at normal speed, without logins and passwords
Back in the early 30s Soviet Union completely stopped importing expensive parachutes. By this time, the problem of landing light weapons, machine guns, rifles, ammunition and other combat cargo had been solved. The situation was more complicated with the release of heavy weapons, without which, as theoretical developments and landing experience showed, the paratroopers could not successfully fight behind enemy lines. It was necessary to create in principle the new kind technology - airborne.
The first step in accomplishing this task was the decision of the command Air Force The Red Army on the conduct of the Air Force Research Institute research work on the creation and testing of various types of means for parachuting military equipment and combat cargo. In accordance with this decision, a design department was created at the Air Force Research Institute in 1930, later transformed into the Special Design Bureau (OKB VVS), under the leadership of a military pilot, participant civil war, talented inventor Pavel Ignatievich Grokhovsky.
Parachute landing craft in the pre-war period.
In 1931, the Grokhovsky Design Bureau built and tested a special suspension for transporting cars, light guns and other heavy combat cargo under the fuselage of the TB-1 aircraft; special bags and boxes (containers) were developed for landing weapons, ammunition, food and equipment that were suspended under the wings of TB-1 or R-5 aircraft.
In 1932, the bureau began developing parachute platforms (G-37a, G-38a, G-43, G-62) for dropping field 76-mm guns and pickup-type vehicles with cargo parachutes from the external slings of a TB-1 aircraft. and from the TB-3 aircraft - motorcycles with a sidecar and wedges.
During the 1936 maneuvers in Belarus, more than 150 heavy machine guns and eighteen light guns were deployed. However, before the Great Patriotic War In the field of parachute landing of large-sized military equipment and heavy cargo, no significant progress was achieved, mainly due to the limited dimensions and carrying capacity of the transport aircraft that existed at that time.
In the early 40s, parachute landing soft bags (PDMM) were improved, a universal landing suspension (UDP-500) was created - for 500 kg of cargo, individual cargo containers GK-20 and GK-30, parachute landing universal belts (PDUR ), and for parachute landing of fuel and lubricants, water and other liquids - a parachute landing gas tank (PDBB-100) and a parachute landing container for liquids (PDTZH-120).
By the end of the Great Patriotic War, design work was completed to improve airborne equipment, ensuring the safe landing with cargo parachutes of heavy mortars, 57 and 85 mm caliber guns, and GAZ-67 vehicles dropped from Tu-2 bomber aircraft. For this, open suspensions were used, as well as streamlined closed suspension containers of the P-101 and P-90 types, created in 1943.
After the Great Patriotic War, along with improving the organizational structure of the airborne troops, airborne equipment and military transport aviation were improved. Significant progress has been made in improving the reliability of parachute systems for heavy loads. The appearance of wide-body transport aircraft with an aft hatch such as the An-8 and An-12 marked a new stage in the development of airborne technology.
Parachute landing craft in the post-war period.
In the sixties, the PP-127-3500 parachute platform, designed for landing military equipment and military cargo with a flight weight of 2700 to 5000 kg, appeared in service. During these same years, they were created parachute system for barrels PDSB-1 and parachute-rocket system PRS-3500.
In the 70s, a new generation of parachute landing equipment appeared in the Airborne Forces. Thus, the PP-128-5000 parachute platform made it possible to drop cargo with a flight weight of 4500 to 8500 kg. Then the P-7 parachute platform is created, designed for landing cargo with a flight weight of 3,700 to 9,500 kg, and the P-16 parachute platform ensured the landing of cargo with a flight weight of up to 21,000 kg.
Paratroopers, as an integral part of airborne equipment, are being developed and improved in parallel with the development of science and technology. Enormous credit for this belongs to the wonderful Soviet designers M.A. Savitsky, A.I. Privalov, N.A. Lobanov, F.D. Tkachev, and the Doronin brothers, who stood at the origins of domestic parachuting.
Contents of the textbook “Airborne training, cargo parachute landing craft, their preparation, landing of military equipment and cargo.”
Introduction.
Names adopted in the Textbook.
Chapter 1. Basics of landing military equipment and cargo.
1.1. Parachute systems.
1.2. Parachute platforms.
Chapter 2. Multidome parachute system MKS-5-128R.
2.1. Exhaust parachute system VPS-8.
2.2. Additional pilot chute.
2.3. Main parachute block.
2.4. Installation parachute system on frame 130, 104 or platform 135.
2.5. Operation of the parachute system in the air.
Chapter 3. Multidome parachute system MKS-5-128M.
3.1. Exhaust parachute system VPS-12130.
3.2. A pilot chute unit with a dome area of 4.5 m2.
3.3. Stabilizing parachute block.
3.4. Main parachute block.
3.5. Installation of the parachute system on site 135.
3.6. Operation of the parachute system in the air.
Chapter 4. Parachute platform P-7.
4.1. Loading platform.
4.2. Automatic devices.
4.3. Support tools and documentation.
Chapter 5. Preparation and landing of the P-7 platform.
5.1. Preparing the platform for mooring cargo and loading it into military transport aircraft.
5.2. Loading the Il-76 aircraft.
5.3. Loading the An-22 aircraft.
5.4. Loading the An-12B aircraft.
5.5. Platform operation in the air.
5.6. Unloading the platform from the Il-76 aircraft.
5.7. Regulatory work.
Chapter 6. Preparation of military equipment and cargo for landing on the P-7 platform from Il-76 and An-22 aircraft.
6.1. Fighting machine BMD-1 landing force.
6.2. Armored personnel carrier BTRD.
6.3. BM-21V combat vehicle.
6.4. Car UAZ-450.
6.5. Car UAZ-469рх.
6.6. Fuel tanker TZ-2-66D, workshop MRS-DAT and product R-142.
Chapter 7. Parachute platform PP-128-5000.
7.1. Loading platform.
7.2. Automatic devices.
7.3. Support tools and documentation.
Chapter 8. Preparation and landing of the PP-128-5000 platform from the An-12B aircraft.
8.1. Preparing the platform for mooring cargo and loading it onto the aircraft.
8.2. Preparing a GAZ-66B vehicle for landing from an airplane.
8.3. Loading the aircraft.
8.4. Platform operation in the air.
8.5. Routine work with PP-128-5000.
Applications.
1. Storage of parachute landing equipment.
2. Characteristics of tapes and cords.
MANAGEMENT OF THE AIR LANDING COMMANDER
BY THE MILITARY
For professional use
AIR FORCE SERGEANT'S BOOK
Part two
Under the general editorship of Lieutenant General P. V. CHAPLYGIN
Approved by the Commander of the Airborne Forces
as a textbook for cadets and parachute sergeants
airborne units of the Airborne Forces
Order of the Red Banner of Labor
MILITARY PUBLISHING HOUSE
MINISTRY OF DEFENSE OF THE USSR
MOCK BA- -1975
The textbook consists of two parts.
Part one: six chapters (tactical, fire, and engineering training; weapons of mass destruction of a potential enemy and protection against it; organization, armament and tactics of actions of subdivisions of the armies of the USA, Germany and England; sergeants - net commanders - educators of their subordinates) .
Part two: seven chapters (airborne, technical, automotive and physical training; artillery, multi-throwers and ATGMs; communications training; military topography).
INTRODUCTION
Successful completion airborne assault combat missions behind enemy lines largely depend on the training and moral-combat qualities of paratroopers.
In the context of the rapid development of the scientific and technological revolution, the further equipping of troops with modern highly effective weapons and equipment, the importance of special and technical training of soldiers, sergeants and officers is increasing.
This Textbook is intended for cadets and sergeants of the Airborne Forces. It contains the main issues in the scope of the combat training program for paratrooper subunits in airborne, technical, physical training, military topography, communications training, and vehicle operation; introduces the tasks, purpose, characteristics of artillery systems and information about shooting. The textbook sets out the responsibilities and methodological advice to the sergeant - the squad leader in his practical work in commanding the squad and in training subordinates.
The first chapter “Airborne training” outlines the structure of human landing parachutes, the order of their placement and use when making jumps from various types of military transport aircraft, the responsibilities of the releaser, the content and procedure for ground testing of jump elements.
In the second chapter, “Technical training,” the general structure of the landing combat vehicle (BMD-1) is given; types, volume and practical recommendations on its maintenance and operation; responsibilities of crew members, as well as data on refueling, lubrication and adjustment of units and mechanisms necessary for the sergeant in his practical work on the maintenance and operation of the vehicle.
The third chapter, “Automotive training,” contains a brief technical description of vehicles, basic provisions for their maintenance and operation, internal service in parks, the duties of a squad commander and a vehicle senior.
The fourth chapter “Artillery, mortars and ATGMs” provides brief information about the tasks, designation, capabilities and use of artillery systems, target designation, shooting and its adjustment.
The fifth chapter, “Communications Training,” contains brief information on portable tactical radio stations, equipment for gathering troops and the R-124 tank intercom, which are necessary for the sergeant in practical work.
The sixth chapter, “Military Topography,” outlines practical recommendations on terrain orientation, movement in azimuths, working with a map on the ground and drawing up the simplest combat graphic documents.
The seventh chapter, “Physical Training,” provides content and methodological advice on conducting a daily morning hour of physical training, training sessions in gymnastics, overcoming obstacles and accelerated movement, attack and self-defense, swimming and ski training.
For a more in-depth study of the material contained in the Textbook, it is necessary to use the appropriate instructions, guides and special teaching aids.
Chapter first
AIR LANDING TRAINING
The squad leader is responsible for training squad personnel in airborne training. » He is obliged:
excellent knowledge of the material parts of human landing parachutes, parachute equipment and be able to prepare them for a jump;
know the heavy airborne equipment of the squad and be able to prepare it for landing;
be able to perform parachute jumps as part of a unit and following military equipment;
know the rules for preparing weapons and equipment for a jump;
be able to conduct classes with the squad on the shells of the airborne training complex on the jump task;
be able to control the readiness of your squad and combat equipment for landing;
know the rules for releasing parachutists from an airplane and be able to perform the duties of a releaser.
1. Parachute D-5 ser. 2
Parachute D-5 ser. 2 (airborne, fifth model, second series - Fig. 1) is intended for training and combat jumps from military transport aircraft by parachutists in equipment and with service weapons of paratroopers of all specialties.
Parachute D-5 ser. 2 allows you to jump from airplanes at flight speeds of up to 400 km/h as part of units from altitudes from 8000 m to 200 m. The rate of descent by parachute D-5 ser. 2 at total weight parachutist 120 kg does not exceed 5 m/s.
Parachute D-5 ser. 2 back Activated by pulling exhaust ring. The required force does not exceed 16 kg. One or two safety devices Tisha PPK-U or AD-ZU are installed on the parachute.
Pue. I. General airborne parachute D-5 ser. 2 complete with reserve parachute 3-5

Rice. 2. Operation of the parachute D-5 ser. 2 in the air:
/ - stabilizing parachute chamber; 2
- stabilizing parachute: 3
- connecting link: 4
- chamber of the Yesiov dome; 5 - main dome; 6
- lachute pack
When performing training jumps with a parachute D-5 ser. 2 a reserve parachute of type 3-5 is used. Parachute 3-5 is put into operation if necessary. Bec parachute D-5 gray. 2, prepared for a jump, does not exceed 15 kg.
The parachute is absolutely reliable in operation and allows you to make more than 100 jumps within 12 years of its operation.
Parachute D-5 ser. 2 consists of the following parts: a stabilizing canopy chamber, a stabilizing parachute 1.5 x 2 with a connecting link, a main canopy chamber, a main canopy 83 m2, a suspension system, a backpack with a double-cone lock, a pull ring with a cable, transferable suyki. The parachute kit also includes: parachute equipment (main and backup), passport and consumables.
Parachute operation (Fig. 2). When separating from the aircraft, the parachutist in the fall uses his weight to activate the stabilizing parachute. The stabilizing dome camera with a carabiner remains in the aircraft on a cable. The stabilizing dome, filling with air, puts the PPK-U device into operation. During a stabilized descent, the parachute pack is closed. Usually you need to open the backpack 3 seconds after separation. After opening the double-cone lock with a parachute and a belay device, the backpack opens and the stabilizing parachute puts the main canopy into action. In this case, the slings come out first, and then the canopy itself, starting from the bottom edge and up to the top. The canopy fills and the skydiver descends at a speed of 5 m/s. The main canopy chamber and the stabilizing parachute with connecting link are lowered onto the canopy. All actions of a parachutist during a jump are performed in accordance with RVDS-75.
2. Reserve parachute 3-5
The reserve parachute 3-5 ensures the safe landing of the parachutist in the event of a complete or partial failure of the main parachute. When making jumps, parachute 3-5 is conveniently attached to the suspension system of the main parachute and is placed at the level of the parachutist’s chest in horizontal position. Parachute 3-5 is activated by a pull ring with a cable and ensures the descent of a parachutist with a weight of 120 kg at a speed of 7 m/s. Parachute bec 5.2 kg. Reserve parachute 3-5 consists of a 50 m 2 canopy, an intermediate suspension system, a backpack, a pull ring with a cable and a carrying bag. Each parachute comes with a passport.
Operation of a reserve parachute. When the exhaust ring is pulled out, the backpack opens and the air flow moves the canopy away from the parachutist. Pockets at the top of the dome facilitate faster filling of the dome. After the canopy is lowered, the jet remains on the main parachute suspension system separately from the intermediate suspension system. In necessary cases, when
Introduced in the operation of a reserve parachute, you need to hold the canopy with your hands after opening the backpack, and then sharply throw it in the desired direction.
3. Parachute devices
When making parachute jumps, the use of parachute devices is a measure to increase the safety of jumps, and the devices themselves function as insurance means. In all

Rice. 3. Parachute devices PPK-U-240B and AD-ZU-D-240:
1 - hose; 2 - cable; 3 - earring; 4 - flexible cord; 5 - flexible
hairpin
In such cases, the parachute must be opened by the parachutist himself. If he does not do this, then after given time or at a given altitude the parachute will open using the device.
For the D-5 type parachute, devices of the PPK-U-240B or AD-ZU-D-240 type are currently used (Fig. 3).
Parachute device PPK-U-240B
The semi-automatic parachute combined and unified PPK-U-240B is a modification of the KAP-ZP device and also ensures deployment of the parachute pack after a given time or at a given height. It operates in a time range from 2 to 5 s, in height from 0.3 to 8 km. The device remains operational in the temperature range from +60 to -60° C and after being raised to a height of up to 35 tsh.
The technical life of the device is 750 operations for 4 years, and with 500 operations for 5 years it guarantees
The device operates completely without failure. In this case, the device must be stored and used carefully.
Device structure. The components of the device are: a body with a shutter, a clock mechanism with locking levers, an aneroid with a height adjustment mechanism and an exhaust device.
Operation of the device. Prnbor can work both in time and in height. During operation, the aneroid is temporarily switched off. To turn off the aneroid, you need to set the height higher than the height of the irrigator. For jumping with a parachute D-5 ser. 2 the altitude is set at 4000 m, and the operating time of the clock mechanism is 3 s. In order for the device to be ready for action, it must be weighed, that is, first insert a flexible pin into the shutter so that the clock mechanism is locked, and compress the springs of the traction device, pulling smoothly and with a force of about 30 kg on the cable until it clicks. A click means that the suction device has entered into connection with the clock mechanism and the clock mechanism is ready for operation. To set 3 seconds, you need to remove the incompletely flexible pin and release the clock mechanism until the hand is opposite mark 3 on the time scale. At the same time, the locking lever with the cutout will come somewhat closer to the aneroid stop. With an increase in height, the aneroid expands and its stop rises upward, but if the height of 4000 m is not reached, then the stop will not fall beyond the plane of the upper board of the device and the aneroid will not interfere with the operation of the clock mechanism. When separated from the aircraft, the flexible pin is pulled out of the shutter by a halyard and the clock mechanism begins to work due to the force of the springs of the exhaust device. After 3 seconds of operation, the pawl connecting the traction device with the clock mechanism disengages and the springs sharply move the cable inside the traction device. The cable, through the earring, will open the double-cone lock, and the parachute will open.
The height on the device must be set using the screwdriver key included with the device, and the power springs must be cocked using a stirrup or a cord threaded into the eyelet at the end of the cable.
The flexible hairpin needs to be countered with a thread in one fold with a measure of eight, tying three simple knots. The remaining ends of the nnti should be 15-20 mm long. It is prohibited to disassemble the device yourself. Information about each operation of the device must be entered in the passport.
The procedure for inspecting the PPK-U-240B device before mounting it on a parachute.
First you need to carry out an external inspection of the device. At the same time, make sure that the seals and glass are in good condition, there is no damage to the body and tube, there are no dents or bulges on the hose, there is no stuck pin in the bolt, the cable threads on the bolt are not torn, the loop is not deformed, the housing cover does not move, inside There is no dust or moisture in the device, the aneroid pin does not protrude outside for a fee. Then the operation of the clock mechanism is checked. For this it is necessary
Cock the device and make sure that the hand has moved beyond the last division of the scale; when the flexible pin in the breech moves by 5 mm, the clock mechanism does not release, even when the pin is bent 90° to the side. Following a general command, flexible pins are pulled out and the smooth operation of the clock mechanism is determined by ear. The operating time should be within 5 ± 0.7 s, and the clock mechanism works without jamming. After making sure once again that no foreign objects are visible inside the device through the glass, and the pin is not deformed, the device can be mounted on the parachute.
Parachute device AD-ZU-D
The AD-ZU-D device is a simplified version of devices of the KAP-3 n PPK-U type. It differs in that it does not have an aneroid and works only by time. Bec and the dimensions of the AD-ZU-D device are smaller than PPK-U-240B. The parts of the device's clock mechanism are the same as those of the K.AP-3 p PPK-U devices. When preparing the device, the difference is that there is no check of response in height, but the operating time of the device is checked from the 3 s mark, and the response time should be within 3 ± 0.3 s. The device is mounted, like the PPK-U-240B device.
Methodical advice
The commander of the department during training on the material part of the parachute D-5 ser. 2, training stowage, during training for putting on a parachute and attaching weapons, must first of all convince the young soldier of the high reliability of the parachute and the reliability of its operation. This can be achieved only with impeccable knowledge of the material part and a deep understanding of the purpose of each part during the operation of the parachute.
In this case, the structure of the parts of the parachute should be explained according to the deployment process, and the purpose and functions of this part should be shown by the method of sequential dissolution of the parachute laid according to all the rules. The stowed parachute is placed on the stowing table next to the parachute, extended to its full length. In this case, the method of explanation “from top to bottom” contributes to better memorization, i.e. in the sequence in which these parts come into operation when making a jump.
When explaining the operation of a parachute as a whole, attention should be paid to the relationship between the work of the parts of the parachute and the actions of the parachutist himself.
For example, if a paratrooper has completed all the necessary actions on the plane and in the air, then nothing can delay the process of opening the parachute, since the carabiner of the stabilizing parachute chamber will be hooked to the cable in the plane or to the ring of the extension cord; the carabiner pawl will not allow the carabiner to detach. a beanie from the cable, a carabiner with a camera when separating the parachutist from
The aircraft will remain on the cable, and the stabilizing parachute will enter the air flow. Failure-free inflation of the stabilizing parachute will occur because the canopy pockets and stabilizer feathers will direct the flow into the canopy in less than 0.1 s. Pulling out the pull ring will force the double-cone lock to open, and the force of the stabilizing canopy, equal to the weight of the parachutist and holding the parachutist in a comfortable position for engaging the main canopy and for the parachutist to operate in the air, will pull the canopy and the lines to its full length, thereby ensuring reliable filling of the canopy . The special design of the dome chamber completely eliminates the possibility of the dome overlapping with slings.
From here it is clearly seen that the precondition for an incident can occur only in two cases: when the carabiner is not engaged and when the pull ring is not pulled out.
Therefore, performing these two actions is mandatory for every paratrooper.
At the same time, it should be explained to young soldiers that to control the engagement of the carabiner, a releaser is appointed, who is responsible for the entire process of parachutists jumping from the plane. In case the parachutist delays in pulling out the ring, then after a set time the parachute device will open the two-cone lock without the intervention of the parachutist.
The combination of a detailed explanation with a practical training film will ensure that every paratrooper can overcome any uncertainty or fear of skydiving.
II. PACKING HUMAN LANDING PARACHUTES 1. Stowing the main parachute
Parachute stowage D-5 ser. 2 is carried out by two people - the layer (the owner of the parachute) and the helper. For ease of control, the process of packing a parachute is divided into stages, and the stages into operations. The stages and correctness of stowing the parachute are controlled by the unit commander and the airborne forces officer.
For stowage, parachutes are concentrated in a prepared workplace specified by the unit commander. At the same time, the installation accessories necessary for quick and high-quality installation in the room are prepared, on open place, in the presence of wind (Fig. 4). The set of packing accessories includes: camping cloth 16X1 m; lining sheet 5.5X1.26 m; 11 metal crutches; 3 weights with sand 450x70 mm; laying fork with hook; portable bag for storing and carrying accessories.
Laying stages: I - inspection of the parachute; II - laying the dome; III- packing the canopy into the chamber and laying the lines; IV - styling
Stabilizing parachute; V - tightening the backpack, installing the device ii double-cone lock; VI - adjusting the suspension system and filling out the passport.

Rice. 4. Parachute stowage kit
Execution of stages (Fig. 5)
I t a p. Inspection of the parachute. For inspection and stowage of the parachute
must be removed from the parachute bag, place the parts of the parachute on
pull out the panel, canopy and slings to their full length. Scroll by
passport for the presence of all parts and proceed to inspection. Steam parts
The chute is inspected in the following order: stabilization chamber
raging dome; stabilizing canopy with slings; connect-
body link; main dome camera; canopy with slings; under-
spring system; backpack with flexible hose and double-cone lock;
string exhaust ring; portable bag; device PPK-U-240B
or AD-ZU-D. During inspection, it is necessary to pay attention to
the presence of all parts of the parachute, their serviceability and mutual reliability
connection.
If rips, burns, abrasions of the fabric with broken threads are detected, if there is contamination, damage to the integrity of the seams, the absence of any elements, and when inspecting metal parts - burrs, corrosion or jamming of moving parts, as well as if there is doubt about the serviceability of parts or correctness their formations must be reported to the commander of their unit and the airborne forces officer supervising the installation. After completing the inspection, insert the ring into your pocket. pass the cable into the hose.
Stage II. Laying the dome. After checking the steam readiness
shuttle to laying proceed to laying the main dome. For
This laying and helping one takes their places (laying - at the lower edge of the dome, helping - at the top of the dome).
The laying person takes the control 14th sling, put it on it
live the loop of the 15th line. With your second hand, straighten the lower edge
> place between these slings and place the middle of the edge on the laying
Dock panel. Continue laying until the factory mark. After this, transfer the unlaid half of the dome onto the laid one, move the control 14th line to the right by 2-3 cm and continue laying the dome in the same order until the factory mark. When installed correctly, the factory mark on the dome should be located on the top right. Upon completion of installation, remove the weights from the dome and tuck right side dome, and then the left one across the width of the chamber and put the weights back on.
Place the camera on the dome, which helps keep the dome from moving, preventing weights from being left on the dome. After putting the camera on, trim the edge of the dome and check that it is level with the tape sewn around the perimeter of the camera.
Check that the dome is installed correctly.
To do this, the helper holds the slings from moving at the lower edge, and the laying one, taking slings 1 and 28 in his hands, walks from the lower edge of the canopy to the backpack. You need to untangle the lines by lifting the backpack up and out, grasping the lines going down inward. When laying correctly, the 1st and 28th lines should be located at the free ends of the suspension system from above and first from the inside, and on the dome - first from the top.
Stage III. Packing the canopy into the chamber and laying the lines. After checking the position of the slings, proceed to securing the camera with slings. To do this, thread the rubber honeycombs into the windows of the apron and pass the slings through them, starting from the lower honeycombs. Pass the slings into the honeycombs by 4-5 cm. After securing the chamber, they should come out of the top honeycomb on the side of the chamber with 6 gases. Do not cover the slings in the honeycombs with the camera pockets until the inspection stage is completed.
Then you need to sequentially place the dome in the chamber and tighten the cord of the upper part of the chamber. The connecting link and bridle assembly of the dome and chamber should be located on the outside. Place the slings in the gazirs. To do this, insert slings sequentially into each gasket, starting with the upper central gasket, then the upper right gasket, the upper left gasket and ending with the lower right gasket. The slings should not extend beyond the gaskets, and no noticeable slack should be allowed to form between the gaskets. 60-70 cm of sling length should remain unlaid. Do not twist the slings during installation. The formation of slack in individual (stretched during operation) slings up to 400 mm at the buckles of the free ends is allowed. After laying the lines, straighten the canopy and lines of the stabilizing parachute and be ready to check the stage. After checking, close the pockets of the sealing cells.
Polonivnie
edastic
rings,
sewn in
e iishiyu
Part
intentions
dare
dressy f$
ya nupoya
Nininiv apron eyelets
WITH  location diagram"Nishny IromiyartocAt*Nupol adjustments

Stsbilmtor""
14

Lereaya. coma

Rice. 5. Stowing parachutes D-5 ser. 2 and 3-5:
o - extension of the lines; b- putting on the camera; e - laying the stabilizing dome; g - installation of the parachute device; ts - position of slings 3-B; e-refilling the backpack 3-5
Stage IV Laying the stabilizing dome. For styling
pull out the stabilizing "] canopy to its full length, fold the feathers
stabilizer one on top of the other, without twisting the canopy line,
bend the feathers twice outward to the reinforcement tapes and put
there's a weight on them. Then put on the stabilizing parachute chamber
on the canopy and lines to the stabilizer rings (carabiner - to the top
dome). Tie the stabilizer ring in two layers with thread and
cameras with a triple simple knot. Then the slings onto the canopy without re-
Place the twist in the chamber and tighten the cord on the chamber. Knot
The cord must be tucked inside the camera. Open the backpack valves
to the sides, fold the free ends in half and place on
backpack
Be prepared for stage verification.
V stage. Tightening the backpack, installing the device and double-cone
castle After checking stage IV, put the dome camera on
slings onto the backpack without turning it over. Put sleep on the camera
The left valve started, then the right one. Take the right power band
with a buckle ii pass it from above into the ring of the left valve, and
thread - into the ring of the right valve, with the arrows on the tape -
swing should be facing outward. Skip power bands
into the windows of the backpack, put the buckles on the cones of the zdmka and close the front
Really a castle. After this, turn the connected halyard with a flexible
pins with a noose loop to the loop of the connecting link and pass-
thread the halyard into the ring at the top of the scarf. Slack connection
fold the link between the ring and the halyard loop in half and tuck
into the honeycomb fork on the right flap. The remaining part of the connection
fold the body link and stabilizer zangzag on top
backpack so that the carabiner is on the side of the valve of the backpack with the pocket
nom for recruitment. Pass the rubber honeycomb on the valve over
camera into the ring at the bottom of the backpack y ero top edge and secure
tape on the carabiner eye. Tuck the carabiner between the elastic bands
honeycomb Mount the parachute device.
To install an inspected and serviceable PPK-U device on a parachute, you must:
set the altitude to 4000 m;
insert the nut with the bayonet pin into the mounting-non-plate hole of the double-cone lock, located closer to the end of the plate;
insert the device body into the pocket of the backpack and tie the ribbons;
insert a flexible pin into the device, cock the device and set the time to 3 s;
secure the flexible thread pin in one fold with a measure of eight;
lock the loop connecting the halyard of the flexible pin to the ring on the valve of the backpack with a thread in two folds;
tuck the flexible pin halyard into the pocket. To finally install the double-cone lock, for this:
holding the buckles of the power straps, open the lock;
put a loop of the exhaust cable on the upper cone of the shutter
Rings, and on the lower cone of the shutter - a special gray parachute device;
lock the lock with a thread in one folded figure of eight;
lower the cable shock absorber towards the hose;
check the reliability of the connection between the special screw and the nut and whether the nut with the bayonet pin is completely aligned towards the device;
close the two-cone lock with the flap and make sure that the flap is held on the button in the fastened position.
To do this you need:
straighten the main strap;
adjust suspension system according to height, moving the right shoulder girth through the jumper of the OSK-D lock body, and the left (or both, if the OSK-D lock is pet) - through the curved shoulder buckle of the main strap;
adjust the suspension system in terms of volume by reducing or increasing the waist girth using rectangular buckles;
tighten the leg loops by moving the ribbons through the rectangular buckles;
adjust the straps of the backpack to fit the strap using special tapes and buckles.
Drop the parachute, fill out your passport. After checking the parachute in the gantry, place the parachute in the bag and seal the bag.
2. Stowing the reserve parachute
Stowing the reserve parachute is organized similarly to stowing the main parachute and consists of the following stages: I - inspection of the parachute; II - laying the dome; III - laying slings; IV - placing the canopy in the backpack and tightening the backpack; V - filling the backpack, issuing a passport.
Execution of stages
Stage I. Inspection of the reserve parachute. It is performed in the same way as inspecting the main parachute. Particular attention is paid to the serviceability of the slings and the pull ring of the strings. After inspecting all parts of the parachute, you need to insert the ring into the pocket, the cable into the flexible hose, and position the intermediate suspension system so that the strap with the coupling is to the right relative to the canopy.
Stage II. Laying the dome. Laying begins with the 12th line.
Place the 13th sling on the 12th sling, straighten the edge
between these lines The helper straightens the canvas
floor to top. Continue laying in the same order until complete
Votic mark. Having then thrown the unlaid panels onto
laid down, move the 12th sling to the right 2-3 cm and continue
laying the dome to the factory mark. Upon completion of installation,
Vodsk glue should be located at the top in the middle. Dome
fold along the width of the backpack, bending the right edge, and then the left
I howl. If necessary, use weights.
To check the correct installation of the dome, you need to take the 1st and 24th slings and make sure that at the other edges they are located on top, next to each other, and at the intermediate suspension system - on top and first on the inside on the half rings. When the slings are weak from being pulled out, bend them to the half rings.
stage. Laying slings. To attach the sling, place the backpack in honeycombs at the top of the intermediate suspension system. The valve with the ring should be located on the left, the remaining valves should be turned down, and the jumper should run along the edge of the bottom of the backpack, located further from the dome. The slings are laid using a hook, without twisting them, into the far left (from the dome) cell, and then alternately into the remaining cells. At a length of 1.4 m up to the half-rings, the slings do not fit into honeycombs. This part of the slings must be laid on the slings in a zigzag pattern across the slings laid in honeycombs.
stage. Laying the canopy and tightening the backpack. Place the canopy on the backpack so that the lower edge runs along the jumper, fold the rest of the canopy zangzag onto the backpack, preventing the canopy from “spreading out.” Holding the dome with your hand,
Ladies on the dome.
While sealing the dome due to the pressure exerted on it by the valves, put the grommet of the lower valve onto the joint of the upper valve and insert an auxiliary pin. In the same way, place the second grommet on the cone, then inserting the pin. Straighten the pockets at the poles evenly on top of the dome and tighten first the left valves (with the ring), and then the right ones, inserting the pull-out cable studs instead of the auxiliary pin. Remove the slack in the cable into the hydraulic hose to the ring.
V stage. Refilling the backpack, obtaining a passport. Refuel
Carefully close the flaps of the backpack and fasten the elastic bands. Re-
the side valves must pass through the fastening rings
backpack. After inspecting the entire parachute, fill out the
port.
3. Attaching a reserve parachute
To attach a reserve parachute you need to: - make sure that the harness is fitted correctly and all carabiners are fastened;
take a parachute;
fasten the fastening carabiners to the half-rings on the backpack;
tighten the fastening straps and tuck them under the spare straps at the bottom of the backpack;
connect the free ends of the intermediate suspension system to the brackets on the main strap by inserting the pins into the bushings all the way and turning the pins a quarter turn until the pin ears fit into their socket.
III. CONTROLLED PARACHUTE D-5 SER. 4 AND ITS FEATURES
Parachute D-5 ser. 4 is made according to the design of the parachute D-5 ser. 2 and has the same purpose. Its main difference is that the coupling is horizontally controlled, and by means of the free ends of the floating type, the speed of horizontal movement can be additionally changed. There is no OOK-D lock on the suspension system. Additional structural elements, unlike D-5 ser. 2 are (Fig. 6):
cutouts in the dome, covered with a fishing net, one each in front and behind the dome;
two control lines;
two pairs of free ends, each prepared from one piece of tape, passing through its middle in the rectangular curved buckle of the suspension system;
ends for fixing the latter from voluntary movement
schiiii.
There are some other differences in design. Bec parachute D-5 gray. 4 for jump 17 kg.
Features of stowing the parachute D-5 ser. 4.
When preparing the parachute for stowage, you need to secure the free ends from moving by inserting the sharpies into the pockets. Laying the canopy should begin with the 13th line, place the 14th line on it and continue laying. For a right-handed dome, the factory mark should be located on the top right.
After checking the correct installation of the canopy, tuck the slack of the control lines into the rubber loops. Otherwise, D-5 ser. 4 fits similarly to the D-5 ser parachute. 2.
Rules for using a controlled dome (Fig. 6, d, e). Until the canopy is completely filled, the operation of the parachute D-5 ser. 4 does not differ from the operation of the D-5 ser parachute. 2.
After filling the canopy, the paratrooper gets the opportunity to control his canopy both horizontally and in terms of speed of movement, i.e., move forward or backward at a speed of 2.3 m/s, turn 180° in 17 s, and use glide. Landing speed with a neutral canopy and calm conditions no more than


S
| Oo | « | « | K | -O | "o | ||||||||||||||||||||||||||||||||||||
| c> | Cm | 4"^* | |||||||||||||||||||||||||||||||||||||||
| Cm | */ | "Uh | V | ||||||||||||||||||||||||||||||||||||||
| A | / | ** | "] | \ | |
||||||||||||||||||||||||||||||||||||
| i | 1 | V |
|||||||||||||||||||||||||||||||||||||||
| "1 | \ |
||||||||||||||||||||||||||||||||||||||||
| V | h | V | ^ | £ | ^ | "~ | |||||||||||||||||||||||||||||||||||
| to | |||||||||||||||||||||||||||||||||||||||||
| 1 | r> |
||||||||||||||||||||||||||||||||||||||||
| 1 . | 00 |
||||||||||||||||||||||||||||||||||||||||
| \ | |||||||||||||||||||||||||||||||||||||||||
| ^ | |||||||||||||||||||||||||||||||||||||||||
| f, | -+r |
||||||||||||||||||||||||||||||||||||||||
| /^ |
|||||||||||||||||||||||||||||||||||||||||
| OE | N | / |
|||||||||||||||||||||||||||||||||||||||
| "O* | 1 | |\ | D |
||||||||||||||||||||||||||||||||||||||
| / ~l | Ol | N | \ | ^ | V | t 4 * |
|||||||||||||||||||||||||||||||||||
| o | JX | ||||||||||||||||||||||||||||||||||||||||
| bX 1 p | N^ | :r | U | 4 |
|||||||||||||||||||||||||||||||||||||
| -r^\/S | sch | l**r*3 | |||||||||||||||||||||||||||||||||||||||
| \ \^ ^ | s | e 4 * | |||||||||||||||||||||||||||||||||||||||
Airborne training is one of the leading disciplines in combat training of airborne troops. It includes:
- study of the material parts of human landing parachutes and safety parachute devices;
- learning the rules for packing parachutes for a jump;
- studying the rules for preparing weapons and equipment for a parachute jump;
- ground training of elements of a parachute jump using airborne missiles;
- organizing and conducting parachute jumps;
- preparation for landing of weapons, military equipment and cargo and their landing.
A special place in airborne training is occupied by practical parachute jumping, which is the most important stage in the training of a paratrooper.
Learning process- This is the active cognitive activity of soldiers to master educational material. The training process in the airborne troops is one of the forms of military labor of military personnel, an important integral part their official activities. Its results are expressed in a certain system of knowledge, skills and abilities that trainees acquire under the guidance of their commanders and superiors.
Knowledge– product cognitive activity of a person, reflection in his consciousness (in the form of ideas, concepts) of objects and phenomena of the objective world, the laws of nature and society. Skill is a practical action performed on the basis of acquired knowledge. Skill there is a practical action characterized by a high degree of mastery (“automation”). There is a complex interaction between skills and abilities: in some cases, a skill is an improved ability, in others, a skill grows on the basis of skills.
Achievement high results learning largely depends on the paths along which the movement from ignorance to knowledge, from incomplete knowledge to more complete knowledge occurs. These ways and means are teaching methods.
Teaching methods- those are the ways and means by which the communication and assimilation of knowledge, the formation of skills and abilities, the development of high moral and combat qualities are achieved, and the combat formation of units and units is ensured. Each method consists of interrelated elements called teaching techniques. Moreover, the same techniques can be part of different methods. This or that method most often gets its name from its leading technique (Table 1).
Depending on the nature of the educational material, these methods can appear in one or another variety that best suits it. What should you consider when choosing one method or another? As you know, in any lesson the leader can set three main didactic or most general educational goals: to impart new knowledge to soldiers and achieve their deep assimilation; develop skills and abilities among trainees; consolidate knowledge and improve skills. Achieving the first goal requires primarily methods such as oral presentation, demonstration, conversation; the second is an exercise accompanied by a brief explanation; third - independent reading of textbooks, technical literature and other sources, independent training.
High-quality training of personnel to perform parachute jumps in the shortest possible time requires commanders of all levels to solve a number of complex problems. The task boils down to ensuring that when minimum costs educational time to ensure deep assimilation of the required amount of knowledge and high level practicing practical skills. The intensification of the personnel training process is closely related to the mastery and development of training methods and means, and the comprehensive improvement of the methodological culture of officers and sergeants. Moreover, the question about the depth of knowledge, the quality of skills and abilities is, in essence, a question about teaching methods, that is, about the ability of the lesson leader to rationally present educational material, organize practical work trainees and control their actions. The methodological skill of the lesson leader is characterized by the ability to find the technique and the means that are needed precisely at a given time, in a given lesson, to effectively apply a method that has already been used many times, taking into account the specific learning conditions (composition of students, place, visual aids, allotted time). Methodological skill is also expressed in providing the most appropriate combination of teaching techniques and methods for a given moment.
Therefore, the task of every airborne force officer (and first of all the commander of an airborne unit) is to constantly work on methodological preparation, develop and improve your skills in organizing and conducting all types of airborne training classes.
Parachute training is one of the mandatory elements that a special forces soldier must master, be he land or sea.
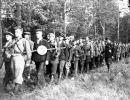
French special forces practice parachute landings
Although it was not the first country to put into practice the ideas of using units special purpose, the Soviet military became pioneers in the training of paratroopers. Already in 1929, small groups of soldiers landed from planes in the sands of Central Asia to fight the Basmachi. And the following year, after military exercises held in the Moscow Military District, the concept of using parachute troops was finally developed. In 1931, a battalion-level combat group, called the parachute detachment (PDO), was created in the Leningrad Military District, where an experimental parachute training center opened around the same time. In 1935, during exercises near Kiev, a full battalion was parachuted out, and the following year an attempt was made to parachute a whole regiment. Shortly before the outbreak of World War II, the Red Army had at least 30 parachute battalions.
Contrary to popular belief, the landing force is not only the well-known Airborne Forces, it also includes GRU special forces units and air assault units Ground Forces, and reconnaissance and landing companies of motorized rifle and tank divisions, and special naval reconnaissance units. They all have one thing in common - a parachute, with the help of which fighters are delivered behind enemy lines.
Parachute training (PAT) is included in the training program for personnel of all branches of the armed forces, who, due to the nature of their service, need to have the appropriate skills. First of all, these are members of airplane and helicopter crews, military personnel of special forces, divisions and airborne brigades, reconnaissance units of some branches of the military, paratroopers and rescuers.

Parachute training for SAS soldiers
Parachute training is organized and carried out both centrally (at special courses for all types of aircraft), and directly in units and subunits in the process of passing military service. The RAP includes three stages: the first - initial training at the parachute training center, the second - in the troops and the third (complicated) - at the school of high-altitude parachute jumps. Only part of the personnel of special forces and reconnaissance units go through the last stage Marine Corps(MP), airborne and air assault divisions. It is mandatory for pararescue jumpers and team members combat control strength special operations Air Force. In addition, instructors from among the most experienced parachutists are trained separately (in special courses).
For a special forces soldier, airborne training is mandatory. The first jump brings together all former and future graduates of the Ryazan Airborne School. The siren's roar opened door an airplane, a jump and an unforgettable feeling of flying, when the wind is rustling very close, there is only the sky above, and the earth is rushing under your feet. It is so beautiful, like a patchwork quilt: cut into squares, with toy buildings and strings of roads. According to the training plan, each cadet must complete in a year
5-7 jumps. But sometimes guys jump more if physical training allows and the cadet has the desire. The desire to hover longer in the air is not acceptable for a special forces soldier. “The less you are in the air, the better your chances of survival,” they say, meaning that in the sky they become the most vulnerable to the enemy.

Russian paratrooper over St. Petersburg
Program parachute training
1. Introductory flight of young fighters by plane and helicopter.
2. Training jumps without weapons and equipment.
3. Jumping with weapons and equipment.
4. Jumping with weapons and cargo container GK30.
5. Jumping in winter.
6. Jumping on the water.
7. Jumping on the forest.
8. Jumping with long-term stabilization of the fall.
Chapter 8
AIRANDING TRAINING METHOD
8.1. General provisions airborne training techniques
Airborne training is one of the leading disciplines in combat training of airborne troops. It includes:
Study of the material part of human landing parachutes and safety parachute devices;
Studying the rules for packing parachutes for a jump;
Studying the rules for preparing weapons and equipment for a parachute jump;
Ground training of elements of a parachute jump using airborne missiles;
Organizing and conducting parachute jumps;
Preparation for landing of weapons, military equipment and cargo and their landing.
A special place in airborne training is occupied by practical parachute jumping, which is the most important stage in the training of a paratrooper.
Learning process - This is the active cognitive activity of soldiers to master educational material. The training process in the airborne troops is one of the forms of military labor of military personnel, an important component of their service activities. Its results are expressed in a certain system of knowledge, skills and abilities that trainees acquire under the guidance of their commanders and superiors.
Knowledge- a product of human cognitive activity, a reflection in his consciousness (in the form of ideas, concepts) of objects and phenomena of the objective world, the laws of nature and society. Skill is a practical action performed on the basis of acquired knowledge. Skill there is a practical action characterized by a high degree of mastery (“automation”). There is a complex interaction between skills and abilities: in some cases, a skill is an improved ability, in others, a skill grows on the basis of skills.
Achieving high learning results largely depends on the paths along which the movement from ignorance to knowledge, from incomplete knowledge to more complete knowledge is carried out. These ways and means are teaching methods.
Teaching methods - then those ways and means by which the communication and assimilation of knowledge, the formation of skills and abilities, the development of high moral and combat qualities are achieved, and the combat formation of units and units is ensured. Each method consists of interrelated elements called teaching techniques. Moreover, the same techniques can be part of different methods. This or that method most often gets its name from its leading technique (Table 1).
Depending on the nature of the educational material, these methods can appear in one or another variety that best suits it. What should you consider when choosing one method or another? As you know, in any lesson the leader can set three main didactic or most general educational goals: to impart new knowledge to soldiers and achieve their deep assimilation; develop skills and abilities among trainees; consolidate knowledge and improve skills. Achieving the first goal requires primarily methods such as oral presentation, demonstration, conversation; the second is an exercise accompanied by a brief explanation; third - independent reading of textbooks, technical literature and other sources, independent training.
High-quality training of personnel to perform parachute jumps in the shortest possible time requires commanders of all levels to solve a number of complex problems. The task boils down to ensuring that, with minimal expenditure of study time, a thorough assimilation of the required amount of knowledge and a high level of development of practical skills. The intensification of the personnel training process is closely related to the mastery and development of training methods and means, and the comprehensive improvement of the methodological culture of officers and sergeants. Moreover, the question about the depth of knowledge, the quality of abilities and skills is, in essence, a question about teaching methods, that is, about the ability of the lesson leader to rationally present educational material, organize the practical work of students, and control their actions. The methodological skill of the lesson leader is characterized by the ability to find the technique and the means that are needed precisely at a given time, in a given lesson, to effectively apply a method that has already been used many times, taking into account the specific learning conditions (composition of students, place, visual aids, allotted time). Methodological skill is also expressed in providing the most appropriate combination of teaching techniques and methods for a given moment.
Therefore, the task of every airborne force officer (and first of all the commander of an airborne unit) is to constantly work on methodological training, develop and improve their skills in organizing and conducting all types of airborne training classes.
Table 1
Basic teaching methods, their varieties and components (techniques)
Teaching methods and their varieties | Teaching Techniques | Manager's actions | Work of trainees |
Oral presentation of educational material ExplanationStoryConversation ExplanatoryHeuristic Control Show: personal demonstration by the lesson leader display of weapons and military equipment demonstration of actions by pre-prepared assistants of the lesson leader display of unit actions Exercises and workout Sensory Motor Mental Independent work individual group | Evidence, reasoning, descriptions; demonstration of weapons and military equipment, visual aids; demonstration of techniques and actions Narration, description, reasoning; demonstration of visual aids Detailed descriptions and narratives; explanations; demonstration of visual aids Asking questions; explanation; response analysis; demonstration of visual aids Demonstration of techniques and actions in divisions and in general at a normal and slow pace; explanation; demonstration of visual aids, weapons and military equipment Learning a technique (action) in sections and together, at a slow and normal pace; error analysis; re-showing the technique (action); explanation. Performing the technique in general Reading; drawing up a plan, outline, diagram; memorization in parts and as a whole; retelling; practical activities on simulators, military equipment, training weapons, sports equipment | Sets learning objectives; presents educational material, organizes its perception by students; manages the process of knowledge acquisition Announces the purpose of the conversation; formulates questions; listens, corrects and summarizes answers, sums up Sets learning goals. During the demonstration of techniques and actions, directs the students’ attention to the most complex elements, explains the order and rules of their execution; illustrates explanation through the use of visual aids Formulates the purpose of the lesson; gives commands, gives input; using various means, creates a situation close to combat; controls the actions of students, corrects mistakes, shows techniques. Summing up Indicates the scope and goals of the work, methods for completing the task, organizes the independent work of students, provides assistance to them and checks the results | Actively perceive and comprehend the presented material; carry out the necessary practical actions; keep records; answer questions from the lesson leader Answer questions; listen and comprehend the answers of their comrades, the explanations of the leader Observe; Following the leader, they repeat the demonstrated techniques and actions. comprehend the purpose of techniques, actions, the connection of their components Repeat the learned techniques and actions many times; analyze their mistakes; improve acquired skills and abilities Comprehend and remember educational material; perform techniques with weapons and military equipment on simulators and gymnastic equipment; improve skills; perform individual tasks |
8.1.1. Requirements of the collection of standards for combat training
airborne troops
Conducting practical training on packing parachutes, preparing for the landing of weapons and equipment, and ground-based testing of the elements of a parachute jump is aimed at instilling in paratroopers solid skills in performing all the actions performed during the preparation and execution of a jump. The main form of monitoring the degree to which military personnel have mastered educational material and the quality of the motor skills they have acquired are standards.
Standards – temporary, quantitative and qualitative indicators of the performance by military personnel or units of tasks, techniques and actions related to the use of weapons and equipment during combat training.
Standards for checking the readiness of personnel to perform parachute jumps, as a rule, have temporary and qualitative components.
Completing them with a positive assessment indicates that the serviceman has motor skills sufficient to allow him to make a parachute jump.
This section provides the basic standards practiced in airborne training classes.
Standard No. 1
Stowing parachutes for a jump
Terms and procedure execution standard | Estimation by time |
||||
Parachutes are in a carrying bag | One main and one reserve parachute for two stowers |
Individual assessment when meeting the standard
By time | By quality |
|
|
Satisfactorily Unsatisfactory |
Great, goodFineGreat, good, satisfactorily SatisfactorilyUnsatisfactory |
FineSatisfactorily Great, good, satisfactorily Unsatisfactory |
Errors that determine an “unsatisfactory” rating:
Standard No. 2
Securing weapons and equipment, donning parachutes
(for a machine gunner, machine gunner, grenade launcher)
Terms and procedurefulfillment of the standard | Volume | Under- | Estimation by time |
||
One main and one reserve parachute for each; weapons and equipment - according to standard specialty |
Standard No. 4
Securing weapons and equipment, donning parachutes
to make a jump while shooting in the air
Terms and procedurefulfillment of the standard | Volume | Under- | Estimation by time |
||
The parachutes are installed in “goats” on racks. Items of equipment - on the personnel: a backpack in the stowed position, a weapon in the “on the belt” position. Cases and weapon straps are located in backpacks. | One main and one reserve parachute for each; weapon - AKS-74 assault rifles |
Individual assessment of actions when fulfilling standards No. 2 and No. 4
By time | By quality |
|
|
Satisfactorily Unsatisfactory |
GreatSatisfactorily,Good ExcellentSatisfactorilyUnsatisfactory | Excellent (no errors) good (no more)two mistakes) Satisfactorily (no more than three errors) Great, goodUnsatisfactory(more than allowedthree errors) |
Main disadvantages that reduce the rating:
The suspension system has not been adjusted;
The machine belt is not caught by the chest suspension bridge
parachute systems;
The backpack is not in the landing position;
The backpack's magazine and grenade pouches are not attached to the waist belt;
The free ends of the reserve parachute fastening straps are not tucked in.
Disadvantages that determine the rating “unsatisfactory”:
The carabiner of the parachute or backpack harness is not fastened;
The reserve parachute mounting bracket is not secured;
Weapons and equipment interfere with the operation of the parachute.
8.2. The procedure for preparing a leader for a lesson
on airborne training
Airborne training is organized and conducted in accordance with the Combat Training Program for formations and units of the airborne troops. In accordance with this program and the planning documents of the unit headquarters, the divisions draw up class schedules, which indicate the topic, educational issues, place and time of classes.
Airborne training classes are conducted by leaders who are knowledgeable about airborne equipment and have practical experience in parachute jumping.
Leader preparation for the lesson includes:
Understanding the topic, educational goals and content of the lesson;
Timing;
Studying literature on the topic and drawing up an outline;
Preparation of material support for the lesson.
Understanding the educational goals and content of the lesson allows the leader to more purposefully prepare for the lesson, study in detail, deepen or repeat the material on the topic of the upcoming lesson.
Drawing up a summary plan is mandatory for every manager. This allows you to think through every detail of the lesson and helps to anticipate all the necessary educational issues. There are no specific templates developed for all types of classes in drawing up a plan-note. The outline plan is the fruit of the officer’s creative work in preparing him for the upcoming lesson. The content of each question and the depth of its presentation are determined by the degree of preparedness of the students, educational tasks and the time allocated for the lesson.
The outline must include: educational goals, educational questions, method of conducting the lesson, material support, timing calculation, summary educational questions, actions of the leader and students, the sequence of working out educational questions. The outline should not be cumbersome. You should not strive for it to have detailed description everything that the leader intends to present during the lesson. The outline is not prepared to be read during class. It is intended to guide the leader in the sequence of presentation of the material and to fully cover the educational material.
The assimilation of educational material by personnel always depends on the method of conducting the lesson, material support, proper distribution of educational time and the preparedness of the leader.
The main forms and methods of airborne training are:
Group lessons - when studying the material part of human landing parachutes and safety parachute devices;
Practical exercises - when studying the rules for packing parachutes, as well as the actions of a paratrooper-parachutist when making a jump;
Training – weekly exercises on airborne equipment while practicing the actions of paratroopers during jumps.
During classes, the leader must use various methodological techniques in combination. So, for example, to explain the material part of a parachute, it is advisable to use a logical scheme of a story (explanation), combining it with a demonstration. First, the leader must indicate the purpose of the parachute, its technical and operational characteristics, then name and show the parts of the parachute system, and then talk in detail about their purpose and design, accompanying his story with a demonstration of the material part. In this case, the parts of the parachute should be named and shown on the stowed parachute by the method of its sequential opening as the educational material is presented. And when explaining the structure of each part, you must adhere to the following diagram:
Name and show the part;
Indicate the purpose of the part;
How the part is structured and what it has on it (the presentation should be from top to bottom).
When conducting a practical lesson on packing parachutes, the following methodological technique is used: a story in combination with an exemplary personal demonstration by the leader of the sequence and rules for packing parachutes by stages and elements.
When conducting a lesson at an airborne complex to practice the elements of a parachute jump, the leader tells and shows the rules for performing the jump as a whole, and then by element. After this, the personnel learn the actions shown in elements, and then in general. Having learned the actions and understood their meaning, students move on to training.
During the lesson, the leader must carefully monitor how the material is absorbed by the students. Periodically (or better after practicing each question), it is necessary to ask the personnel control questions in order to determine what information the trainees have not mastered, and also to check whether they are making notes in the notebook correctly.
It is advisable to start each regular lesson with quizzes to check how the personnel have mastered the material from the previous lesson. Questions should be specific, brief, and not require long, detailed answers. Questions should be posed to all trainees and given some time to think about them, after which one of the trainees should be called to answer. This method forces the entire audience to think; all personnel must be prepared to answer the question posed.
In all classes, the leader must instill in the personnel respect for airborne equipment and teach them to handle it carefully. It is necessary to constantly instill in trainees that careful handling of the parachute ensures its serviceability, and this, in turn, guarantees the safety of the jump.
Material support plays a major role in the successful, high-quality conduct of classes. The necessary material resources must be prepared in advance and concentrated at the location of the lesson. The quality of the lesson noticeably decreases if conventions are allowed in it due to the lack of the necessary material part.
During the entire lesson, the leader must monitor the discipline of the students, demand that subordinates comply with the statutory provisions when answering questions, when addressing elders, etc.
The teacher is obliged to supervise the work of the staff in the most appropriate way to record the material being studied in notebooks, that is, highlight in his story those places that need to be written down and give time for this.
At the end of the lesson, it is recommended to summarize, give a general assessment of the platoon’s work in the lesson, note which of the students learned the material well and who poorly understood the material presented. To these trainees, the supervisor should indicate which training issues they should study further, and also assign a well-trained paratrooper to assist those lagging behind. Next, the leader must set a task for independent preparation and indicate the literature for preparation.
8.3. Organization and methodology of the lesson
on the study of the material part of human landing parachutes and safety parachute devices
At this lesson, the goal is to study the design of the D-6 series 4 landing parachute system, to familiarize students with the operation and interaction of parachute parts when deployed in the air.
It is advisable to consider the following educational questions:
1. Purpose and technical and operational characteristics of the parachute.
2. Parts of the D-6 series 4 parachute system.
3. Purpose and design of parachute parts.
4. Operation and interaction of parachute parts in the air.
To save study time, material support must be obtained the day before and the place for the lesson must be prepared in advance. The material base must ensure high-quality conduct of the lesson and must include the D-6 series 4 parachute system in an open form, one or two parachutes in a folded form, marching panels, posters on the material part of the parachute, a pointer, and a chalkboard. Before the start of the lesson, it is necessary to place the deployed parachute on the field surface in the following sequence: stabilizing system chamber, stabilizing system, main parachute chamber, main canopy with lines, backpack with suspension system, manual deployment link, device, passport, bag. Place the stowed parachutes, intended to show the deployment process, on another panel. For convenience of demonstration and greater mobility of parts, it is advisable to have a separate harness system, backpack, and main parachute chamber during the lesson. This will allow trainees, during self-study, to approach a poster showing parts of a harness while holding the actual harness in hand to gain a better understanding of its design.
Trainees must position themselves along the material part laid out on the canvas so that everyone can see all the details of the parachute.
When explaining the structure of the parts of a parachute, it is necessary to pay more attention to those parts that will be used during subsequent lessons. For example, metal rings on the camera of the stabilizing system and on the stabilizer feathers, line No. 14 of the main canopy, etc.
The time allotted for this lesson is 2 hours.
INTRODUCTORY PART
The training leader accepts the report of the deputy platoon commander on the readiness of the personnel for the training, checks appearance subordinates, the availability of notebooks for them and the readiness of the trainees to begin the lesson. After this, the leader names the topic and goals of the lesson, briefly introduces his subordinates to the program of upcoming VDP classes, what they will have to study in the near future, and what jumps they will have to make during the training period. It is also necessary to name the types of parachutes that are supplied to the airborne troops, and which of them the trainees will have to master.
Time – 5 – 10 minutes
MAIN PART
It is recommended to start the main part of the lesson with general characteristics parachute Having put a parachute on one of the squad commanders, the leader tells what the parachute is intended for, what planes and helicopters can be used to jump from, what minimum height use of a parachute, rate of descent, etc. It is recommended to write down the characteristics of the parachute system on the chalkboard. To make sure that students have mastered the material, the leader asks several test questions according to the characteristics of the parachute system. The survey should not take more than 5 minutes. For the whole study question 10 – 15 minutes are allotted.
Then the leader proceeds to a detailed description of the purpose and design of the parts of the parachute. The sequence of presentation should be as follows:
Name and show all parts of the parachute system;
Talk about the purpose and structure of each part of the parachute.
The parts of the parachute must be named according to the order in which they enter into operation, that is, starting with the camera of the stabilizing system. The display must be carried out with an open parachute, on posters, and also visible parts are shown with a stowed parachute.
The story about the structure of each part should be carried out according to the diagram:
Name and show the part;
Indicate the purpose of the part;
Name its form (if it is clearly expressed);
Name the material from which the part is made;
Indicate digital data (area, length, weight, strength, etc.);
Tell how the part works and what it has on it
(the presentation should be from top to bottom).
A story about the purpose of each part of the parachute system should be accompanied by a practical demonstration of the operation of this part (by sequential deployment of the parachute). For example, when talking about the purpose of a stabilizing system, a manager first talks about the purpose, and then, repeating the purpose, accompanies his story by showing the operation of the stabilizing system. Two pre-trained squad leaders should be recruited to assist in the demonstration. When explaining the structure of the main dome, it is necessary to use a plan diagram of the dome, and also give students the opportunity to practically become familiar with its details. To do this, the dome (if possible) should be unfolded so that students can see all its parts (reinforcing frame, edge, cracks, etc.).